








A tool and python library that helps when interfacing with Ansible directly or as part of another system whether that be through a container image interface, as a standalone tool, or as a Python module that can be imported. The goal is to provide a stable and consistent interface abstraction to Ansible.
Soon-to-be the canonical location of the Kubernetes API definition.
tengqm/apiextensions-apiserver 0
API server for API extensions like CustomResourceDefinitions
Library for writing a Kubernetes-style API server.
apiserver-builder implements libraries and tools to quickly and easily build Kubernetes apiservers to support custom resource types
Go client for Kubernetes.
Cluster Registry API
Kubernetes community content
PR opened kubernetes/website
This PR improves the lsync script so that it can handle directories (recursively). For example, you can run the following command to find the detailed changes that are out of sync:
./scripts/lsync content/zh/docs/concepts/_index.md
and you can run the following command to identify how many files are out of sync under a given directory:
> ./scripts/lsync content/zh/docs/concepts/

content/en/docs/concepts/architecture/control-plane-node-communication.md        |  2 +-
 content/en/docs/concepts/architecture/controller.md                              | 10 ++++++++++
 content/en/docs/concepts/cluster-administration/logging.md                       |  4 ++--
 content/en/docs/concepts/cluster-administration/system-metrics.md                |  2 +-
 content/en/docs/concepts/configuration/pod-priority-preemption.md                |  2 +-
 content/en/docs/concepts/containers/runtime-class.md                             |  2 +-
 content/en/docs/concepts/extend-kubernetes/compute-storage-net/device-plugins.md |  2 +-
 content/en/docs/concepts/extend-kubernetes/operator.md                           |  2 +-
 content/en/docs/concepts/extend-kubernetes/service-catalog.md                    |  2 +-
 content/en/docs/concepts/overview/kubernetes-api.md                              |  2 +-
 content/en/docs/concepts/overview/what-is-kubernetes.md                          |  3 +--
 content/en/docs/concepts/overview/working-with-objects/labels.md                 |  2 +-
 content/en/docs/concepts/scheduling-eviction/kube-scheduler.md                   |  4 ++--
 content/en/docs/concepts/services-networking/dual-stack.md                       |  2 +-
 content/en/docs/concepts/storage/ephemeral-volumes.md                            | 11 +++++------
 content/en/docs/concepts/storage/persistent-volumes.md                           |  2 +-
 content/en/docs/concepts/storage/storage-classes.md                              |  2 +-
 content/en/docs/concepts/storage/volumes.md                                      |  5 ++---
 content/en/docs/concepts/workloads/_index.md                                     |  2 +-
 content/en/docs/concepts/workloads/controllers/replicaset.md                     |  4 ++--
 content/en/docs/concepts/workloads/pods/_index.md                                |  4 ++--
 content/en/docs/concepts/workloads/pods/pod-lifecycle.md                         |  3 ++-
Related: #24419
pr created time in 18 hours
pull request commentkubernetes/website
[zh] translate tutorial guestbook-logs-metrics-with-elk
/approve

comment created time in a day
Pull request review commentkubernetes/website
[zh] translate tutorial guestbook-logs-metrics-with-elk
+---+title: "示例: 添加日志和指标到 PHP / Redis Guestbook 案例"+content_type: tutorial+weight: 21+card:+ name: tutorials+ weight: 31+ title: "示例: 添加日志和指标到 PHP / Redis Guestbook 案例"+---+<!-- +title: "Example: Add logging and metrics to the PHP / Redis Guestbook example"+reviewers:+- sftim+content_type: tutorial+weight: 21+card:+ name: tutorials+ weight: 31+ title: "Example: Add logging and metrics to the PHP / Redis Guestbook example"+-->++<!-- overview -->+<!-- +This tutorial builds upon the [PHP Guestbook with Redis](/docs/tutorials/stateless-application/guestbook) tutorial. Lightweight log, metric, and network data open source shippers, or *Beats*, from Elastic are deployed in the same Kubernetes cluster as the guestbook. The Beats collect, parse, and index the data into Elasticsearch so that you can view and analyze the resulting operational information in Kibana. This example consists of the following components:++* A running instance of the [PHP Guestbook with Redis tutorial](/docs/tutorials/stateless-application/guestbook)+* Elasticsearch and Kibana+* Filebeat+* Metricbeat+* Packetbeat+-->+本教程建立在+[使用 Redis 部署 PHP Guestbook](/zh/docs/tutorials/stateless-application/guestbook) 教程之上。+*Beats*,是 Elastic 出品的开源的轻量级日志、指标和网络数据采集器,+将和 Guestbook 一同部署在 Kubernetes 集群中。+Beats 收集、分析、索引数据到 Elasticsearch,使你可以用 Kibana 查看并分析得到的运营信息。+本示例由以下内容组成:++* Elasticsearch 和 Kibana+* Filebeat+* Metricbeat+* Packetbeat++## {{% heading "objectives" %}}++<!-- +* Start up the PHP Guestbook with Redis.+* Install kube-state-metrics.+* Create a Kubernetes Secret.+* Deploy the Beats.+* View dashboards of your logs and metrics.+-->+* 启动用 Redis 部署的 PHP Guestbook。+* 安装 kube-state-metrics。+* 创建 Kubernetes secret。+* 部署 Beats。+* 用仪表板查看日志和指标。++## {{% heading "prerequisites" %}}+++{{< include "task-tutorial-prereqs.md" >}}+{{< version-check >}}++<!-- +Additionally you need:++* A running deployment of the [PHP Guestbook with Redis](/docs/tutorials/stateless-application/guestbook) tutorial.++* A running Elasticsearch and Kibana deployment. You can use [Elasticsearch Service in Elastic Cloud](https://cloud.elastic.co), + run the [download files](https://www.elastic.co/guide/en/elastic-stack-get-started/current/get-started-elastic-stack.html) + on your workstation or servers, or the [Elastic Helm Charts](https://github.com/elastic/helm-charts).+-->+此外,你还需要:++* 依照教程[使用 Redis 的 PHP留言本](/zh/docs/tutorials/stateless-application/guestbook)得到的一套运行中的部署环境。+* 一套运行中的 Elasticsearch 和 Kibana 部署环境。你可以使用 [Elastic 云中的Elasticsearch 服务](https://cloud.elastic.co)、在工作站或者服务器上运行此[下载文件](https://www.elastic.co/guide/en/elastic-stack-get-started/current/get-started-elastic-stack.html)、或运行 [Elastic Helm Charts](https://github.com/elastic/helm-charts)。++<!-- lessoncontent -->++<!-- +## Start up the PHP Guestbook with Redis++This tutorial builds on the [PHP Guestbook with Redis](/docs/tutorials/stateless-application/guestbook) tutorial. If you have the guestbook application running, then you can monitor that. If you do not have it running then follow the instructions to deploy the guestbook and do not perform the **Cleanup** steps. Come back to this page when you have the guestbook running.+-->+## 启动用 Redis 部署的 PHP Guestbook {#start-up-the-php-guestbook-with-redis}++本教程建立在+[使用 Redis 部署 PHP Guestbook](/zh/docs/tutorials/stateless-application/guestbook) 之上。+如果你已经有一个运行的留言簿应用程序,那就监控它。+如果还没有,那就按照说明先部署 Guestbook ,但不要执行**清理**的步骤。+当 Guestbook 运行起来后,再返回本页。++<!-- +## Add a Cluster role binding++Create a [cluster level role binding](/docs/reference/access-authn-authz/rbac/#rolebinding-and-clusterrolebinding) so that you can deploy kube-state-metrics and the Beats at the cluster level (in kube-system).+-->+## 添加一个集群角色绑定 {#add-a-cluster-role-binding}++创建一个[集群范围的角色绑定](/zh/docs/reference/access-authn-authz/rbac/#rolebinding-和-clusterrolebinding),+以便你可以在集群范围(在 kube-system 中)部署 kube-state-metrics 和 Beats。++```shell+kubectl create clusterrolebinding cluster-admin-binding \+ --clusterrole=cluster-admin --user=<your email associated with the k8s provider account>+```++<!-- +## Install kube-state-metrics++Kubernetes [*kube-state-metrics*](https://github.com/kubernetes/kube-state-metrics) is a simple service that listens to the Kubernetes API server and generates metrics about the state of the objects. Metricbeat reports these metrics. Add kube-state-metrics to the Kubernetes cluster that the guestbook is running in.+--> +### 安装 kube-state-metrics {#install-kube-state-metrics}++Kubernetes [*kube-state-metrics*](https://github.com/kubernetes/kube-state-metrics)+是一个简单的服务,它侦听 Kubernetes API 服务器并生成对象状态的指标。+Metricbeat 报告这些指标。+添加 kube-state-metrics 到运行留言簿的 Kubernetes 集群。++```shell+git clone https://github.com/kubernetes/kube-state-metrics.git kube-state-metrics+kubectl apply -f kube-state-metrics/examples/standard+```++<!-- +### Check to see if kube-state-metrics is running+-->+### 检查 kube-state-metrics 是否正在运行 {#check-to-see-if-kube-state-metrics-is-running}++```shell+kubectl get pods --namespace=kube-system -l app.kubernetes.io/name=kube-state-metrics+```++<!-- +Output:+-->+输出:++```+NAME READY STATUS RESTARTS AGE+kube-state-metrics-89d656bf8-vdthm 1/1 Running 0 21s+```++<!-- +## Clone the Elastic examples GitHub repo+-->+## 从 GitHub 克隆 Elastic examples 库 {#clone-the-elastic-examples-github-repo}++```shell+git clone https://github.com/elastic/examples.git+```++<!-- +The rest of the commands will reference files in the `examples/beats-k8s-send-anywhere` directory, so change dir there:+-->+后续命令将引用目录 `examples/beats-k8s-send-anywhere` 中的文件,+所以把目录切换过去。++```shell+cd examples/beats-k8s-send-anywhere+```++<!-- +## Create a Kubernetes Secret+A Kubernetes {{< glossary_tooltip text="Secret" term_id="secret" >}} is an object that contains a small amount of sensitive data such as a password, a token, or a key. Such information might otherwise be put in a Pod specification or in an image; putting it in a Secret object allows for more control over how it is used, and reduces the risk of accidental exposure.++There are two sets of steps here, one for *self managed* Elasticsearch and Kibana (running on your servers or using the Elastic Helm Charts), and a second separate set for the *managed service* Elasticsearch Service in Elastic Cloud. Only create the secret for the type of Elasticsearch and Kibana system that you will use for this tutorial.+-->+## 创建 Kubernetes Secret {#create-a-kubernetes-secret}++Kubernetes {{< glossary_tooltip text="Secret" term_id="secret" >}}+是包含少量敏感数据(类似密码、令牌、秘钥等)的对象。+这类信息也可以放在 Pod 规格定义或者镜像中;+但放在 Secret 对象中,能更好的控制它的使用方式,也能减少意外泄露的风险。++{{< note >}}+这里有两套步骤,一套用于*自管理*的 Elasticsearch 和 Kibana(运行在你的服务器上或使用 Helm Charts),+另一套用于在 Elastic 云服务中 *Managed service* 的 Elasticsearch 服务。+在本教程中,只需要为 Elasticsearch 和 Kibana 系统创建 secret。+{{< /note >}}++{{< tabs name="tab_with_md" >}}+{{% tab name="自管理" %}}++<!-- +### Self managed+Switch to the **Managed service** tab if you are connecting to Elasticsearch Service in Elastic Cloud.++### Set the credentials+There are four files to edit to create a k8s secret when you are connecting to self managed Elasticsearch and Kibana (self managed is effectively anything other than the managed Elasticsearch Service in Elastic Cloud). The files are:+-->+### 自管理系统 {#self-managed}++如果你使用 Elastic 云中的 Elasticsearch 服务,切换到 **Managed service** 标签页。++### 设置凭据 {#set-the-credentials}++当你使用自管理的 Elasticsearch 和 Kibana (对比托管于 Elastic 云中的 Elasticsearch 服务,自管理更有效率),+创建 k8s secret 需要准备四个文件。这些文件是:++1. `ELASTICSEARCH_HOSTS`+1. `ELASTICSEARCH_PASSWORD`+1. `ELASTICSEARCH_USERNAME`+1. `KIBANA_HOST`++<!-- +Set these with the information for your Elasticsearch cluster and your Kibana host. Here are some examples (also see [*this configuration*](https://stackoverflow.com/questions/59892896/how-to-connect-from-minikube-to-elasticsearch-installed-on-host-local-developme/59892897#59892897))+-->+为你的 Elasticsearch 集群和 Kibana 主机设置这些信息。这里是一些例子+(另见[*此配置*](https://stackoverflow.com/questions/59892896/how-to-connect-from-minikube-to-elasticsearch-installed-on-host-local-developme/59892897#59892897))++#### `ELASTICSEARCH_HOSTS` {#elasticsearch-hosts}++<!-- +1. A nodeGroup from the Elastic Elasticsearch Helm Chart:+-->+1. 来自于 Elastic Elasticsearch Helm Chart 的节点组:++ ```+ ["http://elasticsearch-master.default.svc.cluster.local:9200"]+ ```++ <!-- + 1. A single Elasticsearch node running on a Mac where your Beats are running in Docker for Mac:+ -->+1. Mac 上的单节点的 Elasticsearch,Beats 运行在 Mac 的容器中:++ ```+ ["http://host.docker.internal:9200"]+ ```++ <!-- + 1. Two Elasticsearch nodes running in VMs or on physical hardware:+ -->+1. 运行在虚拟机或物理机上的两个 Elasticsearch 节点++ ```+ ["http://host1.example.com:9200", "http://host2.example.com:9200"]+ ```++<!-- +Edit `ELASTICSEARCH_HOSTS`+-->+编辑 `ELASTICSEARCH_HOSTS`+```shell+vi ELASTICSEARCH_HOSTS+```++#### `ELASTICSEARCH_PASSWORD` {#elasticsearch-password}++<!-- +Just the password; no whitespace, quotes, or <>:+-->+只有密码;没有空格、引号、< 和 >:++```+<yoursecretpassword>+```++<!-- +Edit `ELASTICSEARCH_PASSWORD`+-->+编辑 `ELASTICSEARCH_PASSWORD`:++```shell+vi ELASTICSEARCH_PASSWORD+```++#### `ELASTICSEARCH_USERNAME` {#elasticsearch-username}++<!-- +Just the username; no whitespace, quotes, or <>:+-->+只有用名;没有空格、引号、< 和 >:++<!-- +your ingest username for Elasticsearch+-->+```+<为 Elasticsearch 注入的用户名>+```++<!-- +Edit `ELASTICSEARCH_USERNAME`+-->+编辑 `ELASTICSEARCH_USERNAME`:++```shell+vi ELASTICSEARCH_USERNAME+```++#### `KIBANA_HOST` {#kibana-host}++<!-- +1. The Kibana instance from the Elastic Kibana Helm Chart. The subdomain `default` refers to the default namespace. If you have deployed the Helm Chart using a different namespace, then your subdomain will be different:+-->+1. 从 Elastic Kibana Helm Chart 安装的 Kibana 实例。子域 `default` 指默认的命名空间。如果你把 Helm Chart 指定部署到不同的命名空间,那子域会不同: ++ ```+ "kibana-kibana.default.svc.cluster.local:5601"+ ```++ <!-- + 1. A Kibana instance running on a Mac where your Beats are running in Docker for Mac:+ -->+1. Mac 上的 Kibana 实例,Beats 运行于 Mac 的容器:++ ```+ "host.docker.internal:5601"+ ```+ + <!-- + 1. Two Elasticsearch nodes running in VMs or on physical hardware:+ -->+1. 运行于虚拟机或物理机上的两个 Elasticsearch 节点:++ ```+ "host1.example.com:5601"+ ```++<!-- +Edit `KIBANA_HOST`+-->+编辑 `KIBANA_HOST`:++```shell+vi KIBANA_HOST+```++<!-- +### Create a Kubernetes secret+This command creates a secret in the Kubernetes system level namespace (kube-system) based on the files you just edited:+-->+### 创建 Kubernetes secret {#create-a-kubernetes-secret}++在上面编辑完的文件的基础上,本命令在 Kubernetes 系统范围的命名空间(kube-system)创建一个 secret。++```+ kubectl create secret generic dynamic-logging \+ --from-file=./ELASTICSEARCH_HOSTS \+ --from-file=./ELASTICSEARCH_PASSWORD \+ --from-file=./ELASTICSEARCH_USERNAME \+ --from-file=./KIBANA_HOST \+ --namespace=kube-system+```++{{% /tab %}}+{{% tab name="Managed service" %}}++<!-- +## Managed service+This tab is for Elasticsearch Service in Elastic Cloud only, if you have already created a secret for a self managed Elasticsearch and Kibana deployment, then continue with [Deploy the Beats](#deploy-the-beats).+### Set the credentials+There are two files to edit to create a k8s secret when you are connecting to the managed Elasticsearch Service in Elastic Cloud. The files are:+-->+## Managed service {#managed-service}++本标签页只用于 Elastic 云 的 Elasticsearch 服务,如果你已经为自管理的 Elasticsearch 和 Kibana 创建了secret,请继续[部署 Beats](#deploy-the-beats)并继续。++### 设置凭据 {#set-the-credentials}++在 Elastic 云中的托管 Elasticsearch 服务中,为了创建 k8s secret,你需要先编辑两个文件。它们是:++1. `ELASTIC_CLOUD_AUTH`+1. `ELASTIC_CLOUD_ID`++<!-- +Set these with the information provided to you from the Elasticsearch Service console when you created the deployment. Here are some examples:+-->+当你完成部署的时候,Elasticsearch 服务控制台会提供给你一些信息,用这些信息完成设置。+这里是一些示例:++#### ELASTIC_CLOUD_ID {#elastic-cloud-id}++```+devk8s:ABC123def456ghi789jkl123mno456pqr789stu123vwx456yza789bcd012efg345hijj678klm901nop345zEwOTJjMTc5YWQ0YzQ5OThlN2U5MjAwYTg4NTIzZQ==+```++#### ELASTIC_CLOUD_AUTH {#elastic-cloud-auth}++<!-- +Just the username, a colon (`:`), and the password, no whitespace or quotes:+-->+只要用户名;没有空格、引号、< 和 >:++```+elastic:VFxJJf9Tjwer90wnfTghsn8w+```++<!-- +### Edit the required files:+-->+### 编辑要求的文件 {#edit-the-required-files}+```shell+vi ELASTIC_CLOUD_ID+vi ELASTIC_CLOUD_AUTH+```++<!-- +### Create a Kubernetes secret+This command creates a secret in the Kubernetes system level namespace (kube-system) based on the files you just edited:+-->+### 创建 Kubernetes secret {#create-a-kubernetes-secret}++基于上面刚编辑过的文件,在 Kubernetes 系统范围命名空间(kube-system)中,用下面命令创建一个的secret:++ kubectl create secret generic dynamic-logging \+ --from-file=./ELASTIC_CLOUD_ID \+ --from-file=./ELASTIC_CLOUD_AUTH \+ --namespace=kube-system++ {{% /tab %}}+{{< /tabs >}}++<!-- +## Deploy the Beats+Manifest files are provided for each Beat. These manifest files use the secret created earlier to configure the Beats to connect to your Elasticsearch and Kibana servers.++### About Filebeat+Filebeat will collect logs from the Kubernetes nodes and the containers running in each pod running on those nodes. Filebeat is deployed as a {{< glossary_tooltip text="DaemonSet" term_id="daemonset" >}}. Filebeat can autodiscover applications running in your Kubernetes cluster. At startup Filebeat scans existing containers and launches the proper configurations for them, then it will watch for new start/stop events.++Here is the autodiscover configuration that enables Filebeat to locate and parse Redis logs from the Redis containers deployed with the guestbook application. This configuration is in the file `filebeat-kubernetes.yaml`:+-->+## 部署 Beats {#deploy-the-beats}++为每一个 Beat 提供 清单文件。清单文件使用已创建的 secret 接入 Elasticsearch 和 Kibana 服务器。++### 关于 Filebeat {#about-filebeat}++Filebeat 收集日志,日志来源于 Kubernetes 节点以及这些节点上每一个 Pod 中的容器。Filebeat 部署为+{{< glossary_tooltip text="DaemonSet" term_id="daemonset" >}}。+Filebeat 支持自动发现 Kubernetes 集群中的应用。+在启动时,Filebeat 扫描存量的容器,并为它们提供适当的配置,+然后开始监听新的启动/中止信号。++下面是一个自动发现的配置,它支持 Filebeat 定位并分析来自于 Guestbook 应用部署的 Redis 容器的日志文件。+下面的配置片段来自文件 `filebeat-kubernetes.yaml`:++```yaml+- condition.contains:+ kubernetes.labels.app: redis+ config:+ - module: redis+ log:+ input:+ type: docker+ containers.ids:+ - ${data.kubernetes.container.id}+ slowlog:+ enabled: true+ var.hosts: ["${data.host}:${data.port}"]+```++<!-- +This configures Filebeat to apply the Filebeat module `redis` when a container is detected with a label `app` containing the string `redis`. The redis module has the ability to collect the `log` stream from the container by using the docker input type (reading the file on the Kubernetes node associated with the STDOUT stream from this Redis container). Additionally, the module has the ability to collect Redis `slowlog` entries by connecting to the proper pod host and port, which is provided in the container metadata.++### Deploy Filebeat:+-->++这样配置 Filebeat,当探测到容器拥有 `app` 标签,且值为 `redis`,那就启用 Filebeat 的 `redis` 模块。+`redis` 模块可以根据 docker 的输入类型(在 Kubernetes 节点上读取和 Redis 容器的标准输出流关联的文件) ,从容器收集 `log` 流。+另外,此模块还可以使用容器元数据中提供的配置信息,连到 Pod 适当的主机和端口,收集 Redis 的 `slowlog` 。++### 部署 Filebeat {#deploy-filebeat}++```shell+kubectl create -f filebeat-kubernetes.yaml+```++<!-- +#### Verify+-->+#### 验证 {#verify}++```shell+kubectl get pods -n kube-system -l k8s-app=filebeat-dynamic+```++<!-- +### About Metricbeat+Metricbeat autodiscover is configured in the same way as Filebeat. Here is the Metricbeat autodiscover configuration for the Redis containers. This configuration is in the file `metricbeat-kubernetes.yaml`:+-->+### 关于 Metricbeat {#about-metricbeat}++Metricbeat 自动发现的配置方式与 Filebeat 完全相同。+这里是针对 Redis 容器的 Metricbeat 自动发现配置。+此配置片段来自于文件 `metricbeat-kubernetes.yaml`:++```yaml+- condition.equals:+ kubernetes.labels.tier: backend+ config:+ - module: redis+ metricsets: ["info", "keyspace"]+ period: 10s++ # Redis hosts+ hosts: ["${data.host}:${data.port}"]+```+<!-- +This configures Metricbeat to apply the Metricbeat module `redis` when a container is detected with a label `tier` equal to the string `backend`. The `redis` module has the ability to collect the `info` and `keyspace` metrics from the container by connecting to the proper pod host and port, which is provided in the container metadata.++### Deploy Metricbeat+-->+配置 Metricbeat,在探测到标签 `tier` 的值等于 `backend` 时,应用 Metricbeat 模块 `redis`。+`redis` 模块可以获取容器元数据,连接到 Pod 适当的主机和端口,从 Pod 中收集指标 `info` 和 `keyspace`。++### 部署 Metricbeat {#deploy-metricbeat}++```shell+kubectl create -f metricbeat-kubernetes.yaml+```++<!-- +#### Verify+-->+#### 验证 {#verify2}++```shell+kubectl get pods -n kube-system -l k8s-app=metricbeat+```++<!-- +### About Packetbeat+Packetbeat configuration is different than Filebeat and Metricbeat. Rather than specify patterns to match against container labels the configuration is based on the protocols and port numbers involved. Shown below is a subset of the port numbers.++{{< note >}}
This note is not translated?
comment created time in a day
Pull request review commentkubernetes/website
[zh] translate tutorial guestbook-logs-metrics-with-elk
+---+title: "示例: 添加日志和指标到 PHP / Redis Guestbook 案例"+content_type: tutorial+weight: 21+card:+ name: tutorials+ weight: 31+ title: "示例: 添加日志和指标到 PHP / Redis Guestbook 案例"+---+<!-- +title: "Example: Add logging and metrics to the PHP / Redis Guestbook example"+reviewers:+- sftim+content_type: tutorial+weight: 21+card:+ name: tutorials+ weight: 31+ title: "Example: Add logging and metrics to the PHP / Redis Guestbook example"+-->++<!-- overview -->+<!-- +This tutorial builds upon the [PHP Guestbook with Redis](/docs/tutorials/stateless-application/guestbook) tutorial. Lightweight log, metric, and network data open source shippers, or *Beats*, from Elastic are deployed in the same Kubernetes cluster as the guestbook. The Beats collect, parse, and index the data into Elasticsearch so that you can view and analyze the resulting operational information in Kibana. This example consists of the following components:++* A running instance of the [PHP Guestbook with Redis tutorial](/docs/tutorials/stateless-application/guestbook)+* Elasticsearch and Kibana+* Filebeat+* Metricbeat+* Packetbeat+-->+本教程建立在+[使用 Redis 部署 PHP Guestbook](/zh/docs/tutorials/stateless-application/guestbook) 教程之上。+*Beats*,是 Elastic 出品的开源的轻量级日志、指标和网络数据采集器,+将和 Guestbook 一同部署在 Kubernetes 集群中。+Beats 收集、分析、索引数据到 Elasticsearch,使你可以用 Kibana 查看并分析得到的运营信息。+本示例由以下内容组成:++* Elasticsearch 和 Kibana+* Filebeat+* Metricbeat+* Packetbeat++## {{% heading "objectives" %}}++<!-- +* Start up the PHP Guestbook with Redis.+* Install kube-state-metrics.+* Create a Kubernetes Secret.+* Deploy the Beats.+* View dashboards of your logs and metrics.+-->+* 启动用 Redis 部署的 PHP Guestbook。+* 安装 kube-state-metrics。+* 创建 Kubernetes secret。+* 部署 Beats。+* 用仪表板查看日志和指标。++## {{% heading "prerequisites" %}}+++{{< include "task-tutorial-prereqs.md" >}}+{{< version-check >}}++<!-- +Additionally you need:++* A running deployment of the [PHP Guestbook with Redis](/docs/tutorials/stateless-application/guestbook) tutorial.++* A running Elasticsearch and Kibana deployment. You can use [Elasticsearch Service in Elastic Cloud](https://cloud.elastic.co), + run the [download files](https://www.elastic.co/guide/en/elastic-stack-get-started/current/get-started-elastic-stack.html) + on your workstation or servers, or the [Elastic Helm Charts](https://github.com/elastic/helm-charts).+-->+此外,你还需要:++* 依照教程[使用 Redis 的 PHP留言本](/zh/docs/tutorials/stateless-application/guestbook)得到的一套运行中的部署环境。+* 一套运行中的 Elasticsearch 和 Kibana 部署环境。你可以使用 [Elastic 云中的Elasticsearch 服务](https://cloud.elastic.co)、在工作站或者服务器上运行此[下载文件](https://www.elastic.co/guide/en/elastic-stack-get-started/current/get-started-elastic-stack.html)、或运行 [Elastic Helm Charts](https://github.com/elastic/helm-charts)。++<!-- lessoncontent -->++<!-- +## Start up the PHP Guestbook with Redis++This tutorial builds on the [PHP Guestbook with Redis](/docs/tutorials/stateless-application/guestbook) tutorial. If you have the guestbook application running, then you can monitor that. If you do not have it running then follow the instructions to deploy the guestbook and do not perform the **Cleanup** steps. Come back to this page when you have the guestbook running.+-->+## 启动用 Redis 部署的 PHP Guestbook {#start-up-the-php-guestbook-with-redis}++本教程建立在+[使用 Redis 部署 PHP Guestbook](/zh/docs/tutorials/stateless-application/guestbook) 之上。+如果你已经有一个运行的留言簿应用程序,那就监控它。+如果还没有,那就按照说明先部署 Guestbook ,但不要执行**清理**的步骤。+当 Guestbook 运行起来后,再返回本页。++<!-- +## Add a Cluster role binding++Create a [cluster level role binding](/docs/reference/access-authn-authz/rbac/#rolebinding-and-clusterrolebinding) so that you can deploy kube-state-metrics and the Beats at the cluster level (in kube-system).+-->+## 添加一个集群角色绑定 {#add-a-cluster-role-binding}++创建一个[集群范围的角色绑定](/zh/docs/reference/access-authn-authz/rbac/#rolebinding-和-clusterrolebinding),+以便你可以在集群范围(在 kube-system 中)部署 kube-state-metrics 和 Beats。++```shell+kubectl create clusterrolebinding cluster-admin-binding \+ --clusterrole=cluster-admin --user=<your email associated with the k8s provider account>+```++<!-- +## Install kube-state-metrics++Kubernetes [*kube-state-metrics*](https://github.com/kubernetes/kube-state-metrics) is a simple service that listens to the Kubernetes API server and generates metrics about the state of the objects. Metricbeat reports these metrics. Add kube-state-metrics to the Kubernetes cluster that the guestbook is running in.+--> +### 安装 kube-state-metrics {#install-kube-state-metrics}++Kubernetes [*kube-state-metrics*](https://github.com/kubernetes/kube-state-metrics)+是一个简单的服务,它侦听 Kubernetes API 服务器并生成对象状态的指标。+Metricbeat 报告这些指标。+添加 kube-state-metrics 到运行留言簿的 Kubernetes 集群。++```shell+git clone https://github.com/kubernetes/kube-state-metrics.git kube-state-metrics+kubectl apply -f kube-state-metrics/examples/standard+```++<!-- +### Check to see if kube-state-metrics is running+-->+### 检查 kube-state-metrics 是否正在运行 {#check-to-see-if-kube-state-metrics-is-running}++```shell+kubectl get pods --namespace=kube-system -l app.kubernetes.io/name=kube-state-metrics+```++<!-- +Output:+-->+输出:++```+NAME READY STATUS RESTARTS AGE+kube-state-metrics-89d656bf8-vdthm 1/1 Running 0 21s+```++<!-- +## Clone the Elastic examples GitHub repo+-->+## 从 GitHub 克隆 Elastic examples 库 {#clone-the-elastic-examples-github-repo}++```shell+git clone https://github.com/elastic/examples.git+```++<!-- +The rest of the commands will reference files in the `examples/beats-k8s-send-anywhere` directory, so change dir there:+-->+后续命令将引用目录 `examples/beats-k8s-send-anywhere` 中的文件,+所以把目录切换过去。++```shell+cd examples/beats-k8s-send-anywhere+```++<!-- +## Create a Kubernetes Secret+A Kubernetes {{< glossary_tooltip text="Secret" term_id="secret" >}} is an object that contains a small amount of sensitive data such as a password, a token, or a key. Such information might otherwise be put in a Pod specification or in an image; putting it in a Secret object allows for more control over how it is used, and reduces the risk of accidental exposure.++There are two sets of steps here, one for *self managed* Elasticsearch and Kibana (running on your servers or using the Elastic Helm Charts), and a second separate set for the *managed service* Elasticsearch Service in Elastic Cloud. Only create the secret for the type of Elasticsearch and Kibana system that you will use for this tutorial.+-->+## 创建 Kubernetes Secret {#create-a-kubernetes-secret}++Kubernetes {{< glossary_tooltip text="Secret" term_id="secret" >}}+是包含少量敏感数据(类似密码、令牌、秘钥等)的对象。+这类信息也可以放在 Pod 规格定义或者镜像中;+但放在 Secret 对象中,能更好的控制它的使用方式,也能减少意外泄露的风险。++{{< note >}}+这里有两套步骤,一套用于*自管理*的 Elasticsearch 和 Kibana(运行在你的服务器上或使用 Helm Charts),+另一套用于在 Elastic 云服务中 *Managed service* 的 Elasticsearch 服务。+在本教程中,只需要为 Elasticsearch 和 Kibana 系统创建 secret。+{{< /note >}}++{{< tabs name="tab_with_md" >}}+{{% tab name="自管理" %}}++<!-- +### Self managed+Switch to the **Managed service** tab if you are connecting to Elasticsearch Service in Elastic Cloud.++### Set the credentials+There are four files to edit to create a k8s secret when you are connecting to self managed Elasticsearch and Kibana (self managed is effectively anything other than the managed Elasticsearch Service in Elastic Cloud). The files are:+-->+### 自管理系统 {#self-managed}++如果你使用 Elastic 云中的 Elasticsearch 服务,切换到 **Managed service** 标签页。++### 设置凭据 {#set-the-credentials}++当你使用自管理的 Elasticsearch 和 Kibana (对比托管于 Elastic 云中的 Elasticsearch 服务,自管理更有效率),+创建 k8s secret 需要准备四个文件。这些文件是:++1. `ELASTICSEARCH_HOSTS`+1. `ELASTICSEARCH_PASSWORD`+1. `ELASTICSEARCH_USERNAME`+1. `KIBANA_HOST`++<!-- +Set these with the information for your Elasticsearch cluster and your Kibana host. Here are some examples (also see [*this configuration*](https://stackoverflow.com/questions/59892896/how-to-connect-from-minikube-to-elasticsearch-installed-on-host-local-developme/59892897#59892897))+-->+为你的 Elasticsearch 集群和 Kibana 主机设置这些信息。这里是一些例子+(另见[*此配置*](https://stackoverflow.com/questions/59892896/how-to-connect-from-minikube-to-elasticsearch-installed-on-host-local-developme/59892897#59892897))++#### `ELASTICSEARCH_HOSTS` {#elasticsearch-hosts}++<!-- +1. A nodeGroup from the Elastic Elasticsearch Helm Chart:+-->+1. 来自于 Elastic Elasticsearch Helm Chart 的节点组:++ ```+ ["http://elasticsearch-master.default.svc.cluster.local:9200"]+ ```++ <!-- + 1. A single Elasticsearch node running on a Mac where your Beats are running in Docker for Mac:+ -->+1. Mac 上的单节点的 Elasticsearch,Beats 运行在 Mac 的容器中:++ ```+ ["http://host.docker.internal:9200"]+ ```++ <!-- + 1. Two Elasticsearch nodes running in VMs or on physical hardware:+ -->+1. 运行在虚拟机或物理机上的两个 Elasticsearch 节点++ ```+ ["http://host1.example.com:9200", "http://host2.example.com:9200"]+ ```++<!-- +Edit `ELASTICSEARCH_HOSTS`+-->+编辑 `ELASTICSEARCH_HOSTS`+```shell+vi ELASTICSEARCH_HOSTS+```++#### `ELASTICSEARCH_PASSWORD` {#elasticsearch-password}++<!-- +Just the password; no whitespace, quotes, or <>:+-->+只有密码;没有空格、引号、< 和 >:++```+<yoursecretpassword>+```++<!-- +Edit `ELASTICSEARCH_PASSWORD`+-->+编辑 `ELASTICSEARCH_PASSWORD`:++```shell+vi ELASTICSEARCH_PASSWORD+```++#### `ELASTICSEARCH_USERNAME` {#elasticsearch-username}++<!-- +Just the username; no whitespace, quotes, or <>:+-->+只有用名;没有空格、引号、< 和 >:++<!-- +your ingest username for Elasticsearch+-->+```+<为 Elasticsearch 注入的用户名>+```++<!-- +Edit `ELASTICSEARCH_USERNAME`+-->+编辑 `ELASTICSEARCH_USERNAME`:++```shell+vi ELASTICSEARCH_USERNAME+```++#### `KIBANA_HOST` {#kibana-host}++<!-- +1. The Kibana instance from the Elastic Kibana Helm Chart. The subdomain `default` refers to the default namespace. If you have deployed the Helm Chart using a different namespace, then your subdomain will be different:+-->+1. 从 Elastic Kibana Helm Chart 安装的 Kibana 实例。子域 `default` 指默认的命名空间。如果你把 Helm Chart 指定部署到不同的命名空间,那子域会不同: ++ ```+ "kibana-kibana.default.svc.cluster.local:5601"+ ```++ <!-- + 1. A Kibana instance running on a Mac where your Beats are running in Docker for Mac:+ -->+1. Mac 上的 Kibana 实例,Beats 运行于 Mac 的容器:++ ```+ "host.docker.internal:5601"+ ```+ + <!-- + 1. Two Elasticsearch nodes running in VMs or on physical hardware:+ -->+1. 运行于虚拟机或物理机上的两个 Elasticsearch 节点:++ ```+ "host1.example.com:5601"+ ```++<!-- +Edit `KIBANA_HOST`+-->+编辑 `KIBANA_HOST`:++```shell+vi KIBANA_HOST+```++<!-- +### Create a Kubernetes secret+This command creates a secret in the Kubernetes system level namespace (kube-system) based on the files you just edited:+-->+### 创建 Kubernetes secret {#create-a-kubernetes-secret}++在上面编辑完的文件的基础上,本命令在 Kubernetes 系统范围的命名空间(kube-system)创建一个 secret。++```+ kubectl create secret generic dynamic-logging \+ --from-file=./ELASTICSEARCH_HOSTS \+ --from-file=./ELASTICSEARCH_PASSWORD \+ --from-file=./ELASTICSEARCH_USERNAME \+ --from-file=./KIBANA_HOST \+ --namespace=kube-system+```++{{% /tab %}}+{{% tab name="Managed service" %}}++<!-- +## Managed service+This tab is for Elasticsearch Service in Elastic Cloud only, if you have already created a secret for a self managed Elasticsearch and Kibana deployment, then continue with [Deploy the Beats](#deploy-the-beats).+### Set the credentials+There are two files to edit to create a k8s secret when you are connecting to the managed Elasticsearch Service in Elastic Cloud. The files are:+-->+## Managed service {#managed-service}++本标签页只用于 Elastic 云 的 Elasticsearch 服务,如果你已经为自管理的 Elasticsearch 和 Kibana 创建了secret,请继续[部署 Beats](#deploy-the-beats)并继续。++### 设置凭据 {#set-the-credentials}++在 Elastic 云中的托管 Elasticsearch 服务中,为了创建 k8s secret,你需要先编辑两个文件。它们是:++1. `ELASTIC_CLOUD_AUTH`+1. `ELASTIC_CLOUD_ID`++<!-- +Set these with the information provided to you from the Elasticsearch Service console when you created the deployment. Here are some examples:+-->+当你完成部署的时候,Elasticsearch 服务控制台会提供给你一些信息,用这些信息完成设置。+这里是一些示例:++#### ELASTIC_CLOUD_ID {#elastic-cloud-id}++```+devk8s:ABC123def456ghi789jkl123mno456pqr789stu123vwx456yza789bcd012efg345hijj678klm901nop345zEwOTJjMTc5YWQ0YzQ5OThlN2U5MjAwYTg4NTIzZQ==+```++#### ELASTIC_CLOUD_AUTH {#elastic-cloud-auth}++<!-- +Just the username, a colon (`:`), and the password, no whitespace or quotes:+-->+只要用户名;没有空格、引号、< 和 >:++```+elastic:VFxJJf9Tjwer90wnfTghsn8w+```++<!-- +### Edit the required files:+-->+### 编辑要求的文件 {#edit-the-required-files}+```shell+vi ELASTIC_CLOUD_ID+vi ELASTIC_CLOUD_AUTH+```++<!-- +### Create a Kubernetes secret+This command creates a secret in the Kubernetes system level namespace (kube-system) based on the files you just edited:+-->+### 创建 Kubernetes secret {#create-a-kubernetes-secret}++基于上面刚编辑过的文件,在 Kubernetes 系统范围命名空间(kube-system)中,用下面命令创建一个的secret:++ kubectl create secret generic dynamic-logging \+ --from-file=./ELASTIC_CLOUD_ID \+ --from-file=./ELASTIC_CLOUD_AUTH \+ --namespace=kube-system++ {{% /tab %}}+{{< /tabs >}}++<!-- +## Deploy the Beats+Manifest files are provided for each Beat. These manifest files use the secret created earlier to configure the Beats to connect to your Elasticsearch and Kibana servers.++### About Filebeat+Filebeat will collect logs from the Kubernetes nodes and the containers running in each pod running on those nodes. Filebeat is deployed as a {{< glossary_tooltip text="DaemonSet" term_id="daemonset" >}}. Filebeat can autodiscover applications running in your Kubernetes cluster. At startup Filebeat scans existing containers and launches the proper configurations for them, then it will watch for new start/stop events.++Here is the autodiscover configuration that enables Filebeat to locate and parse Redis logs from the Redis containers deployed with the guestbook application. This configuration is in the file `filebeat-kubernetes.yaml`:+-->+## 部署 Beats {#deploy-the-beats}++为每一个 Beat 提供 清单文件。清单文件使用已创建的 secret 接入 Elasticsearch 和 Kibana 服务器。++### 关于 Filebeat {#about-filebeat}++Filebeat 收集日志,日志来源于 Kubernetes 节点以及这些节点上每一个 Pod 中的容器。Filebeat 部署为+{{< glossary_tooltip text="DaemonSet" term_id="daemonset" >}}。+Filebeat 支持自动发现 Kubernetes 集群中的应用。+在启动时,Filebeat 扫描存量的容器,并为它们提供适当的配置,+然后开始监听新的启动/中止信号。++下面是一个自动发现的配置,它支持 Filebeat 定位并分析来自于 Guestbook 应用部署的 Redis 容器的日志文件。+下面的配置片段来自文件 `filebeat-kubernetes.yaml`:++```yaml+- condition.contains:+ kubernetes.labels.app: redis+ config:+ - module: redis+ log:+ input:+ type: docker+ containers.ids:+ - ${data.kubernetes.container.id}+ slowlog:+ enabled: true+ var.hosts: ["${data.host}:${data.port}"]+```++<!-- +This configures Filebeat to apply the Filebeat module `redis` when a container is detected with a label `app` containing the string `redis`. The redis module has the ability to collect the `log` stream from the container by using the docker input type (reading the file on the Kubernetes node associated with the STDOUT stream from this Redis container). Additionally, the module has the ability to collect Redis `slowlog` entries by connecting to the proper pod host and port, which is provided in the container metadata.++### Deploy Filebeat:+-->++这样配置 Filebeat,当探测到容器拥有 `app` 标签,且值为 `redis`,那就启用 Filebeat 的 `redis` 模块。+`redis` 模块可以根据 docker 的输入类型(在 Kubernetes 节点上读取和 Redis 容器的标准输出流关联的文件) ,从容器收集 `log` 流。+另外,此模块还可以使用容器元数据中提供的配置信息,连到 Pod 适当的主机和端口,收集 Redis 的 `slowlog` 。++### 部署 Filebeat {#deploy-filebeat}++```shell+kubectl create -f filebeat-kubernetes.yaml+```++<!-- +#### Verify+-->+#### 验证 {#verify}++```shell+kubectl get pods -n kube-system -l k8s-app=filebeat-dynamic+```++<!-- +### About Metricbeat+Metricbeat autodiscover is configured in the same way as Filebeat. Here is the Metricbeat autodiscover configuration for the Redis containers. This configuration is in the file `metricbeat-kubernetes.yaml`:+-->+### 关于 Metricbeat {#about-metricbeat}++Metricbeat 自动发现的配置方式与 Filebeat 完全相同。+这里是针对 Redis 容器的 Metricbeat 自动发现配置。+此配置片段来自于文件 `metricbeat-kubernetes.yaml`:++```yaml+- condition.equals:+ kubernetes.labels.tier: backend+ config:+ - module: redis+ metricsets: ["info", "keyspace"]+ period: 10s++ # Redis hosts+ hosts: ["${data.host}:${data.port}"]+```+<!-- +This configures Metricbeat to apply the Metricbeat module `redis` when a container is detected with a label `tier` equal to the string `backend`. The `redis` module has the ability to collect the `info` and `keyspace` metrics from the container by connecting to the proper pod host and port, which is provided in the container metadata.++### Deploy Metricbeat+-->+配置 Metricbeat,在探测到标签 `tier` 的值等于 `backend` 时,应用 Metricbeat 模块 `redis`。+`redis` 模块可以获取容器元数据,连接到 Pod 适当的主机和端口,从 Pod 中收集指标 `info` 和 `keyspace`。++### 部署 Metricbeat {#deploy-metricbeat}++```shell+kubectl create -f metricbeat-kubernetes.yaml+```++<!-- +#### Verify+-->+#### 验证 {#verify2}++```shell+kubectl get pods -n kube-system -l k8s-app=metricbeat+```++<!-- +### About Packetbeat+Packetbeat configuration is different than Filebeat and Metricbeat. Rather than specify patterns to match against container labels the configuration is based on the protocols and port numbers involved. Shown below is a subset of the port numbers.++{{< note >}}+If you are running a service on a non-standard port add that port number to the appropriate type in `filebeat.yaml` and delete / create the Packetbeat DaemonSet.+{{< /note >}}+-->+### 关于 Packetbeat {#about-packetbeat}++Packetbeat 的配置方式不同与 Filebeat 和 Metricbeat。+相对于匹配容器标签的模式,它的配置基于相关协议和端口号。+下面展示的是端口号的一个子集:++```yaml+packetbeat.interfaces.device: any++packetbeat.protocols:+- type: dns+ ports: [53]+ include_authorities: true+ include_additionals: true++- type: http+ ports: [80, 8000, 8080, 9200]++- type: mysql+ ports: [3306]++- type: redis+ ports: [6379]++packetbeat.flows:+ timeout: 30s+ period: 10s+```++<!-- +#### Deploy Packetbeat+-->+### 部署 Packetbeat {#deploy-packetbeat}++```shell+kubectl create -f packetbeat-kubernetes.yaml+```++<!-- +#### Verify+-->+#### 验证 {#verify3}++```shell+kubectl get pods -n kube-system -l k8s-app=packetbeat-dynamic+```++<!-- +## View in Kibana++Open Kibana in your browser and then open the **Dashboard** application. In the search bar type Kubernetes and click on the Metricbeat dashboard for Kubernetes. This dashboard reports on the state of your Nodes, deployments, etc.++Search for Packetbeat on the Dashboard page, and view the Packetbeat overview.++Similarly, view dashboards for Apache and Redis. You will see dashboards for logs and metrics for each. The Apache Metricbeat dashboard will be blank. Look at the Apache Filebeat dashboard and scroll to the bottom to view the Apache error logs. This will tell you why there are no metrics available for Apache.++To enable Metricbeat to retrieve the Apache metrics, enable server-status by adding a ConfigMap including a mod-status configuration file and re-deploy the guestbook.+++## Scale your deployments and see new pods being monitored+List the existing deployments:+-->+## 在 kibana 中浏览 {#view-in-kibana}++在浏览器中打开 kibana,再打开**仪表盘**。+在搜索栏中键入 Kubernetes,再点击 Metricbeat 的 Kubernetes 仪表盘。+此仪表盘展示节点状态、应用部署等。++在仪表盘页面,搜索 Packetbeat,并浏览 Packetbeat 概览信息。++同样地,浏览Apache 和 Redis的仪表盘。+可以看到日志和指标各自独立仪表盘。+Apache Metricbeat 仪表盘是空的。+看着 Apache Filebeat 仪表盘,拉到最下面,查看 Apache 的错误日志。+日志会揭示出没有 Apache 指标的原因。++要让 metricbeat 得到 Apache 的指标,需要添加一个包含模块状态配置文件的 ConfigMap,并重新部署留言簿。++## 缩放部署规模,查看新 Pod 已被监控 {#scale-your-deployments-and-see-new-pods-being-monitored}++列出现有的 deployments:++```shell+kubectl get deployments+```++<!-- +The output:+-->+输出:++```+NAME READY UP-TO-DATE AVAILABLE AGE+frontend 3/3 3 3 3h27m+redis-master 1/1 1 1 3h27m+redis-slave 2/2 2 2 3h27m+```++<!-- +Scale the frontend down to two pods:+-->+缩放前端到两个 Pod:++```shell+kubectl scale --replicas=2 deployment/frontend+```++<!-- +The output:+ -->+输出:++```+deployment.extensions/frontend scaled+```++<!-- +Scale the frontend back up to three pods:+-->+将前端应用缩放回三个 Pod:++```shell+kubectl scale --replicas=3 deployment/frontend+```++<!-- +## View the changes in Kibana+See the screenshot, add the indicated filters and then add the columns to the view. You can see the ScalingReplicaSet entry that is marked, following from there to the top of the list of events shows the image being pulled, the volumes mounted, the pod starting, etc.++-->+## 在 Kibana 中查看变化 {#view-the-chagnes-in-kibana}++参见屏幕截图,添加指定的过滤器,然后将列添加到视图。+你可以看到,ScalingReplicaSet 被标记了,从标记的点开始,到消息列表的顶部,展示了拉取的镜像、挂载的卷、启动的 Pod 等。+++## {{% heading "cleanup" %}}++<!-- +Deleting the Deployments and Services also deletes any running Pods. Use labels to delete multiple resources with one command.++1. Run the following commands to delete all Pods, Deployments, and Services.+-->+删除 Deployments 和 Services, 删除运行的 Pod。+用标签功能在一个命令中删除多个资源。++1. 执行下列命令,删除所有的 Pod、Deployment 和 Services。++ ```shell+ kubectl delete deployment -l app=redis+ kubectl delete service -l app=redis+ kubectl delete deployment -l app=guestbook+ kubectl delete service -l app=guestbook+ kubectl delete -f filebeat-kubernetes.yaml+ kubectl delete -f metricbeat-kubernetes.yaml+ kubectl delete -f packetbeat-kubernetes.yaml+ kubectl delete secret dynamic-logging -n kube-system+ ```+ <!-- + 1. Query the list of Pods to verify that no Pods are running:+ -->+2. 查询 Pod,以核实没有 Pod 还在运行:++ ```shell+ kubectl get pods+ ```++ <!--+ The response should be this:+ -->+ 响应应该是这样:++ ```+ No resources found.+ ```+++## {{% heading "whatsnext" %}}++<!-- +* Learn about [tools for monitoring resources](/docs/tasks/debug-application-cluster/resource-usage-monitoring/)+* Read more about [logging architecture](/docs/concepts/cluster-administration/logging/)+* Read more about [application introspection and debugging](/docs/tasks/debug-application-cluster/)+* Read more about [troubleshoot applications](/docs/tasks/debug-application-cluster/resource-usage-monitoring/)+-->+* 了解[监控资源的工具](/zh/docs/tasks/debug-application-cluster/resource-usage-monitoring/)+* 阅读更多[日志体系架构](/zh/docs/concepts/cluster-administration/logging/)+* 阅读更多[应用内省和调试](/zh/docs/tasks/debug-application-cluster/)+* 阅读更多[应用程序的故障排除](/zh/docs/tasks/debug-application-cluster/resource-usage-monitoring/)
read more about -> 进一步阅读
comment created time in a day
Pull request review commentkubernetes/website
[zh] translate tutorial guestbook-logs-metrics-with-elk
+---+title: "示例: 添加日志和指标到 PHP / Redis Guestbook 案例"+content_type: tutorial+weight: 21+card:+ name: tutorials+ weight: 31+ title: "示例: 添加日志和指标到 PHP / Redis Guestbook 案例"+---+<!-- +title: "Example: Add logging and metrics to the PHP / Redis Guestbook example"+reviewers:+- sftim+content_type: tutorial+weight: 21+card:+ name: tutorials+ weight: 31+ title: "Example: Add logging and metrics to the PHP / Redis Guestbook example"+-->++<!-- overview -->+<!-- +This tutorial builds upon the [PHP Guestbook with Redis](/docs/tutorials/stateless-application/guestbook) tutorial. Lightweight log, metric, and network data open source shippers, or *Beats*, from Elastic are deployed in the same Kubernetes cluster as the guestbook. The Beats collect, parse, and index the data into Elasticsearch so that you can view and analyze the resulting operational information in Kibana. This example consists of the following components:++* A running instance of the [PHP Guestbook with Redis tutorial](/docs/tutorials/stateless-application/guestbook)+* Elasticsearch and Kibana+* Filebeat+* Metricbeat+* Packetbeat+-->+本教程建立在+[使用 Redis 部署 PHP Guestbook](/zh/docs/tutorials/stateless-application/guestbook) 教程之上。+*Beats*,是 Elastic 出品的开源的轻量级日志、指标和网络数据采集器,+将和 Guestbook 一同部署在 Kubernetes 集群中。+Beats 收集、分析、索引数据到 Elasticsearch,使你可以用 Kibana 查看并分析得到的运营信息。+本示例由以下内容组成:++* Elasticsearch 和 Kibana+* Filebeat+* Metricbeat+* Packetbeat++## {{% heading "objectives" %}}++<!-- +* Start up the PHP Guestbook with Redis.+* Install kube-state-metrics.+* Create a Kubernetes Secret.+* Deploy the Beats.+* View dashboards of your logs and metrics.+-->+* 启动用 Redis 部署的 PHP Guestbook。+* 安装 kube-state-metrics。+* 创建 Kubernetes secret。+* 部署 Beats。+* 用仪表板查看日志和指标。++## {{% heading "prerequisites" %}}+++{{< include "task-tutorial-prereqs.md" >}}+{{< version-check >}}++<!-- +Additionally you need:++* A running deployment of the [PHP Guestbook with Redis](/docs/tutorials/stateless-application/guestbook) tutorial.++* A running Elasticsearch and Kibana deployment. You can use [Elasticsearch Service in Elastic Cloud](https://cloud.elastic.co), + run the [download files](https://www.elastic.co/guide/en/elastic-stack-get-started/current/get-started-elastic-stack.html) + on your workstation or servers, or the [Elastic Helm Charts](https://github.com/elastic/helm-charts).+-->+此外,你还需要:++* 依照教程[使用 Redis 的 PHP留言本](/zh/docs/tutorials/stateless-application/guestbook)得到的一套运行中的部署环境。+* 一套运行中的 Elasticsearch 和 Kibana 部署环境。你可以使用 [Elastic 云中的Elasticsearch 服务](https://cloud.elastic.co)、在工作站或者服务器上运行此[下载文件](https://www.elastic.co/guide/en/elastic-stack-get-started/current/get-started-elastic-stack.html)、或运行 [Elastic Helm Charts](https://github.com/elastic/helm-charts)。++<!-- lessoncontent -->++<!-- +## Start up the PHP Guestbook with Redis++This tutorial builds on the [PHP Guestbook with Redis](/docs/tutorials/stateless-application/guestbook) tutorial. If you have the guestbook application running, then you can monitor that. If you do not have it running then follow the instructions to deploy the guestbook and do not perform the **Cleanup** steps. Come back to this page when you have the guestbook running.+-->+## 启动用 Redis 部署的 PHP Guestbook {#start-up-the-php-guestbook-with-redis}++本教程建立在+[使用 Redis 部署 PHP Guestbook](/zh/docs/tutorials/stateless-application/guestbook) 之上。+如果你已经有一个运行的留言簿应用程序,那就监控它。+如果还没有,那就按照说明先部署 Guestbook ,但不要执行**清理**的步骤。+当 Guestbook 运行起来后,再返回本页。++<!-- +## Add a Cluster role binding++Create a [cluster level role binding](/docs/reference/access-authn-authz/rbac/#rolebinding-and-clusterrolebinding) so that you can deploy kube-state-metrics and the Beats at the cluster level (in kube-system).+-->+## 添加一个集群角色绑定 {#add-a-cluster-role-binding}++创建一个[集群范围的角色绑定](/zh/docs/reference/access-authn-authz/rbac/#rolebinding-和-clusterrolebinding),+以便你可以在集群范围(在 kube-system 中)部署 kube-state-metrics 和 Beats。++```shell+kubectl create clusterrolebinding cluster-admin-binding \+ --clusterrole=cluster-admin --user=<your email associated with the k8s provider account>+```++<!-- +## Install kube-state-metrics++Kubernetes [*kube-state-metrics*](https://github.com/kubernetes/kube-state-metrics) is a simple service that listens to the Kubernetes API server and generates metrics about the state of the objects. Metricbeat reports these metrics. Add kube-state-metrics to the Kubernetes cluster that the guestbook is running in.+--> +### 安装 kube-state-metrics {#install-kube-state-metrics}++Kubernetes [*kube-state-metrics*](https://github.com/kubernetes/kube-state-metrics)+是一个简单的服务,它侦听 Kubernetes API 服务器并生成对象状态的指标。+Metricbeat 报告这些指标。+添加 kube-state-metrics 到运行留言簿的 Kubernetes 集群。++```shell+git clone https://github.com/kubernetes/kube-state-metrics.git kube-state-metrics+kubectl apply -f kube-state-metrics/examples/standard+```++<!-- +### Check to see if kube-state-metrics is running+-->+### 检查 kube-state-metrics 是否正在运行 {#check-to-see-if-kube-state-metrics-is-running}++```shell+kubectl get pods --namespace=kube-system -l app.kubernetes.io/name=kube-state-metrics+```++<!-- +Output:+-->+输出:++```+NAME READY STATUS RESTARTS AGE+kube-state-metrics-89d656bf8-vdthm 1/1 Running 0 21s+```++<!-- +## Clone the Elastic examples GitHub repo+-->+## 从 GitHub 克隆 Elastic examples 库 {#clone-the-elastic-examples-github-repo}++```shell+git clone https://github.com/elastic/examples.git+```++<!-- +The rest of the commands will reference files in the `examples/beats-k8s-send-anywhere` directory, so change dir there:+-->+后续命令将引用目录 `examples/beats-k8s-send-anywhere` 中的文件,+所以把目录切换过去。++```shell+cd examples/beats-k8s-send-anywhere+```++<!-- +## Create a Kubernetes Secret+A Kubernetes {{< glossary_tooltip text="Secret" term_id="secret" >}} is an object that contains a small amount of sensitive data such as a password, a token, or a key. Such information might otherwise be put in a Pod specification or in an image; putting it in a Secret object allows for more control over how it is used, and reduces the risk of accidental exposure.++There are two sets of steps here, one for *self managed* Elasticsearch and Kibana (running on your servers or using the Elastic Helm Charts), and a second separate set for the *managed service* Elasticsearch Service in Elastic Cloud. Only create the secret for the type of Elasticsearch and Kibana system that you will use for this tutorial.+-->+## 创建 Kubernetes Secret {#create-a-kubernetes-secret}++Kubernetes {{< glossary_tooltip text="Secret" term_id="secret" >}}+是包含少量敏感数据(类似密码、令牌、秘钥等)的对象。+这类信息也可以放在 Pod 规格定义或者镜像中;+但放在 Secret 对象中,能更好的控制它的使用方式,也能减少意外泄露的风险。++{{< note >}}+这里有两套步骤,一套用于*自管理*的 Elasticsearch 和 Kibana(运行在你的服务器上或使用 Helm Charts),+另一套用于在 Elastic 云服务中 *Managed service* 的 Elasticsearch 服务。+在本教程中,只需要为 Elasticsearch 和 Kibana 系统创建 secret。+{{< /note >}}++{{< tabs name="tab_with_md" >}}+{{% tab name="自管理" %}}++<!-- +### Self managed+Switch to the **Managed service** tab if you are connecting to Elasticsearch Service in Elastic Cloud.++### Set the credentials+There are four files to edit to create a k8s secret when you are connecting to self managed Elasticsearch and Kibana (self managed is effectively anything other than the managed Elasticsearch Service in Elastic Cloud). The files are:+-->+### 自管理系统 {#self-managed}++如果你使用 Elastic 云中的 Elasticsearch 服务,切换到 **Managed service** 标签页。++### 设置凭据 {#set-the-credentials}++当你使用自管理的 Elasticsearch 和 Kibana (对比托管于 Elastic 云中的 Elasticsearch 服务,自管理更有效率),+创建 k8s secret 需要准备四个文件。这些文件是:++1. `ELASTICSEARCH_HOSTS`+1. `ELASTICSEARCH_PASSWORD`+1. `ELASTICSEARCH_USERNAME`+1. `KIBANA_HOST`++<!-- +Set these with the information for your Elasticsearch cluster and your Kibana host. Here are some examples (also see [*this configuration*](https://stackoverflow.com/questions/59892896/how-to-connect-from-minikube-to-elasticsearch-installed-on-host-local-developme/59892897#59892897))+-->+为你的 Elasticsearch 集群和 Kibana 主机设置这些信息。这里是一些例子+(另见[*此配置*](https://stackoverflow.com/questions/59892896/how-to-connect-from-minikube-to-elasticsearch-installed-on-host-local-developme/59892897#59892897))++#### `ELASTICSEARCH_HOSTS` {#elasticsearch-hosts}++<!-- +1. A nodeGroup from the Elastic Elasticsearch Helm Chart:+-->+1. 来自于 Elastic Elasticsearch Helm Chart 的节点组:++ ```+ ["http://elasticsearch-master.default.svc.cluster.local:9200"]+ ```++ <!-- + 1. A single Elasticsearch node running on a Mac where your Beats are running in Docker for Mac:+ -->+1. Mac 上的单节点的 Elasticsearch,Beats 运行在 Mac 的容器中:++ ```+ ["http://host.docker.internal:9200"]+ ```++ <!-- + 1. Two Elasticsearch nodes running in VMs or on physical hardware:+ -->+1. 运行在虚拟机或物理机上的两个 Elasticsearch 节点++ ```+ ["http://host1.example.com:9200", "http://host2.example.com:9200"]+ ```++<!-- +Edit `ELASTICSEARCH_HOSTS`+-->+编辑 `ELASTICSEARCH_HOSTS`+```shell+vi ELASTICSEARCH_HOSTS+```++#### `ELASTICSEARCH_PASSWORD` {#elasticsearch-password}++<!-- +Just the password; no whitespace, quotes, or <>:+-->+只有密码;没有空格、引号、< 和 >:++```+<yoursecretpassword>+```++<!-- +Edit `ELASTICSEARCH_PASSWORD`+-->+编辑 `ELASTICSEARCH_PASSWORD`:++```shell+vi ELASTICSEARCH_PASSWORD+```++#### `ELASTICSEARCH_USERNAME` {#elasticsearch-username}++<!-- +Just the username; no whitespace, quotes, or <>:+-->+只有用名;没有空格、引号、< 和 >:++<!-- +your ingest username for Elasticsearch+-->+```+<为 Elasticsearch 注入的用户名>+```++<!-- +Edit `ELASTICSEARCH_USERNAME`+-->+编辑 `ELASTICSEARCH_USERNAME`:++```shell+vi ELASTICSEARCH_USERNAME+```++#### `KIBANA_HOST` {#kibana-host}++<!-- +1. The Kibana instance from the Elastic Kibana Helm Chart. The subdomain `default` refers to the default namespace. If you have deployed the Helm Chart using a different namespace, then your subdomain will be different:+-->+1. 从 Elastic Kibana Helm Chart 安装的 Kibana 实例。子域 `default` 指默认的命名空间。如果你把 Helm Chart 指定部署到不同的命名空间,那子域会不同: ++ ```+ "kibana-kibana.default.svc.cluster.local:5601"+ ```++ <!-- + 1. A Kibana instance running on a Mac where your Beats are running in Docker for Mac:+ -->+1. Mac 上的 Kibana 实例,Beats 运行于 Mac 的容器:++ ```+ "host.docker.internal:5601"+ ```+ + <!-- + 1. Two Elasticsearch nodes running in VMs or on physical hardware:+ -->+1. 运行于虚拟机或物理机上的两个 Elasticsearch 节点:++ ```+ "host1.example.com:5601"+ ```++<!-- +Edit `KIBANA_HOST`+-->+编辑 `KIBANA_HOST`:++```shell+vi KIBANA_HOST+```++<!-- +### Create a Kubernetes secret+This command creates a secret in the Kubernetes system level namespace (kube-system) based on the files you just edited:+-->+### 创建 Kubernetes secret {#create-a-kubernetes-secret}++在上面编辑完的文件的基础上,本命令在 Kubernetes 系统范围的命名空间(kube-system)创建一个 secret。++```+ kubectl create secret generic dynamic-logging \+ --from-file=./ELASTICSEARCH_HOSTS \+ --from-file=./ELASTICSEARCH_PASSWORD \+ --from-file=./ELASTICSEARCH_USERNAME \+ --from-file=./KIBANA_HOST \+ --namespace=kube-system+```++{{% /tab %}}+{{% tab name="Managed service" %}}++<!-- +## Managed service+This tab is for Elasticsearch Service in Elastic Cloud only, if you have already created a secret for a self managed Elasticsearch and Kibana deployment, then continue with [Deploy the Beats](#deploy-the-beats).+### Set the credentials+There are two files to edit to create a k8s secret when you are connecting to the managed Elasticsearch Service in Elastic Cloud. The files are:+-->+## Managed service {#managed-service}++本标签页只用于 Elastic 云 的 Elasticsearch 服务,如果你已经为自管理的 Elasticsearch 和 Kibana 创建了secret,请继续[部署 Beats](#deploy-the-beats)并继续。++### 设置凭据 {#set-the-credentials}++在 Elastic 云中的托管 Elasticsearch 服务中,为了创建 k8s secret,你需要先编辑两个文件。它们是:++1. `ELASTIC_CLOUD_AUTH`+1. `ELASTIC_CLOUD_ID`++<!-- +Set these with the information provided to you from the Elasticsearch Service console when you created the deployment. Here are some examples:+-->+当你完成部署的时候,Elasticsearch 服务控制台会提供给你一些信息,用这些信息完成设置。+这里是一些示例:++#### ELASTIC_CLOUD_ID {#elastic-cloud-id}++```+devk8s:ABC123def456ghi789jkl123mno456pqr789stu123vwx456yza789bcd012efg345hijj678klm901nop345zEwOTJjMTc5YWQ0YzQ5OThlN2U5MjAwYTg4NTIzZQ==+```++#### ELASTIC_CLOUD_AUTH {#elastic-cloud-auth}++<!-- +Just the username, a colon (`:`), and the password, no whitespace or quotes:+-->+只要用户名;没有空格、引号、< 和 >:++```+elastic:VFxJJf9Tjwer90wnfTghsn8w+```++<!-- +### Edit the required files:+-->+### 编辑要求的文件 {#edit-the-required-files}+```shell+vi ELASTIC_CLOUD_ID+vi ELASTIC_CLOUD_AUTH+```++<!-- +### Create a Kubernetes secret+This command creates a secret in the Kubernetes system level namespace (kube-system) based on the files you just edited:+-->+### 创建 Kubernetes secret {#create-a-kubernetes-secret}++基于上面刚编辑过的文件,在 Kubernetes 系统范围命名空间(kube-system)中,用下面命令创建一个的secret:++ kubectl create secret generic dynamic-logging \+ --from-file=./ELASTIC_CLOUD_ID \+ --from-file=./ELASTIC_CLOUD_AUTH \+ --namespace=kube-system++ {{% /tab %}}+{{< /tabs >}}++<!-- +## Deploy the Beats+Manifest files are provided for each Beat. These manifest files use the secret created earlier to configure the Beats to connect to your Elasticsearch and Kibana servers.++### About Filebeat+Filebeat will collect logs from the Kubernetes nodes and the containers running in each pod running on those nodes. Filebeat is deployed as a {{< glossary_tooltip text="DaemonSet" term_id="daemonset" >}}. Filebeat can autodiscover applications running in your Kubernetes cluster. At startup Filebeat scans existing containers and launches the proper configurations for them, then it will watch for new start/stop events.++Here is the autodiscover configuration that enables Filebeat to locate and parse Redis logs from the Redis containers deployed with the guestbook application. This configuration is in the file `filebeat-kubernetes.yaml`:+-->+## 部署 Beats {#deploy-the-beats}++为每一个 Beat 提供 清单文件。清单文件使用已创建的 secret 接入 Elasticsearch 和 Kibana 服务器。++### 关于 Filebeat {#about-filebeat}++Filebeat 收集日志,日志来源于 Kubernetes 节点以及这些节点上每一个 Pod 中的容器。Filebeat 部署为+{{< glossary_tooltip text="DaemonSet" term_id="daemonset" >}}。+Filebeat 支持自动发现 Kubernetes 集群中的应用。+在启动时,Filebeat 扫描存量的容器,并为它们提供适当的配置,+然后开始监听新的启动/中止信号。++下面是一个自动发现的配置,它支持 Filebeat 定位并分析来自于 Guestbook 应用部署的 Redis 容器的日志文件。+下面的配置片段来自文件 `filebeat-kubernetes.yaml`:++```yaml+- condition.contains:+ kubernetes.labels.app: redis+ config:+ - module: redis+ log:+ input:+ type: docker+ containers.ids:+ - ${data.kubernetes.container.id}+ slowlog:+ enabled: true+ var.hosts: ["${data.host}:${data.port}"]+```++<!-- +This configures Filebeat to apply the Filebeat module `redis` when a container is detected with a label `app` containing the string `redis`. The redis module has the ability to collect the `log` stream from the container by using the docker input type (reading the file on the Kubernetes node associated with the STDOUT stream from this Redis container). Additionally, the module has the ability to collect Redis `slowlog` entries by connecting to the proper pod host and port, which is provided in the container metadata.++### Deploy Filebeat:+-->++这样配置 Filebeat,当探测到容器拥有 `app` 标签,且值为 `redis`,那就启用 Filebeat 的 `redis` 模块。+`redis` 模块可以根据 docker 的输入类型(在 Kubernetes 节点上读取和 Redis 容器的标准输出流关联的文件) ,从容器收集 `log` 流。+另外,此模块还可以使用容器元数据中提供的配置信息,连到 Pod 适当的主机和端口,收集 Redis 的 `slowlog` 。++### 部署 Filebeat {#deploy-filebeat}++```shell+kubectl create -f filebeat-kubernetes.yaml+```++<!-- +#### Verify+-->+#### 验证 {#verify}++```shell+kubectl get pods -n kube-system -l k8s-app=filebeat-dynamic+```++<!-- +### About Metricbeat+Metricbeat autodiscover is configured in the same way as Filebeat. Here is the Metricbeat autodiscover configuration for the Redis containers. This configuration is in the file `metricbeat-kubernetes.yaml`:+-->+### 关于 Metricbeat {#about-metricbeat}++Metricbeat 自动发现的配置方式与 Filebeat 完全相同。+这里是针对 Redis 容器的 Metricbeat 自动发现配置。+此配置片段来自于文件 `metricbeat-kubernetes.yaml`:++```yaml+- condition.equals:+ kubernetes.labels.tier: backend+ config:+ - module: redis+ metricsets: ["info", "keyspace"]+ period: 10s++ # Redis hosts+ hosts: ["${data.host}:${data.port}"]+```+<!-- +This configures Metricbeat to apply the Metricbeat module `redis` when a container is detected with a label `tier` equal to the string `backend`. The `redis` module has the ability to collect the `info` and `keyspace` metrics from the container by connecting to the proper pod host and port, which is provided in the container metadata.++### Deploy Metricbeat+-->+配置 Metricbeat,在探测到标签 `tier` 的值等于 `backend` 时,应用 Metricbeat 模块 `redis`。+`redis` 模块可以获取容器元数据,连接到 Pod 适当的主机和端口,从 Pod 中收集指标 `info` 和 `keyspace`。++### 部署 Metricbeat {#deploy-metricbeat}++```shell+kubectl create -f metricbeat-kubernetes.yaml+```++<!-- +#### Verify+-->+#### 验证 {#verify2}++```shell+kubectl get pods -n kube-system -l k8s-app=metricbeat+```++<!-- +### About Packetbeat+Packetbeat configuration is different than Filebeat and Metricbeat. Rather than specify patterns to match against container labels the configuration is based on the protocols and port numbers involved. Shown below is a subset of the port numbers.++{{< note >}}+If you are running a service on a non-standard port add that port number to the appropriate type in `filebeat.yaml` and delete / create the Packetbeat DaemonSet.+{{< /note >}}+-->+### 关于 Packetbeat {#about-packetbeat}++Packetbeat 的配置方式不同与 Filebeat 和 Metricbeat。+相对于匹配容器标签的模式,它的配置基于相关协议和端口号。+下面展示的是端口号的一个子集:++```yaml+packetbeat.interfaces.device: any++packetbeat.protocols:+- type: dns+ ports: [53]+ include_authorities: true+ include_additionals: true++- type: http+ ports: [80, 8000, 8080, 9200]++- type: mysql+ ports: [3306]++- type: redis+ ports: [6379]++packetbeat.flows:+ timeout: 30s+ period: 10s+```++<!-- +#### Deploy Packetbeat+-->+### 部署 Packetbeat {#deploy-packetbeat}++```shell+kubectl create -f packetbeat-kubernetes.yaml+```++<!-- +#### Verify+-->+#### 验证 {#verify3}++```shell+kubectl get pods -n kube-system -l k8s-app=packetbeat-dynamic+```++<!-- +## View in Kibana++Open Kibana in your browser and then open the **Dashboard** application. In the search bar type Kubernetes and click on the Metricbeat dashboard for Kubernetes. This dashboard reports on the state of your Nodes, deployments, etc.++Search for Packetbeat on the Dashboard page, and view the Packetbeat overview.++Similarly, view dashboards for Apache and Redis. You will see dashboards for logs and metrics for each. The Apache Metricbeat dashboard will be blank. Look at the Apache Filebeat dashboard and scroll to the bottom to view the Apache error logs. This will tell you why there are no metrics available for Apache.++To enable Metricbeat to retrieve the Apache metrics, enable server-status by adding a ConfigMap including a mod-status configuration file and re-deploy the guestbook.+++## Scale your deployments and see new pods being monitored+List the existing deployments:+-->+## 在 kibana 中浏览 {#view-in-kibana}++在浏览器中打开 kibana,再打开**仪表盘**。
在浏览器中打开 kibana,再打开**Dashboard**。
comment created time in a day
Pull request review commentkubernetes/website
[zh] translate tutorial guestbook-logs-metrics-with-elk
+---+title: "示例: 添加日志和指标到 PHP / Redis Guestbook 案例"+content_type: tutorial+weight: 21+card:+ name: tutorials+ weight: 31+ title: "示例: 添加日志和指标到 PHP / Redis Guestbook 案例"+---+<!-- +title: "Example: Add logging and metrics to the PHP / Redis Guestbook example"+reviewers:+- sftim+content_type: tutorial+weight: 21+card:+ name: tutorials+ weight: 31+ title: "Example: Add logging and metrics to the PHP / Redis Guestbook example"+-->++<!-- overview -->+<!-- +This tutorial builds upon the [PHP Guestbook with Redis](/docs/tutorials/stateless-application/guestbook) tutorial. Lightweight log, metric, and network data open source shippers, or *Beats*, from Elastic are deployed in the same Kubernetes cluster as the guestbook. The Beats collect, parse, and index the data into Elasticsearch so that you can view and analyze the resulting operational information in Kibana. This example consists of the following components:++* A running instance of the [PHP Guestbook with Redis tutorial](/docs/tutorials/stateless-application/guestbook)+* Elasticsearch and Kibana+* Filebeat+* Metricbeat+* Packetbeat+-->+本教程建立在+[使用 Redis 部署 PHP Guestbook](/zh/docs/tutorials/stateless-application/guestbook) 教程之上。+*Beats*,是 Elastic 出品的开源的轻量级日志、指标和网络数据采集器,+将和 Guestbook 一同部署在 Kubernetes 集群中。+Beats 收集、分析、索引数据到 Elasticsearch,使你可以用 Kibana 查看并分析得到的运营信息。+本示例由以下内容组成:++* Elasticsearch 和 Kibana+* Filebeat+* Metricbeat+* Packetbeat++## {{% heading "objectives" %}}++<!-- +* Start up the PHP Guestbook with Redis.+* Install kube-state-metrics.+* Create a Kubernetes Secret.+* Deploy the Beats.+* View dashboards of your logs and metrics.+-->+* 启动用 Redis 部署的 PHP Guestbook。+* 安装 kube-state-metrics。+* 创建 Kubernetes secret。+* 部署 Beats。+* 用仪表板查看日志和指标。++## {{% heading "prerequisites" %}}+++{{< include "task-tutorial-prereqs.md" >}}+{{< version-check >}}++<!-- +Additionally you need:++* A running deployment of the [PHP Guestbook with Redis](/docs/tutorials/stateless-application/guestbook) tutorial.++* A running Elasticsearch and Kibana deployment. You can use [Elasticsearch Service in Elastic Cloud](https://cloud.elastic.co), + run the [download files](https://www.elastic.co/guide/en/elastic-stack-get-started/current/get-started-elastic-stack.html) + on your workstation or servers, or the [Elastic Helm Charts](https://github.com/elastic/helm-charts).+-->+此外,你还需要:++* 依照教程[使用 Redis 的 PHP留言本](/zh/docs/tutorials/stateless-application/guestbook)得到的一套运行中的部署环境。+* 一套运行中的 Elasticsearch 和 Kibana 部署环境。你可以使用 [Elastic 云中的Elasticsearch 服务](https://cloud.elastic.co)、在工作站或者服务器上运行此[下载文件](https://www.elastic.co/guide/en/elastic-stack-get-started/current/get-started-elastic-stack.html)、或运行 [Elastic Helm Charts](https://github.com/elastic/helm-charts)。++<!-- lessoncontent -->++<!-- +## Start up the PHP Guestbook with Redis++This tutorial builds on the [PHP Guestbook with Redis](/docs/tutorials/stateless-application/guestbook) tutorial. If you have the guestbook application running, then you can monitor that. If you do not have it running then follow the instructions to deploy the guestbook and do not perform the **Cleanup** steps. Come back to this page when you have the guestbook running.+-->+## 启动用 Redis 部署的 PHP Guestbook {#start-up-the-php-guestbook-with-redis}++本教程建立在+[使用 Redis 部署 PHP Guestbook](/zh/docs/tutorials/stateless-application/guestbook) 之上。+如果你已经有一个运行的留言簿应用程序,那就监控它。+如果还没有,那就按照说明先部署 Guestbook ,但不要执行**清理**的步骤。+当 Guestbook 运行起来后,再返回本页。++<!-- +## Add a Cluster role binding++Create a [cluster level role binding](/docs/reference/access-authn-authz/rbac/#rolebinding-and-clusterrolebinding) so that you can deploy kube-state-metrics and the Beats at the cluster level (in kube-system).+-->+## 添加一个集群角色绑定 {#add-a-cluster-role-binding}++创建一个[集群范围的角色绑定](/zh/docs/reference/access-authn-authz/rbac/#rolebinding-和-clusterrolebinding),+以便你可以在集群范围(在 kube-system 中)部署 kube-state-metrics 和 Beats。++```shell+kubectl create clusterrolebinding cluster-admin-binding \+ --clusterrole=cluster-admin --user=<your email associated with the k8s provider account>+```++<!-- +## Install kube-state-metrics++Kubernetes [*kube-state-metrics*](https://github.com/kubernetes/kube-state-metrics) is a simple service that listens to the Kubernetes API server and generates metrics about the state of the objects. Metricbeat reports these metrics. Add kube-state-metrics to the Kubernetes cluster that the guestbook is running in.+--> +### 安装 kube-state-metrics {#install-kube-state-metrics}++Kubernetes [*kube-state-metrics*](https://github.com/kubernetes/kube-state-metrics)+是一个简单的服务,它侦听 Kubernetes API 服务器并生成对象状态的指标。+Metricbeat 报告这些指标。+添加 kube-state-metrics 到运行留言簿的 Kubernetes 集群。++```shell+git clone https://github.com/kubernetes/kube-state-metrics.git kube-state-metrics+kubectl apply -f kube-state-metrics/examples/standard+```++<!-- +### Check to see if kube-state-metrics is running+-->+### 检查 kube-state-metrics 是否正在运行 {#check-to-see-if-kube-state-metrics-is-running}++```shell+kubectl get pods --namespace=kube-system -l app.kubernetes.io/name=kube-state-metrics+```++<!-- +Output:+-->+输出:++```+NAME READY STATUS RESTARTS AGE+kube-state-metrics-89d656bf8-vdthm 1/1 Running 0 21s+```++<!-- +## Clone the Elastic examples GitHub repo+-->+## 从 GitHub 克隆 Elastic examples 库 {#clone-the-elastic-examples-github-repo}++```shell+git clone https://github.com/elastic/examples.git+```++<!-- +The rest of the commands will reference files in the `examples/beats-k8s-send-anywhere` directory, so change dir there:+-->+后续命令将引用目录 `examples/beats-k8s-send-anywhere` 中的文件,+所以把目录切换过去。++```shell+cd examples/beats-k8s-send-anywhere+```++<!-- +## Create a Kubernetes Secret+A Kubernetes {{< glossary_tooltip text="Secret" term_id="secret" >}} is an object that contains a small amount of sensitive data such as a password, a token, or a key. Such information might otherwise be put in a Pod specification or in an image; putting it in a Secret object allows for more control over how it is used, and reduces the risk of accidental exposure.++There are two sets of steps here, one for *self managed* Elasticsearch and Kibana (running on your servers or using the Elastic Helm Charts), and a second separate set for the *managed service* Elasticsearch Service in Elastic Cloud. Only create the secret for the type of Elasticsearch and Kibana system that you will use for this tutorial.+-->+## 创建 Kubernetes Secret {#create-a-kubernetes-secret}++Kubernetes {{< glossary_tooltip text="Secret" term_id="secret" >}}+是包含少量敏感数据(类似密码、令牌、秘钥等)的对象。+这类信息也可以放在 Pod 规格定义或者镜像中;+但放在 Secret 对象中,能更好的控制它的使用方式,也能减少意外泄露的风险。++{{< note >}}+这里有两套步骤,一套用于*自管理*的 Elasticsearch 和 Kibana(运行在你的服务器上或使用 Helm Charts),+另一套用于在 Elastic 云服务中 *Managed service* 的 Elasticsearch 服务。+在本教程中,只需要为 Elasticsearch 和 Kibana 系统创建 secret。+{{< /note >}}++{{< tabs name="tab_with_md" >}}+{{% tab name="自管理" %}}++<!-- +### Self managed+Switch to the **Managed service** tab if you are connecting to Elasticsearch Service in Elastic Cloud.++### Set the credentials+There are four files to edit to create a k8s secret when you are connecting to self managed Elasticsearch and Kibana (self managed is effectively anything other than the managed Elasticsearch Service in Elastic Cloud). The files are:+-->+### 自管理系统 {#self-managed}++如果你使用 Elastic 云中的 Elasticsearch 服务,切换到 **Managed service** 标签页。++### 设置凭据 {#set-the-credentials}++当你使用自管理的 Elasticsearch 和 Kibana (对比托管于 Elastic 云中的 Elasticsearch 服务,自管理更有效率),+创建 k8s secret 需要准备四个文件。这些文件是:++1. `ELASTICSEARCH_HOSTS`+1. `ELASTICSEARCH_PASSWORD`+1. `ELASTICSEARCH_USERNAME`+1. `KIBANA_HOST`++<!-- +Set these with the information for your Elasticsearch cluster and your Kibana host. Here are some examples (also see [*this configuration*](https://stackoverflow.com/questions/59892896/how-to-connect-from-minikube-to-elasticsearch-installed-on-host-local-developme/59892897#59892897))+-->+为你的 Elasticsearch 集群和 Kibana 主机设置这些信息。这里是一些例子+(另见[*此配置*](https://stackoverflow.com/questions/59892896/how-to-connect-from-minikube-to-elasticsearch-installed-on-host-local-developme/59892897#59892897))++#### `ELASTICSEARCH_HOSTS` {#elasticsearch-hosts}++<!-- +1. A nodeGroup from the Elastic Elasticsearch Helm Chart:+-->+1. 来自于 Elastic Elasticsearch Helm Chart 的节点组:++ ```+ ["http://elasticsearch-master.default.svc.cluster.local:9200"]+ ```++ <!-- + 1. A single Elasticsearch node running on a Mac where your Beats are running in Docker for Mac:+ -->+1. Mac 上的单节点的 Elasticsearch,Beats 运行在 Mac 的容器中:++ ```+ ["http://host.docker.internal:9200"]+ ```++ <!-- + 1. Two Elasticsearch nodes running in VMs or on physical hardware:+ -->+1. 运行在虚拟机或物理机上的两个 Elasticsearch 节点++ ```+ ["http://host1.example.com:9200", "http://host2.example.com:9200"]+ ```++<!-- +Edit `ELASTICSEARCH_HOSTS`+-->+编辑 `ELASTICSEARCH_HOSTS`+```shell+vi ELASTICSEARCH_HOSTS+```++#### `ELASTICSEARCH_PASSWORD` {#elasticsearch-password}++<!-- +Just the password; no whitespace, quotes, or <>:+-->+只有密码;没有空格、引号、< 和 >:++```+<yoursecretpassword>+```++<!-- +Edit `ELASTICSEARCH_PASSWORD`+-->+编辑 `ELASTICSEARCH_PASSWORD`:++```shell+vi ELASTICSEARCH_PASSWORD+```++#### `ELASTICSEARCH_USERNAME` {#elasticsearch-username}++<!-- +Just the username; no whitespace, quotes, or <>:+-->+只有用名;没有空格、引号、< 和 >:++<!-- +your ingest username for Elasticsearch+-->+```+<为 Elasticsearch 注入的用户名>+```++<!-- +Edit `ELASTICSEARCH_USERNAME`+-->+编辑 `ELASTICSEARCH_USERNAME`:++```shell+vi ELASTICSEARCH_USERNAME+```++#### `KIBANA_HOST` {#kibana-host}++<!-- +1. The Kibana instance from the Elastic Kibana Helm Chart. The subdomain `default` refers to the default namespace. If you have deployed the Helm Chart using a different namespace, then your subdomain will be different:+-->+1. 从 Elastic Kibana Helm Chart 安装的 Kibana 实例。子域 `default` 指默认的命名空间。如果你把 Helm Chart 指定部署到不同的命名空间,那子域会不同: ++ ```+ "kibana-kibana.default.svc.cluster.local:5601"+ ```++ <!-- + 1. A Kibana instance running on a Mac where your Beats are running in Docker for Mac:+ -->+1. Mac 上的 Kibana 实例,Beats 运行于 Mac 的容器:++ ```+ "host.docker.internal:5601"+ ```+ + <!-- + 1. Two Elasticsearch nodes running in VMs or on physical hardware:+ -->+1. 运行于虚拟机或物理机上的两个 Elasticsearch 节点:++ ```+ "host1.example.com:5601"+ ```++<!-- +Edit `KIBANA_HOST`+-->+编辑 `KIBANA_HOST`:++```shell+vi KIBANA_HOST+```++<!-- +### Create a Kubernetes secret+This command creates a secret in the Kubernetes system level namespace (kube-system) based on the files you just edited:+-->+### 创建 Kubernetes secret {#create-a-kubernetes-secret}++在上面编辑完的文件的基础上,本命令在 Kubernetes 系统范围的命名空间(kube-system)创建一个 secret。++```+ kubectl create secret generic dynamic-logging \+ --from-file=./ELASTICSEARCH_HOSTS \+ --from-file=./ELASTICSEARCH_PASSWORD \+ --from-file=./ELASTICSEARCH_USERNAME \+ --from-file=./KIBANA_HOST \+ --namespace=kube-system+```++{{% /tab %}}+{{% tab name="Managed service" %}}++<!-- +## Managed service+This tab is for Elasticsearch Service in Elastic Cloud only, if you have already created a secret for a self managed Elasticsearch and Kibana deployment, then continue with [Deploy the Beats](#deploy-the-beats).+### Set the credentials+There are two files to edit to create a k8s secret when you are connecting to the managed Elasticsearch Service in Elastic Cloud. The files are:+-->+## Managed service {#managed-service}++本标签页只用于 Elastic 云 的 Elasticsearch 服务,如果你已经为自管理的 Elasticsearch 和 Kibana 创建了secret,请继续[部署 Beats](#deploy-the-beats)并继续。++### 设置凭据 {#set-the-credentials}++在 Elastic 云中的托管 Elasticsearch 服务中,为了创建 k8s secret,你需要先编辑两个文件。它们是:++1. `ELASTIC_CLOUD_AUTH`+1. `ELASTIC_CLOUD_ID`++<!-- +Set these with the information provided to you from the Elasticsearch Service console when you created the deployment. Here are some examples:+-->+当你完成部署的时候,Elasticsearch 服务控制台会提供给你一些信息,用这些信息完成设置。+这里是一些示例:++#### ELASTIC_CLOUD_ID {#elastic-cloud-id}++```+devk8s:ABC123def456ghi789jkl123mno456pqr789stu123vwx456yza789bcd012efg345hijj678klm901nop345zEwOTJjMTc5YWQ0YzQ5OThlN2U5MjAwYTg4NTIzZQ==+```++#### ELASTIC_CLOUD_AUTH {#elastic-cloud-auth}++<!-- +Just the username, a colon (`:`), and the password, no whitespace or quotes:+-->+只要用户名;没有空格、引号、< 和 >:++```+elastic:VFxJJf9Tjwer90wnfTghsn8w+```++<!-- +### Edit the required files:+-->+### 编辑要求的文件 {#edit-the-required-files}+```shell+vi ELASTIC_CLOUD_ID+vi ELASTIC_CLOUD_AUTH+```++<!-- +### Create a Kubernetes secret+This command creates a secret in the Kubernetes system level namespace (kube-system) based on the files you just edited:+-->+### 创建 Kubernetes secret {#create-a-kubernetes-secret}++基于上面刚编辑过的文件,在 Kubernetes 系统范围命名空间(kube-system)中,用下面命令创建一个的secret:++ kubectl create secret generic dynamic-logging \+ --from-file=./ELASTIC_CLOUD_ID \+ --from-file=./ELASTIC_CLOUD_AUTH \+ --namespace=kube-system++ {{% /tab %}}+{{< /tabs >}}++<!-- +## Deploy the Beats+Manifest files are provided for each Beat. These manifest files use the secret created earlier to configure the Beats to connect to your Elasticsearch and Kibana servers.++### About Filebeat+Filebeat will collect logs from the Kubernetes nodes and the containers running in each pod running on those nodes. Filebeat is deployed as a {{< glossary_tooltip text="DaemonSet" term_id="daemonset" >}}. Filebeat can autodiscover applications running in your Kubernetes cluster. At startup Filebeat scans existing containers and launches the proper configurations for them, then it will watch for new start/stop events.++Here is the autodiscover configuration that enables Filebeat to locate and parse Redis logs from the Redis containers deployed with the guestbook application. This configuration is in the file `filebeat-kubernetes.yaml`:+-->+## 部署 Beats {#deploy-the-beats}++为每一个 Beat 提供 清单文件。清单文件使用已创建的 secret 接入 Elasticsearch 和 Kibana 服务器。++### 关于 Filebeat {#about-filebeat}++Filebeat 收集日志,日志来源于 Kubernetes 节点以及这些节点上每一个 Pod 中的容器。Filebeat 部署为+{{< glossary_tooltip text="DaemonSet" term_id="daemonset" >}}。+Filebeat 支持自动发现 Kubernetes 集群中的应用。+在启动时,Filebeat 扫描存量的容器,并为它们提供适当的配置,+然后开始监听新的启动/中止信号。++下面是一个自动发现的配置,它支持 Filebeat 定位并分析来自于 Guestbook 应用部署的 Redis 容器的日志文件。+下面的配置片段来自文件 `filebeat-kubernetes.yaml`:++```yaml+- condition.contains:+ kubernetes.labels.app: redis+ config:+ - module: redis+ log:+ input:+ type: docker+ containers.ids:+ - ${data.kubernetes.container.id}+ slowlog:+ enabled: true+ var.hosts: ["${data.host}:${data.port}"]+```++<!-- +This configures Filebeat to apply the Filebeat module `redis` when a container is detected with a label `app` containing the string `redis`. The redis module has the ability to collect the `log` stream from the container by using the docker input type (reading the file on the Kubernetes node associated with the STDOUT stream from this Redis container). Additionally, the module has the ability to collect Redis `slowlog` entries by connecting to the proper pod host and port, which is provided in the container metadata.++### Deploy Filebeat:+-->++这样配置 Filebeat,当探测到容器拥有 `app` 标签,且值为 `redis`,那就启用 Filebeat 的 `redis` 模块。+`redis` 模块可以根据 docker 的输入类型(在 Kubernetes 节点上读取和 Redis 容器的标准输出流关联的文件) ,从容器收集 `log` 流。+另外,此模块还可以使用容器元数据中提供的配置信息,连到 Pod 适当的主机和端口,收集 Redis 的 `slowlog` 。++### 部署 Filebeat {#deploy-filebeat}++```shell+kubectl create -f filebeat-kubernetes.yaml+```++<!-- +#### Verify+-->+#### 验证 {#verify}++```shell+kubectl get pods -n kube-system -l k8s-app=filebeat-dynamic+```++<!-- +### About Metricbeat+Metricbeat autodiscover is configured in the same way as Filebeat. Here is the Metricbeat autodiscover configuration for the Redis containers. This configuration is in the file `metricbeat-kubernetes.yaml`:+-->+### 关于 Metricbeat {#about-metricbeat}++Metricbeat 自动发现的配置方式与 Filebeat 完全相同。+这里是针对 Redis 容器的 Metricbeat 自动发现配置。+此配置片段来自于文件 `metricbeat-kubernetes.yaml`:++```yaml+- condition.equals:+ kubernetes.labels.tier: backend+ config:+ - module: redis+ metricsets: ["info", "keyspace"]+ period: 10s++ # Redis hosts+ hosts: ["${data.host}:${data.port}"]+```+<!-- +This configures Metricbeat to apply the Metricbeat module `redis` when a container is detected with a label `tier` equal to the string `backend`. The `redis` module has the ability to collect the `info` and `keyspace` metrics from the container by connecting to the proper pod host and port, which is provided in the container metadata.++### Deploy Metricbeat+-->+配置 Metricbeat,在探测到标签 `tier` 的值等于 `backend` 时,应用 Metricbeat 模块 `redis`。+`redis` 模块可以获取容器元数据,连接到 Pod 适当的主机和端口,从 Pod 中收集指标 `info` 和 `keyspace`。++### 部署 Metricbeat {#deploy-metricbeat}++```shell+kubectl create -f metricbeat-kubernetes.yaml+```++<!-- +#### Verify+-->+#### 验证 {#verify2}++```shell+kubectl get pods -n kube-system -l k8s-app=metricbeat+```++<!-- +### About Packetbeat+Packetbeat configuration is different than Filebeat and Metricbeat. Rather than specify patterns to match against container labels the configuration is based on the protocols and port numbers involved. Shown below is a subset of the port numbers.++{{< note >}}
remove this and line 530
comment created time in a day
Pull request review commentkubernetes/website
[zh] translate tutorial guestbook-logs-metrics-with-elk
+---+title: "示例: 添加日志和指标到 PHP / Redis Guestbook 案例"+content_type: tutorial+weight: 21+card:+ name: tutorials+ weight: 31+ title: "示例: 添加日志和指标到 PHP / Redis Guestbook 案例"+---+<!-- +title: "Example: Add logging and metrics to the PHP / Redis Guestbook example"+reviewers:+- sftim+content_type: tutorial+weight: 21+card:+ name: tutorials+ weight: 31+ title: "Example: Add logging and metrics to the PHP / Redis Guestbook example"+-->++<!-- overview -->+<!-- +This tutorial builds upon the [PHP Guestbook with Redis](/docs/tutorials/stateless-application/guestbook) tutorial. Lightweight log, metric, and network data open source shippers, or *Beats*, from Elastic are deployed in the same Kubernetes cluster as the guestbook. The Beats collect, parse, and index the data into Elasticsearch so that you can view and analyze the resulting operational information in Kibana. This example consists of the following components:++* A running instance of the [PHP Guestbook with Redis tutorial](/docs/tutorials/stateless-application/guestbook)+* Elasticsearch and Kibana+* Filebeat+* Metricbeat+* Packetbeat+-->+本教程建立在+[使用 Redis 部署 PHP Guestbook](/zh/docs/tutorials/stateless-application/guestbook) 教程之上。+*Beats*,是 Elastic 出品的开源的轻量级日志、指标和网络数据采集器,+将和 Guestbook 一同部署在 Kubernetes 集群中。+Beats 收集、分析、索引数据到 Elasticsearch,使你可以用 Kibana 查看并分析得到的运营信息。+本示例由以下内容组成:++* Elasticsearch 和 Kibana+* Filebeat+* Metricbeat+* Packetbeat++## {{% heading "objectives" %}}++<!-- +* Start up the PHP Guestbook with Redis.+* Install kube-state-metrics.+* Create a Kubernetes Secret.+* Deploy the Beats.+* View dashboards of your logs and metrics.+-->+* 启动用 Redis 部署的 PHP Guestbook。+* 安装 kube-state-metrics。+* 创建 Kubernetes secret。+* 部署 Beats。+* 用仪表板查看日志和指标。++## {{% heading "prerequisites" %}}+++{{< include "task-tutorial-prereqs.md" >}}+{{< version-check >}}++<!-- +Additionally you need:++* A running deployment of the [PHP Guestbook with Redis](/docs/tutorials/stateless-application/guestbook) tutorial.++* A running Elasticsearch and Kibana deployment. You can use [Elasticsearch Service in Elastic Cloud](https://cloud.elastic.co), + run the [download files](https://www.elastic.co/guide/en/elastic-stack-get-started/current/get-started-elastic-stack.html) + on your workstation or servers, or the [Elastic Helm Charts](https://github.com/elastic/helm-charts).+-->+此外,你还需要:++* 依照教程[使用 Redis 的 PHP留言本](/zh/docs/tutorials/stateless-application/guestbook)得到的一套运行中的部署环境。
* 依照教程[使用 Redis 的 PHP Guestbook](/zh/docs/tutorials/stateless-application/guestbook)得到的一套运行中的部署环境。
comment created time in a day
Pull request review commentkubernetes/website
[zh] translate tutorial guestbook-logs-metrics-with-elk
+---+title: "示例: 添加日志和指标到 PHP / Redis Guestbook 案例"+content_type: tutorial+weight: 21+card:+ name: tutorials+ weight: 31+ title: "示例: 添加日志和指标到 PHP / Redis Guestbook 案例"+---+<!-- +title: "Example: Add logging and metrics to the PHP / Redis Guestbook example"+reviewers:+- sftim+content_type: tutorial+weight: 21+card:+ name: tutorials+ weight: 31+ title: "Example: Add logging and metrics to the PHP / Redis Guestbook example"+-->++<!-- overview -->+<!-- +This tutorial builds upon the [PHP Guestbook with Redis](/docs/tutorials/stateless-application/guestbook) tutorial. Lightweight log, metric, and network data open source shippers, or *Beats*, from Elastic are deployed in the same Kubernetes cluster as the guestbook. The Beats collect, parse, and index the data into Elasticsearch so that you can view and analyze the resulting operational information in Kibana. This example consists of the following components:++* A running instance of the [PHP Guestbook with Redis tutorial](/docs/tutorials/stateless-application/guestbook)+* Elasticsearch and Kibana+* Filebeat+* Metricbeat+* Packetbeat+-->+本教程建立在+[使用 Redis 部署 PHP Guestbook](/zh/docs/tutorials/stateless-application/guestbook) 教程之上。+*Beats*,是 Elastic 出品的开源的轻量级日志、指标和网络数据采集器,+将和 Guestbook 一同部署在 Kubernetes 集群中。+Beats 收集、分析、索引数据到 Elasticsearch,使你可以用 Kibana 查看并分析得到的运营信息。+本示例由以下内容组成:++* Elasticsearch 和 Kibana+* Filebeat+* Metricbeat+* Packetbeat++## {{% heading "objectives" %}}++<!-- +* Start up the PHP Guestbook with Redis.+* Install kube-state-metrics.+* Create a Kubernetes Secret.+* Deploy the Beats.+* View dashboards of your logs and metrics.+-->+* 启动用 Redis 部署的 PHP Guestbook。+* 安装 kube-state-metrics。+* 创建 Kubernetes secret。+* 部署 Beats。+* 用仪表板查看日志和指标。++## {{% heading "prerequisites" %}}+++{{< include "task-tutorial-prereqs.md" >}}+{{< version-check >}}++<!-- +Additionally you need:++* A running deployment of the [PHP Guestbook with Redis](/docs/tutorials/stateless-application/guestbook) tutorial.++* A running Elasticsearch and Kibana deployment. You can use [Elasticsearch Service in Elastic Cloud](https://cloud.elastic.co), + run the [download files](https://www.elastic.co/guide/en/elastic-stack-get-started/current/get-started-elastic-stack.html) + on your workstation or servers, or the [Elastic Helm Charts](https://github.com/elastic/helm-charts).+-->+此外,你还需要:++* 依照教程[使用 Redis 的 PHP留言本](/zh/docs/tutorials/stateless-application/guestbook)得到的一套运行中的部署环境。+* 一套运行中的 Elasticsearch 和 Kibana 部署环境。你可以使用 [Elastic 云中的Elasticsearch 服务](https://cloud.elastic.co)、在工作站或者服务器上运行此[下载文件](https://www.elastic.co/guide/en/elastic-stack-get-started/current/get-started-elastic-stack.html)、或运行 [Elastic Helm Charts](https://github.com/elastic/helm-charts)。++<!-- lessoncontent -->++<!-- +## Start up the PHP Guestbook with Redis++This tutorial builds on the [PHP Guestbook with Redis](/docs/tutorials/stateless-application/guestbook) tutorial. If you have the guestbook application running, then you can monitor that. If you do not have it running then follow the instructions to deploy the guestbook and do not perform the **Cleanup** steps. Come back to this page when you have the guestbook running.+-->+## 启动用 Redis 部署的 PHP Guestbook {#start-up-the-php-guestbook-with-redis}++本教程建立在+[使用 Redis 部署 PHP Guestbook](/zh/docs/tutorials/stateless-application/guestbook) 之上。+如果你已经有一个运行的留言簿应用程序,那就监控它。+如果还没有,那就按照说明先部署 Guestbook ,但不要执行**清理**的步骤。+当 Guestbook 运行起来后,再返回本页。++<!-- +## Add a Cluster role binding++Create a [cluster level role binding](/docs/reference/access-authn-authz/rbac/#rolebinding-and-clusterrolebinding) so that you can deploy kube-state-metrics and the Beats at the cluster level (in kube-system).+-->+## 添加一个集群角色绑定 {#add-a-cluster-role-binding}++创建一个[集群范围的角色绑定](/zh/docs/reference/access-authn-authz/rbac/#rolebinding-和-clusterrolebinding),+以便你可以在集群范围(在 kube-system 中)部署 kube-state-metrics 和 Beats。++```shell+kubectl create clusterrolebinding cluster-admin-binding \+ --clusterrole=cluster-admin --user=<your email associated with the k8s provider account>+```++<!-- +## Install kube-state-metrics++Kubernetes [*kube-state-metrics*](https://github.com/kubernetes/kube-state-metrics) is a simple service that listens to the Kubernetes API server and generates metrics about the state of the objects. Metricbeat reports these metrics. Add kube-state-metrics to the Kubernetes cluster that the guestbook is running in.+--> +### 安装 kube-state-metrics {#install-kube-state-metrics}++Kubernetes [*kube-state-metrics*](https://github.com/kubernetes/kube-state-metrics)+是一个简单的服务,它侦听 Kubernetes API 服务器并生成对象状态的指标。+Metricbeat 报告这些指标。+添加 kube-state-metrics 到运行留言簿的 Kubernetes 集群。
添加 kube-state-metrics 到运行 Guestbook 的 Kubernetes 集群。
comment created time in a day

pull request commentkubernetes/website
/close We are not participating in that program.

comment created time in a day
push eventtengqm/kubernetes
commit sha bd17ef4f767a21868edafa19d7596e8df914b2db
fix func name NewCreateCreateDeploymentOptions
commit sha 87e775e066d58913efaeb86b2423fd90eca9fe0b
Enhance apiextensions-apiserver in standalone mode
commit sha 429672037c6eb2b871961ad0ba73521cd2ccb317
Refactoring: Reduce unnecessary lines
commit sha 339ed92ba8393e9d4f276c039a0269b241e765f8
[e2e/storage] fix range issue in getCSINodeLimits Signed-off-by: Gaurav Singh <[email protected]>
commit sha 8accd354b04f549077ae85462a8f120e172f0ef8
Run make verify with python3 to fix publishing bot issue verify-publishing-bot is experiencing errors importing pyyaml since python3 was added to kubekins-e2e image. This changes make verify to run verify-publishing-bot with python3. Signed-off-by: hasheddan <[email protected]>
commit sha a451e2ec3d248879d7c91d683ac8fa67484c65a7
Fix typo in comment of hack/verify-shellcheck.sh Signed-off-by: Ma Xinjian <[email protected]>
commit sha 00a3db0063ff85d6fca9a83453a56eb98fc43521
Add the storageversion.Manager interface The interface exposes methods to record storage versions in ResourceInfo, to update StorageVersions, and to check if storageVersion updated have completed.
commit sha feea9f3708d1050385c195306c781e4490e3be5e
Move the RuntimeClass tests out of node-kubelet-orphans Signed-off-by: Harshal Patil <[email protected]>
commit sha 3bc560225e1bca19b57985a443b72c5f8d19a712
Do not assume storageclass is still in-tree after csi migration Signed-off-by: ialidzhikov <[email protected]>
commit sha 04185f4e533b9b8ebaabe1ed09516e85c5ed1ae1
kubectl: add a space between effect and operator when printing tolerations Empty key and non-empty effect means to match all keys and values and the specified effect. However "kubectl describe" prints it without space between effect and operator. This patch adds the space for this case.
commit sha 9a0b9138aff179e601f854c70271a50842742b12
Fix `kubectl describe ingress` format Fixes https://github.com/kubernetes/kubernetes/issues/94980 Fixes two formatting issues: * Un-opened parenthesis (`10.244.0.6:8080)`) * Bad format string and spacing Before this PR: ``` Name: example-ingress Namespace: default Address: Default backend: istio-ingressgateway:80 (<error: endpoints "istio-ingressgateway" not found>) Rules: Host Path Backends ---- ---- -------- * * %!(EXTRA string=istio-ingressgateway:80 (<error: endpoints "istio-ingressgateway" not found>))Annotations: <none> Events: <none> ``` After this PR: ``` Name: example-ingress Namespace: default Address: Default backend: istio-ingressgateway:80 (<error: endpoints "istio-ingressgateway" not found>) Rules: Host Path Backends ---- ---- -------- * * istio-ingressgateway:80 (<error: endpoints "istio-ingressgateway" not found>) Annotations: <none> Events: <none> ``` Compare to an old kubectl without the bug: ``` Name: example-ingress Namespace: default Address: Default backend: istio-ingressgateway:80 (<none>) Rules: Host Path Backends ---- ---- -------- * * istio-ingressgateway:80 (<none>) Annotations: kubectl.kubernetes.io/last-applied-configuration: ... Events: <none> ```
commit sha 7594702b22e57b7ecd029e19e7453480cee60064
modify static check fix format
commit sha c99b18580dd26f154589b08b8bbe5d7353876b5e
tests: Refactor agnhost image pod usage - common (part 1) A previous commit added a few agnhost related functions that creates agnhost pods / containers for general purposes. Refactors tests to use those functions.
commit sha d37cbeb388dc60972d76f3e01aad361e41a72edf
tests: Refactors agnhost image pod usage - network A previous commit created a few agnhost related functions that creates agnhost pods / containers for general purposes. Refactors tests to use those functions.
commit sha ff3c751afceb72502e78b6057b275f4a3ae7203d
wrap errors in taint-toleration plugin
commit sha ad415b9f5435a100b78774520e4ef3ffc2fdaf4d
wrap errors in service affinity plugin
commit sha 600d621ce6ed5816b3625853798eeaa294f74087
Lint ttl_controller
commit sha 104ad794e5d42cd5c4317bd547d85db1dc2c31fa
Fix lint errors in pkg/contoller/endpoint Also mark reason for lint errors in: pkg/controller/endpoint/config/v1alpha1, pkg/controller/endpointslice/config/v1alpha1 pkg/controller/endpointslicemirroring/config/v1alpha1
Amanda Hager Lopes de Andrade Katz
commit sha de9c2c2090bbf66943022e902868a5457410af90
Fixes high CPU usage in kubectl drain
commit sha fd7c02dd9a64282630aa1fc9e11240bfaef5faf4
SetHostnameAsFQDN will be beta in v1.20, enable feature gate by default.
push time in 2 days
push eventtengqm/website
commit sha c732907fc870e43d0b2c21821dafb575b569208d
Update multiple-zones.md
commit sha a766d28b300b1b89664b7d89d59b4404ee7b7d67
Provide example of direct control for Controller concept
commit sha a8b6551c22ce37f5b847206d1cab2c8c3924396d
update kubernetes-incubator references
commit sha b85afa0989bf0ee8207449bcee3a35ccf4fcd766
Merge pull request #23804 from MrZhaoAtBJ/patch-1 Update multiple-zones.md
commit sha b9bad4ce3c2dd4e56aaded3b3cd3667366f8bf15
Update pod-security-policy.md
commit sha 4a82c0be9315b2a1966d30ca014c971b1a724037
Merge pull request #24663 from WangXiangUSTC/patch-1 docs: fix typo
commit sha df0f955bca3bb8a2f4b92ae74a9615eac1e095b3
Merge pull request #24527 from sftim/20201012_controller_concept_provide_direct_control_example Provide example of direct control for Controller concept
commit sha 09f5c42d592d6c5efe1cbb2bbb41b14138505395
Merge pull request #24619 from neha-viswanathan/24380-remove-k8s-incubator update kubernetes-incubator references
commit sha 38821d7a4f428f45a36cfbe15fab8da73dc6595e
fix typo in file name
commit sha 288ebeed7401ce486f1040df26850d4f7f1b12f4
Merge pull request #24668 from remyleone/quick_fix fix typo in file name
commit sha de655df255e26cfdd9eed05eae9c2879755bd689
fix case for scale subresource fields This change corrects the capitalization for the code blocks referring to `statusReplicasPath` and `labelSelectorPath` to make the descriptive text consistent with the code values.
commit sha 60ac962ff79fea92089c354250c68d10d182869b
Merge pull request #24671 from elmiko/update-scale-subresource fix case for scale subresource fields
commit sha cebcdf5fca38134e56d746fd388cbf46a95e3193
Tweak coding styles for guestbook logging tutorial
commit sha 070023b24a585f2b78df4f8ac642e664e9aa7c8d
Fix links in concepts section
commit sha f34f99d4f4a969f2a1c9daf7882999d3af6fdc22
Merge pull request #24675 from tengqm/fix-code-lang-type Tweak coding styles for guestbook logging tutorial
commit sha 740eb340d47423ce8bb5256242e773eb43e875bc
Fix links in the tasks section This PR fixes links where the target is a redirection. The special case is about minikube, which has been deleted recently. The dangling link now points to `/docs/tasks/tools/` which makes no sense. This PR change the target for `minikube` to `https://minikube.sigs.k8s.io/docs/`.
commit sha 972b2c5c40192bedb50746cbf4806898c6c1700d
Fix links in contribute section
commit sha 00fd1a68f2b76f719fe1d7bce307fb8a78577c27
Fix links in reference section
commit sha 774594bf15084f4e082387f8a2bd49c6e49cc907
Fix links in tutorials section
commit sha 7a31c1045b52361f99824931f6079d601c3cf58a
Merge pull request #24681 from tengqm/links-tutorials Fix links in tutorials section
push time in 2 days
pull request commentkubernetes/website
LGTM from docs perspective. @PatrickLang Please help verify if the target is the right one to use.

comment created time in 2 days
PR opened kubernetes/website
This PR fixes links where the target is a redirection. The special case
is about minikube, which has been deleted recently. The dangling link
now points to /docs/tasks/tools/ which makes no sense. This PR change
the target for minikube to https://minikube.sigs.k8s.io/docs/.
pr created time in 3 days
pull request commentkubernetes/website
[zh] translate tutorial guestbook-logs-metrics-with-elk
@zhiguo-lu since #24675 is in, please help rebase your PR onto the master for a resync.
comment created time in 3 days
pull request commentkubernetes/website
FWIW, using redirection in links is bad because:
- it slows down page loading for English site, the browser has to raise a new request to the real target;
- it makes the localization teams' life difficult, they cannot simply localize the link by prefixing it with country code like 'es' or 'ko'.

comment created time in 3 days
PR opened kubernetes/website
closes: #24676
This PR also fixes other link problems:
- Some links are dead because the target page has been moved;
- Some link targets are redirection records which means they only work for English version (we don't have any redirection entries for localized pages)
The link problems fixed in this PR are identified using the following command:
./scripts/linkchecker.py -f /docs/concepts/**/*.md
pr created time in 3 days
Pull request review commentkubernetes/website
revise style guidelines for capitalization
When you refer specifically to interacting with an API object, use [UpperCamelCa Don't split the API object name into separate words. For example, use PodTemplateList, not Pod Template List. -Refer to API objects without saying "object," unless omitting "object"-leads to an awkward construction.+There is a subtle distinction between formal API objects and general concepts. Use "object" where appropriate to clarify the meaning of terms. Calling out a "Pod object" may be appropriate when moving from general concepts to specific API objects. For example, "Pods may have multiple volume mounts. The Pod object includes a Volumes field."++Do not use "object" repetitively, such as where it's clear a term is an API object. ++Note that capitalization is a weak way to signal information to the reader. This information may be lost entirely due to assistive technology, differences in visual abilities, or translation. {{< table caption = "Do and Don't - API objects" >}} Do | Don't :--| :------The pod has two containers. | The Pod has two containers.-The HorizontalPodAutoscaler is responsible for ... | The HorizontalPodAutoscaler object is responsible for ... A PodList is a list of pods. | A Pod List is a list of pods.-The two ContainerPorts ... | The two ContainerPort objects ...-The two ContainerStateTerminated objects ... | The two ContainerStateTerminateds ...+HostPath is a type of Volume. | Hostpath is a type of volume.+The Volume object is tied to a Pod. | The volume is tied to a pod. {{< /table >}}
The example on line 63 is a little confusing to me, a non-native English speaker. I'm okay to this sentence:
The Volume object is referenced by a Pod.
Because in this context, saying "The Volume is referenced by a Pod" instead is not acceptable, because we are obviously talking about the Volume API object.
As a second example, the following may be NOT okay:
That Volume object is mounted when the Pod is created.
The "object" should be deleted here because we are talking about the storage volume represented by a Volume.
You example is confusing to me because the meaning of "tied to" is vague.

comment created time in 3 days
pull request commentkubernetes/website
[zh] translate tutorial guestbook-logs-metrics-with-elk
Overall looks good. I'm proposing a tweak to the English content in #24675. Hopefully you can rebase the translation onto it so we don't need to resync again. Thanks.
comment created time in 3 days
Pull request review commentkubernetes/website
[zh] translate tutorial guestbook-logs-metrics-with-elk
+---+title: "示例: 添加日志和指标到 PHP / Redis 留言板案例"+content_type: tutorial+weight: 21+card:+ name: tutorials+ weight: 31+ title: "示例: 添加日志和指标到 PHP / Redis 留言板案例"+---+<!-- +title: "Example: Add logging and metrics to the PHP / Redis Guestbook example"+reviewers:+- sftim+content_type: tutorial+weight: 21+card:+ name: tutorials+ weight: 31+ title: "Example: Add logging and metrics to the PHP / Redis Guestbook example"+-->++<!-- overview -->+<!-- +This tutorial builds upon the [PHP Guestbook with Redis](/docs/tutorials/stateless-application/guestbook) tutorial. Lightweight log, metric, and network data open source shippers, or *Beats*, from Elastic are deployed in the same Kubernetes cluster as the guestbook. The Beats collect, parse, and index the data into Elasticsearch so that you can view and analyze the resulting operational information in Kibana. This example consists of the following components:++* A running instance of the [PHP Guestbook with Redis tutorial](/docs/tutorials/stateless-application/guestbook)+* Elasticsearch and Kibana+* Filebeat+* Metricbeat+* Packetbeat+-->+本教程建立在+[使用 Redis 部署 PHP 留言板](/zh/docs/tutorials/stateless-application/guestbook)教程之上。+*Beats*,是 Elastic 出品的开源的轻量级日志、指标和网络数据采集器,+将和留言板一同部署在 Kubernetes 集群中。+Beats 收集、分析、索引数据到 Elasticsearch,使你可以用 Kibana 查看并分析得到的运营信息。+本示例由以下内容组成:++* Elasticsearch 和 Kibana+* Filebeat+* Metricbeat+* Packetbeat++## {{% heading "objectives" %}}++<!-- +* Start up the PHP Guestbook with Redis.+* Install kube-state-metrics.+* Create a Kubernetes secret.+* Deploy the Beats.+* View dashboards of your logs and metrics.+-->+* 启动用 Redis 部署的 PHP 留言板。+* 安装 kube-state-metrics。+* 创建 Kubernetes secret。+* 部署 Beats。+* 用仪表板查看日志和指标。++## {{% heading "prerequisites" %}}+++{{< include "task-tutorial-prereqs.md" >}}+{{< version-check >}}++<!-- +Additionally you need:++* A running deployment of the [PHP Guestbook with Redis](/docs/tutorials/stateless-application/guestbook) tutorial.++* A running Elasticsearch and Kibana deployment. You can use [Elasticsearch Service in Elastic Cloud](https://cloud.elastic.co), run the [download files](https://www.elastic.co/guide/en/elastic-stack-get-started/current/get-started-elastic-stack.html) on your workstation or servers, or the [Elastic Helm Charts](https://github.com/elastic/helm-charts).+-->+此外,你还需要:++* 依照教程[使用 Redis 的 PHP留言本](/zh/docs/tutorials/stateless-application/guestbook)得到的一套运行中的部署环境。+* 一套运行中的Elasticsearch 和 Kibana部署环境。你可以使用[Elastic 云中的Elasticsearch 服务](https://cloud.elastic.co)、在工作站或者服务器上运行此[下载文件](https://www.elastic.co/guide/en/elastic-stack-get-started/current/get-started-elastic-stack.html)、或运行 [Elastic Helm Charts](https://github.com/elastic/helm-charts)。++<!-- lessoncontent -->++<!-- +## Start up the PHP Guestbook with Redis+This tutorial builds on the [PHP Guestbook with Redis](/docs/tutorials/stateless-application/guestbook) tutorial. If you have the guestbook application running, then you can monitor that. If you do not have it running then follow the instructions to deploy the guestbook and do not perform the **Cleanup** steps. Come back to this page when you have the guestbook running.+-->+## 启动用 Redis 部署的 PHP 留言板 {#start-up-the-php-guestbook-with-redis}+本教程建立在+[使用 Redis 部署 PHP 留言板](/zh/docs/tutorials/stateless-application/guestbook)之上。+如果你已经有一个运行的留言簿应用程序,那就监控它。+如果还没有,那就按照说明先部署留言板,但不要执行**清理**的步骤。+当留言板运行起来后,再返回本页。++<!-- +## Add a Cluster role binding+Create a [cluster level role binding](/docs/reference/access-authn-authz/rbac/#rolebinding-and-clusterrolebinding) so that you can deploy kube-state-metrics and the Beats at the cluster level (in kube-system).+-->+## 添加一个集群角色绑定 {#add-a-cluster-role-binding}+创建一个[集群范围的角色绑定](/zh/docs/reference/access-authn-authz/rbac/#rolebinding-和-clusterrolebinding),+以便你可以在集群范围(在 kube-system 中)部署 kube-state-metrics 和 Beats。++```shell+kubectl create clusterrolebinding cluster-admin-binding \+ --clusterrole=cluster-admin --user=<your email associated with the k8s provider account>+```++<!-- +## Install kube-state-metrics++Kubernetes [*kube-state-metrics*](https://github.com/kubernetes/kube-state-metrics) is a simple service that listens to the Kubernetes API server and generates metrics about the state of the objects. Metricbeat reports these metrics. Add kube-state-metrics to the Kubernetes cluster that the guestbook is running in.+--> +### 安装 kube-state-metrics {#install-kube-state-metrics}+Kubernetes [*kube-state-metrics*](https://github.com/kubernetes/kube-state-metrics)+是一个简单的服务,它侦听 Kubernetes API 服务器并生成对象状态的指标。+Metricbeat 报告这些指标。+添加 kube-state-metrics 到运行留言簿的 Kubernetes 集群。++```shell+git clone https://github.com/kubernetes/kube-state-metrics.git kube-state-metrics+kubectl apply -f kube-state-metrics/examples/standard+```++<!-- +### Check to see if kube-state-metrics is running+-->+### 检查 kube-state-metrics 是否正在运行 {#check-to-see-if-kube-state-metrics-is-running}+```shell+kubectl get pods --namespace=kube-system -l app.kubernetes.io/name=kube-state-metrics+```+<!-- +Output:+-->+输出;+```shell+NAME READY STATUS RESTARTS AGE+kube-state-metrics-89d656bf8-vdthm 1/1 Running 0 21s+```+<!-- +## Clone the Elastic examples GitHub repo+-->+## 从 GitHub 克隆 Elastic examples 库 {#clone-the-elastic-examples-github-repo}+```shell+git clone https://github.com/elastic/examples.git+```++<!-- +The rest of the commands will reference files in the `examples/beats-k8s-send-anywhere` directory, so change dir there:+-->+后续命令将引用目录 `examples/beats-k8s-send-anywhere` 中的文件,+所以把目录切换过去。++```shell+cd examples/beats-k8s-send-anywhere+```++<!-- +## Create a Kubernetes Secret+A Kubernetes {{< glossary_tooltip text="Secret" term_id="secret" >}} is an object that contains a small amount of sensitive data such as a password, a token, or a key. Such information might otherwise be put in a Pod specification or in an image; putting it in a Secret object allows for more control over how it is used, and reduces the risk of accidental exposure.++There are two sets of steps here, one for *self managed* Elasticsearch and Kibana (running on your servers or using the Elastic Helm Charts), and a second separate set for the *managed service* Elasticsearch Service in Elastic Cloud. Only create the secret for the type of Elasticsearch and Kibana system that you will use for this tutorial.+-->+## 创建 Kubernetes Secret {#create-a-kubernetes-secret}+Kubernetes {{< glossary_tooltip text="Secret" term_id="secret" >}}+是包含少量敏感数据(类似密码、令牌、秘钥等)的对象。+这类信息也可以放在 Pod 规格定义或者镜像中;+但放在 Secret 对象中,能更好的控制它的使用方式,也能减少意外泄露的风险。++{{< note >}}+这里有两套步骤,一套用于*自管理*的 Elasticsearch 和 Kibana(运行在你的服务器上或使用 Helm Charts),+另一套用于在 Elastic 云服务中*托管*的 Elasticsearch 服务。+在本教程中,只需要为 Elasticsearch 和 Kibana 系统创建 secret。+{{< /note >}}++{{< tabs name="tab_with_md" >}}+{{% tab name="自管理" %}}++<!-- +### Self managed+Switch to the **Managed service** tab if you are connecting to Elasticsearch Service in Elastic Cloud.++### Set the credentials+There are four files to edit to create a k8s secret when you are connecting to self managed Elasticsearch and Kibana (self managed is effectively anything other than the managed Elasticsearch Service in Elastic Cloud). The files are:+-->+### 自管理系统 {#self-managed}+如果你使用 Elastic 云中的 Elasticsearch 服务,切换到 **托管服务** 标签页。++### 设置凭据 {#set-the-credentials}+当你使用自管理的 Elasticsearch 和 Kibana (对比托管于 Elastic 云中的 Elasticsearch 服务,自管理更有效率),+创建 k8s secret 需要准备四个文件。这些文件是:++1. ELASTICSEARCH_HOSTS+2. ELASTICSEARCH_PASSWORD+3. ELASTICSEARCH_USERNAME+4. KIBANA_HOST++<!-- +Set these with the information for your Elasticsearch cluster and your Kibana host. Here are some examples (also see [*this configuration*](https://stackoverflow.com/questions/59892896/how-to-connect-from-minikube-to-elasticsearch-installed-on-host-local-developme/59892897#59892897))+-->+为你的 Elasticsearch 集群和 Kibana 主机设置这些信息。这里是一些例子+(另见[*此配置*](https://stackoverflow.com/questions/59892896/how-to-connect-from-minikube-to-elasticsearch-installed-on-host-local-developme/59892897#59892897))++#### `ELASTICSEARCH_HOSTS` {#elasticsearch-hosts}+<!-- +1. A nodeGroup from the Elastic Elasticsearch Helm Chart:+-->+1. 来自于 Elastic Elasticsearch Helm Chart 的节点组:++ ```shell+ ["http://elasticsearch-master.default.svc.cluster.local:9200"]+ ```+ <!-- + 1. A single Elasticsearch node running on a Mac where your Beats are running in Docker for Mac:+ -->+1. Mac 上的单节点的 Elasticsearch,Beats 运行在 Mac 的容器中:++ ```shell+ ["http://host.docker.internal:9200"]+ ```+ <!-- + 1. Two Elasticsearch nodes running in VMs or on physical hardware:+ -->+1. 运行在虚拟机或物理机上的两个 Elasticsearch 节点++ ```shell+ ["http://host1.example.com:9200", "http://host2.example.com:9200"]+ ```+<!-- +Edit `ELASTICSEARCH_HOSTS`+-->+编辑 `ELASTICSEARCH_HOSTS`+```shell+vi ELASTICSEARCH_HOSTS+```++#### `ELASTICSEARCH_PASSWORD` {#elasticsearch-password}+<!-- +Just the password; no whitespace, quotes, or <>:+-->+只有密码;没有空格、引号、<>:+ <yoursecretpassword>++<!-- +Edit `ELASTICSEARCH_PASSWORD`+-->+编辑 `ELASTICSEARCH_PASSWORD`+```shell+vi ELASTICSEARCH_PASSWORD+```++#### `ELASTICSEARCH_USERNAME` {#elasticsearch-username}+<!-- +Just the username; no whitespace, quotes, or <>:+-->+只有用名;没有空格、引号、<>:++ <your ingest username for Elasticsearch>++<!-- +Edit `ELASTICSEARCH_USERNAME`+-->+编辑 `ELASTICSEARCH_USERNAME`++```shell+vi ELASTICSEARCH_USERNAME+```++#### `KIBANA_HOST` {#kibana-host}++<!-- +1. The Kibana instance from the Elastic Kibana Helm Chart. The subdomain `default` refers to the default namespace. If you have deployed the Helm Chart using a different namespace, then your subdomain will be different:+-->+1. 从 Elastic Kibana Helm Chart 安装的 Kibana 实例。子域 `default` 指默认的命名空间。如果你把 Helm Chart 指定部署到不同的命名空间,那子域会不同: ++ ```shell+ "kibana-kibana.default.svc.cluster.local:5601"+ ```+ <!-- + 1. A Kibana instance running on a Mac where your Beats are running in Docker for Mac:+ -->+1. Mac 上的 Kibana 实例,Beats 运行于 Mac 的容器:++ ```shell+ "host.docker.internal:5601"+ ```+ <!-- + 1. Two Elasticsearch nodes running in VMs or on physical hardware:+ -->+1. 运行于虚拟机或物理机上的两个 Elasticsearch 节点:+ ```shell+ "host1.example.com:5601"+ ```+<!-- +Edit `KIBANA_HOST`+-->+编辑 `KIBANA_HOST`+```shell+vi KIBANA_HOST+```++<!-- +### Create a Kubernetes secret+This command creates a secret in the Kubernetes system level namespace (kube-system) based on the files you just edited:+-->+### 创建 Kubernetes secret {#create-a-kubernetes-secret}+在上面编辑完的文件的基础上,本命令在 Kubernetes 系统范围的命名空间(kube-system)创建一个 secret。+
使用三个反引号来标记下面的命令行
comment created time in 3 days
Pull request review commentkubernetes/website
[zh] translate tutorial guestbook-logs-metrics-with-elk
+---+title: "示例: 添加日志和指标到 PHP / Redis 留言板案例"+content_type: tutorial+weight: 21+card:+ name: tutorials+ weight: 31+ title: "示例: 添加日志和指标到 PHP / Redis 留言板案例"+---+<!-- +title: "Example: Add logging and metrics to the PHP / Redis Guestbook example"+reviewers:+- sftim+content_type: tutorial+weight: 21+card:+ name: tutorials+ weight: 31+ title: "Example: Add logging and metrics to the PHP / Redis Guestbook example"+-->++<!-- overview -->+<!-- +This tutorial builds upon the [PHP Guestbook with Redis](/docs/tutorials/stateless-application/guestbook) tutorial. Lightweight log, metric, and network data open source shippers, or *Beats*, from Elastic are deployed in the same Kubernetes cluster as the guestbook. The Beats collect, parse, and index the data into Elasticsearch so that you can view and analyze the resulting operational information in Kibana. This example consists of the following components:++* A running instance of the [PHP Guestbook with Redis tutorial](/docs/tutorials/stateless-application/guestbook)+* Elasticsearch and Kibana+* Filebeat+* Metricbeat+* Packetbeat+-->+本教程建立在+[使用 Redis 部署 PHP 留言板](/zh/docs/tutorials/stateless-application/guestbook)教程之上。+*Beats*,是 Elastic 出品的开源的轻量级日志、指标和网络数据采集器,+将和留言板一同部署在 Kubernetes 集群中。+Beats 收集、分析、索引数据到 Elasticsearch,使你可以用 Kibana 查看并分析得到的运营信息。+本示例由以下内容组成:++* Elasticsearch 和 Kibana+* Filebeat+* Metricbeat+* Packetbeat++## {{% heading "objectives" %}}++<!-- +* Start up the PHP Guestbook with Redis.+* Install kube-state-metrics.+* Create a Kubernetes secret.+* Deploy the Beats.+* View dashboards of your logs and metrics.+-->+* 启动用 Redis 部署的 PHP 留言板。+* 安装 kube-state-metrics。+* 创建 Kubernetes secret。+* 部署 Beats。+* 用仪表板查看日志和指标。++## {{% heading "prerequisites" %}}+++{{< include "task-tutorial-prereqs.md" >}}+{{< version-check >}}++<!-- +Additionally you need:++* A running deployment of the [PHP Guestbook with Redis](/docs/tutorials/stateless-application/guestbook) tutorial.++* A running Elasticsearch and Kibana deployment. You can use [Elasticsearch Service in Elastic Cloud](https://cloud.elastic.co), run the [download files](https://www.elastic.co/guide/en/elastic-stack-get-started/current/get-started-elastic-stack.html) on your workstation or servers, or the [Elastic Helm Charts](https://github.com/elastic/helm-charts).+-->+此外,你还需要:++* 依照教程[使用 Redis 的 PHP留言本](/zh/docs/tutorials/stateless-application/guestbook)得到的一套运行中的部署环境。+* 一套运行中的Elasticsearch 和 Kibana部署环境。你可以使用[Elastic 云中的Elasticsearch 服务](https://cloud.elastic.co)、在工作站或者服务器上运行此[下载文件](https://www.elastic.co/guide/en/elastic-stack-get-started/current/get-started-elastic-stack.html)、或运行 [Elastic Helm Charts](https://github.com/elastic/helm-charts)。++<!-- lessoncontent -->++<!-- +## Start up the PHP Guestbook with Redis+This tutorial builds on the [PHP Guestbook with Redis](/docs/tutorials/stateless-application/guestbook) tutorial. If you have the guestbook application running, then you can monitor that. If you do not have it running then follow the instructions to deploy the guestbook and do not perform the **Cleanup** steps. Come back to this page when you have the guestbook running.+-->+## 启动用 Redis 部署的 PHP 留言板 {#start-up-the-php-guestbook-with-redis}+本教程建立在+[使用 Redis 部署 PHP 留言板](/zh/docs/tutorials/stateless-application/guestbook)之上。+如果你已经有一个运行的留言簿应用程序,那就监控它。+如果还没有,那就按照说明先部署留言板,但不要执行**清理**的步骤。+当留言板运行起来后,再返回本页。++<!-- +## Add a Cluster role binding+Create a [cluster level role binding](/docs/reference/access-authn-authz/rbac/#rolebinding-and-clusterrolebinding) so that you can deploy kube-state-metrics and the Beats at the cluster level (in kube-system).+-->+## 添加一个集群角色绑定 {#add-a-cluster-role-binding}+创建一个[集群范围的角色绑定](/zh/docs/reference/access-authn-authz/rbac/#rolebinding-和-clusterrolebinding),+以便你可以在集群范围(在 kube-system 中)部署 kube-state-metrics 和 Beats。++```shell+kubectl create clusterrolebinding cluster-admin-binding \+ --clusterrole=cluster-admin --user=<your email associated with the k8s provider account>+```++<!-- +## Install kube-state-metrics++Kubernetes [*kube-state-metrics*](https://github.com/kubernetes/kube-state-metrics) is a simple service that listens to the Kubernetes API server and generates metrics about the state of the objects. Metricbeat reports these metrics. Add kube-state-metrics to the Kubernetes cluster that the guestbook is running in.+--> +### 安装 kube-state-metrics {#install-kube-state-metrics}+Kubernetes [*kube-state-metrics*](https://github.com/kubernetes/kube-state-metrics)+是一个简单的服务,它侦听 Kubernetes API 服务器并生成对象状态的指标。+Metricbeat 报告这些指标。+添加 kube-state-metrics 到运行留言簿的 Kubernetes 集群。++```shell+git clone https://github.com/kubernetes/kube-state-metrics.git kube-state-metrics+kubectl apply -f kube-state-metrics/examples/standard+```++<!-- +### Check to see if kube-state-metrics is running+-->+### 检查 kube-state-metrics 是否正在运行 {#check-to-see-if-kube-state-metrics-is-running}+```shell+kubectl get pods --namespace=kube-system -l app.kubernetes.io/name=kube-state-metrics+```+<!-- +Output:+-->+输出;+```shell+NAME READY STATUS RESTARTS AGE+kube-state-metrics-89d656bf8-vdthm 1/1 Running 0 21s+```+<!-- +## Clone the Elastic examples GitHub repo+-->+## 从 GitHub 克隆 Elastic examples 库 {#clone-the-elastic-examples-github-repo}+```shell+git clone https://github.com/elastic/examples.git+```++<!-- +The rest of the commands will reference files in the `examples/beats-k8s-send-anywhere` directory, so change dir there:+-->+后续命令将引用目录 `examples/beats-k8s-send-anywhere` 中的文件,+所以把目录切换过去。++```shell+cd examples/beats-k8s-send-anywhere+```++<!-- +## Create a Kubernetes Secret+A Kubernetes {{< glossary_tooltip text="Secret" term_id="secret" >}} is an object that contains a small amount of sensitive data such as a password, a token, or a key. Such information might otherwise be put in a Pod specification or in an image; putting it in a Secret object allows for more control over how it is used, and reduces the risk of accidental exposure.++There are two sets of steps here, one for *self managed* Elasticsearch and Kibana (running on your servers or using the Elastic Helm Charts), and a second separate set for the *managed service* Elasticsearch Service in Elastic Cloud. Only create the secret for the type of Elasticsearch and Kibana system that you will use for this tutorial.+-->+## 创建 Kubernetes Secret {#create-a-kubernetes-secret}+Kubernetes {{< glossary_tooltip text="Secret" term_id="secret" >}}+是包含少量敏感数据(类似密码、令牌、秘钥等)的对象。+这类信息也可以放在 Pod 规格定义或者镜像中;+但放在 Secret 对象中,能更好的控制它的使用方式,也能减少意外泄露的风险。++{{< note >}}+这里有两套步骤,一套用于*自管理*的 Elasticsearch 和 Kibana(运行在你的服务器上或使用 Helm Charts),+另一套用于在 Elastic 云服务中*托管*的 Elasticsearch 服务。+在本教程中,只需要为 Elasticsearch 和 Kibana 系统创建 secret。+{{< /note >}}++{{< tabs name="tab_with_md" >}}+{{% tab name="自管理" %}}++<!-- +### Self managed+Switch to the **Managed service** tab if you are connecting to Elasticsearch Service in Elastic Cloud.++### Set the credentials+There are four files to edit to create a k8s secret when you are connecting to self managed Elasticsearch and Kibana (self managed is effectively anything other than the managed Elasticsearch Service in Elastic Cloud). The files are:+-->+### 自管理系统 {#self-managed}+如果你使用 Elastic 云中的 Elasticsearch 服务,切换到 **托管服务** 标签页。++### 设置凭据 {#set-the-credentials}+当你使用自管理的 Elasticsearch 和 Kibana (对比托管于 Elastic 云中的 Elasticsearch 服务,自管理更有效率),+创建 k8s secret 需要准备四个文件。这些文件是:++1. ELASTICSEARCH_HOSTS+2. ELASTICSEARCH_PASSWORD+3. ELASTICSEARCH_USERNAME+4. KIBANA_HOST++<!-- +Set these with the information for your Elasticsearch cluster and your Kibana host. Here are some examples (also see [*this configuration*](https://stackoverflow.com/questions/59892896/how-to-connect-from-minikube-to-elasticsearch-installed-on-host-local-developme/59892897#59892897))+-->+为你的 Elasticsearch 集群和 Kibana 主机设置这些信息。这里是一些例子+(另见[*此配置*](https://stackoverflow.com/questions/59892896/how-to-connect-from-minikube-to-elasticsearch-installed-on-host-local-developme/59892897#59892897))++#### `ELASTICSEARCH_HOSTS` {#elasticsearch-hosts}+<!-- +1. A nodeGroup from the Elastic Elasticsearch Helm Chart:+-->+1. 来自于 Elastic Elasticsearch Helm Chart 的节点组:++ ```shell+ ["http://elasticsearch-master.default.svc.cluster.local:9200"]+ ```+ <!-- + 1. A single Elasticsearch node running on a Mac where your Beats are running in Docker for Mac:+ -->+1. Mac 上的单节点的 Elasticsearch,Beats 运行在 Mac 的容器中:++ ```shell+ ["http://host.docker.internal:9200"]+ ```+ <!-- + 1. Two Elasticsearch nodes running in VMs or on physical hardware:+ -->+1. 运行在虚拟机或物理机上的两个 Elasticsearch 节点++ ```shell+ ["http://host1.example.com:9200", "http://host2.example.com:9200"]+ ```+<!-- +Edit `ELASTICSEARCH_HOSTS`+-->+编辑 `ELASTICSEARCH_HOSTS`+```shell+vi ELASTICSEARCH_HOSTS+```++#### `ELASTICSEARCH_PASSWORD` {#elasticsearch-password}+<!-- +Just the password; no whitespace, quotes, or <>:+-->+只有密码;没有空格、引号、<>:+ <yoursecretpassword>++<!-- +Edit `ELASTICSEARCH_PASSWORD`+-->+编辑 `ELASTICSEARCH_PASSWORD`+```shell+vi ELASTICSEARCH_PASSWORD+```++#### `ELASTICSEARCH_USERNAME` {#elasticsearch-username}+<!-- +Just the username; no whitespace, quotes, or <>:+-->+只有用名;没有空格、引号、<>:++ <your ingest username for Elasticsearch>++<!-- +Edit `ELASTICSEARCH_USERNAME`+-->+编辑 `ELASTICSEARCH_USERNAME`++```shell+vi ELASTICSEARCH_USERNAME+```++#### `KIBANA_HOST` {#kibana-host}++<!-- +1. The Kibana instance from the Elastic Kibana Helm Chart. The subdomain `default` refers to the default namespace. If you have deployed the Helm Chart using a different namespace, then your subdomain will be different:+-->+1. 从 Elastic Kibana Helm Chart 安装的 Kibana 实例。子域 `default` 指默认的命名空间。如果你把 Helm Chart 指定部署到不同的命名空间,那子域会不同: ++ ```shell+ "kibana-kibana.default.svc.cluster.local:5601"+ ```+ <!-- + 1. A Kibana instance running on a Mac where your Beats are running in Docker for Mac:+ -->+1. Mac 上的 Kibana 实例,Beats 运行于 Mac 的容器:++ ```shell+ "host.docker.internal:5601"+ ```+ <!-- + 1. Two Elasticsearch nodes running in VMs or on physical hardware:+ -->+1. 运行于虚拟机或物理机上的两个 Elasticsearch 节点:+ ```shell
here too
comment created time in 3 days
Pull request review commentkubernetes/website
[zh] translate tutorial guestbook-logs-metrics-with-elk
+---+title: "示例: 添加日志和指标到 PHP / Redis 留言板案例"+content_type: tutorial+weight: 21+card:+ name: tutorials+ weight: 31+ title: "示例: 添加日志和指标到 PHP / Redis 留言板案例"+---+<!-- +title: "Example: Add logging and metrics to the PHP / Redis Guestbook example"+reviewers:+- sftim+content_type: tutorial+weight: 21+card:+ name: tutorials+ weight: 31+ title: "Example: Add logging and metrics to the PHP / Redis Guestbook example"+-->++<!-- overview -->+<!-- +This tutorial builds upon the [PHP Guestbook with Redis](/docs/tutorials/stateless-application/guestbook) tutorial. Lightweight log, metric, and network data open source shippers, or *Beats*, from Elastic are deployed in the same Kubernetes cluster as the guestbook. The Beats collect, parse, and index the data into Elasticsearch so that you can view and analyze the resulting operational information in Kibana. This example consists of the following components:++* A running instance of the [PHP Guestbook with Redis tutorial](/docs/tutorials/stateless-application/guestbook)+* Elasticsearch and Kibana+* Filebeat+* Metricbeat+* Packetbeat+-->+本教程建立在+[使用 Redis 部署 PHP 留言板](/zh/docs/tutorials/stateless-application/guestbook)教程之上。+*Beats*,是 Elastic 出品的开源的轻量级日志、指标和网络数据采集器,+将和留言板一同部署在 Kubernetes 集群中。+Beats 收集、分析、索引数据到 Elasticsearch,使你可以用 Kibana 查看并分析得到的运营信息。+本示例由以下内容组成:++* Elasticsearch 和 Kibana+* Filebeat+* Metricbeat+* Packetbeat++## {{% heading "objectives" %}}++<!-- +* Start up the PHP Guestbook with Redis.+* Install kube-state-metrics.+* Create a Kubernetes secret.+* Deploy the Beats.+* View dashboards of your logs and metrics.+-->+* 启动用 Redis 部署的 PHP 留言板。+* 安装 kube-state-metrics。+* 创建 Kubernetes secret。+* 部署 Beats。+* 用仪表板查看日志和指标。++## {{% heading "prerequisites" %}}+++{{< include "task-tutorial-prereqs.md" >}}+{{< version-check >}}++<!-- +Additionally you need:++* A running deployment of the [PHP Guestbook with Redis](/docs/tutorials/stateless-application/guestbook) tutorial.++* A running Elasticsearch and Kibana deployment. You can use [Elasticsearch Service in Elastic Cloud](https://cloud.elastic.co), run the [download files](https://www.elastic.co/guide/en/elastic-stack-get-started/current/get-started-elastic-stack.html) on your workstation or servers, or the [Elastic Helm Charts](https://github.com/elastic/helm-charts).+-->+此外,你还需要:++* 依照教程[使用 Redis 的 PHP留言本](/zh/docs/tutorials/stateless-application/guestbook)得到的一套运行中的部署环境。+* 一套运行中的Elasticsearch 和 Kibana部署环境。你可以使用[Elastic 云中的Elasticsearch 服务](https://cloud.elastic.co)、在工作站或者服务器上运行此[下载文件](https://www.elastic.co/guide/en/elastic-stack-get-started/current/get-started-elastic-stack.html)、或运行 [Elastic Helm Charts](https://github.com/elastic/helm-charts)。++<!-- lessoncontent -->++<!-- +## Start up the PHP Guestbook with Redis+This tutorial builds on the [PHP Guestbook with Redis](/docs/tutorials/stateless-application/guestbook) tutorial. If you have the guestbook application running, then you can monitor that. If you do not have it running then follow the instructions to deploy the guestbook and do not perform the **Cleanup** steps. Come back to this page when you have the guestbook running.+-->+## 启动用 Redis 部署的 PHP 留言板 {#start-up-the-php-guestbook-with-redis}+本教程建立在+[使用 Redis 部署 PHP 留言板](/zh/docs/tutorials/stateless-application/guestbook)之上。+如果你已经有一个运行的留言簿应用程序,那就监控它。+如果还没有,那就按照说明先部署留言板,但不要执行**清理**的步骤。+当留言板运行起来后,再返回本页。++<!-- +## Add a Cluster role binding+Create a [cluster level role binding](/docs/reference/access-authn-authz/rbac/#rolebinding-and-clusterrolebinding) so that you can deploy kube-state-metrics and the Beats at the cluster level (in kube-system).+-->+## 添加一个集群角色绑定 {#add-a-cluster-role-binding}+创建一个[集群范围的角色绑定](/zh/docs/reference/access-authn-authz/rbac/#rolebinding-和-clusterrolebinding),+以便你可以在集群范围(在 kube-system 中)部署 kube-state-metrics 和 Beats。++```shell+kubectl create clusterrolebinding cluster-admin-binding \+ --clusterrole=cluster-admin --user=<your email associated with the k8s provider account>+```++<!-- +## Install kube-state-metrics++Kubernetes [*kube-state-metrics*](https://github.com/kubernetes/kube-state-metrics) is a simple service that listens to the Kubernetes API server and generates metrics about the state of the objects. Metricbeat reports these metrics. Add kube-state-metrics to the Kubernetes cluster that the guestbook is running in.+--> +### 安装 kube-state-metrics {#install-kube-state-metrics}+Kubernetes [*kube-state-metrics*](https://github.com/kubernetes/kube-state-metrics)+是一个简单的服务,它侦听 Kubernetes API 服务器并生成对象状态的指标。+Metricbeat 报告这些指标。+添加 kube-state-metrics 到运行留言簿的 Kubernetes 集群。++```shell+git clone https://github.com/kubernetes/kube-state-metrics.git kube-state-metrics+kubectl apply -f kube-state-metrics/examples/standard+```++<!-- +### Check to see if kube-state-metrics is running+-->+### 检查 kube-state-metrics 是否正在运行 {#check-to-see-if-kube-state-metrics-is-running}+```shell+kubectl get pods --namespace=kube-system -l app.kubernetes.io/name=kube-state-metrics+```+<!-- +Output:+-->+输出;+```shell+NAME READY STATUS RESTARTS AGE+kube-state-metrics-89d656bf8-vdthm 1/1 Running 0 21s+```+<!-- +## Clone the Elastic examples GitHub repo+-->+## 从 GitHub 克隆 Elastic examples 库 {#clone-the-elastic-examples-github-repo}+```shell+git clone https://github.com/elastic/examples.git+```++<!-- +The rest of the commands will reference files in the `examples/beats-k8s-send-anywhere` directory, so change dir there:+-->+后续命令将引用目录 `examples/beats-k8s-send-anywhere` 中的文件,+所以把目录切换过去。++```shell+cd examples/beats-k8s-send-anywhere+```++<!-- +## Create a Kubernetes Secret+A Kubernetes {{< glossary_tooltip text="Secret" term_id="secret" >}} is an object that contains a small amount of sensitive data such as a password, a token, or a key. Such information might otherwise be put in a Pod specification or in an image; putting it in a Secret object allows for more control over how it is used, and reduces the risk of accidental exposure.++There are two sets of steps here, one for *self managed* Elasticsearch and Kibana (running on your servers or using the Elastic Helm Charts), and a second separate set for the *managed service* Elasticsearch Service in Elastic Cloud. Only create the secret for the type of Elasticsearch and Kibana system that you will use for this tutorial.+-->+## 创建 Kubernetes Secret {#create-a-kubernetes-secret}+Kubernetes {{< glossary_tooltip text="Secret" term_id="secret" >}}+是包含少量敏感数据(类似密码、令牌、秘钥等)的对象。+这类信息也可以放在 Pod 规格定义或者镜像中;+但放在 Secret 对象中,能更好的控制它的使用方式,也能减少意外泄露的风险。++{{< note >}}+这里有两套步骤,一套用于*自管理*的 Elasticsearch 和 Kibana(运行在你的服务器上或使用 Helm Charts),+另一套用于在 Elastic 云服务中*托管*的 Elasticsearch 服务。+在本教程中,只需要为 Elasticsearch 和 Kibana 系统创建 secret。+{{< /note >}}++{{< tabs name="tab_with_md" >}}+{{% tab name="自管理" %}}++<!-- +### Self managed+Switch to the **Managed service** tab if you are connecting to Elasticsearch Service in Elastic Cloud.++### Set the credentials+There are four files to edit to create a k8s secret when you are connecting to self managed Elasticsearch and Kibana (self managed is effectively anything other than the managed Elasticsearch Service in Elastic Cloud). The files are:+-->+### 自管理系统 {#self-managed}+如果你使用 Elastic 云中的 Elasticsearch 服务,切换到 **托管服务** 标签页。++### 设置凭据 {#set-the-credentials}+当你使用自管理的 Elasticsearch 和 Kibana (对比托管于 Elastic 云中的 Elasticsearch 服务,自管理更有效率),+创建 k8s secret 需要准备四个文件。这些文件是:++1. ELASTICSEARCH_HOSTS+2. ELASTICSEARCH_PASSWORD+3. ELASTICSEARCH_USERNAME+4. KIBANA_HOST++<!-- +Set these with the information for your Elasticsearch cluster and your Kibana host. Here are some examples (also see [*this configuration*](https://stackoverflow.com/questions/59892896/how-to-connect-from-minikube-to-elasticsearch-installed-on-host-local-developme/59892897#59892897))+-->+为你的 Elasticsearch 集群和 Kibana 主机设置这些信息。这里是一些例子+(另见[*此配置*](https://stackoverflow.com/questions/59892896/how-to-connect-from-minikube-to-elasticsearch-installed-on-host-local-developme/59892897#59892897))++#### `ELASTICSEARCH_HOSTS` {#elasticsearch-hosts}+<!-- +1. A nodeGroup from the Elastic Elasticsearch Helm Chart:+-->+1. 来自于 Elastic Elasticsearch Helm Chart 的节点组:++ ```shell+ ["http://elasticsearch-master.default.svc.cluster.local:9200"]+ ```+ <!-- + 1. A single Elasticsearch node running on a Mac where your Beats are running in Docker for Mac:+ -->+1. Mac 上的单节点的 Elasticsearch,Beats 运行在 Mac 的容器中:++ ```shell+ ["http://host.docker.internal:9200"]+ ```+ <!-- + 1. Two Elasticsearch nodes running in VMs or on physical hardware:+ -->+1. 运行在虚拟机或物理机上的两个 Elasticsearch 节点++ ```shell+ ["http://host1.example.com:9200", "http://host2.example.com:9200"]+ ```+<!-- +Edit `ELASTICSEARCH_HOSTS`+-->+编辑 `ELASTICSEARCH_HOSTS`+```shell+vi ELASTICSEARCH_HOSTS+```++#### `ELASTICSEARCH_PASSWORD` {#elasticsearch-password}+<!-- +Just the password; no whitespace, quotes, or <>:+-->+只有密码;没有空格、引号、<>:+ <yoursecretpassword>++<!-- +Edit `ELASTICSEARCH_PASSWORD`+-->+编辑 `ELASTICSEARCH_PASSWORD`+```shell+vi ELASTICSEARCH_PASSWORD+```++#### `ELASTICSEARCH_USERNAME` {#elasticsearch-username}+<!-- +Just the username; no whitespace, quotes, or <>:+-->+只有用名;没有空格、引号、<>:++ <your ingest username for Elasticsearch>
同上。 尖括号中的内容可翻译。
comment created time in 3 days
Pull request review commentkubernetes/website
[zh] translate tutorial guestbook-logs-metrics-with-elk
+---+title: "示例: 添加日志和指标到 PHP / Redis 留言板案例"+content_type: tutorial+weight: 21+card:+ name: tutorials+ weight: 31+ title: "示例: 添加日志和指标到 PHP / Redis 留言板案例"+---+<!-- +title: "Example: Add logging and metrics to the PHP / Redis Guestbook example"+reviewers:+- sftim+content_type: tutorial+weight: 21+card:+ name: tutorials+ weight: 31+ title: "Example: Add logging and metrics to the PHP / Redis Guestbook example"+-->++<!-- overview -->+<!-- +This tutorial builds upon the [PHP Guestbook with Redis](/docs/tutorials/stateless-application/guestbook) tutorial. Lightweight log, metric, and network data open source shippers, or *Beats*, from Elastic are deployed in the same Kubernetes cluster as the guestbook. The Beats collect, parse, and index the data into Elasticsearch so that you can view and analyze the resulting operational information in Kibana. This example consists of the following components:++* A running instance of the [PHP Guestbook with Redis tutorial](/docs/tutorials/stateless-application/guestbook)+* Elasticsearch and Kibana+* Filebeat+* Metricbeat+* Packetbeat+-->+本教程建立在+[使用 Redis 部署 PHP 留言板](/zh/docs/tutorials/stateless-application/guestbook)教程之上。+*Beats*,是 Elastic 出品的开源的轻量级日志、指标和网络数据采集器,+将和留言板一同部署在 Kubernetes 集群中。+Beats 收集、分析、索引数据到 Elasticsearch,使你可以用 Kibana 查看并分析得到的运营信息。+本示例由以下内容组成:++* Elasticsearch 和 Kibana+* Filebeat+* Metricbeat+* Packetbeat++## {{% heading "objectives" %}}++<!-- +* Start up the PHP Guestbook with Redis.+* Install kube-state-metrics.+* Create a Kubernetes secret.+* Deploy the Beats.+* View dashboards of your logs and metrics.+-->+* 启动用 Redis 部署的 PHP 留言板。+* 安装 kube-state-metrics。+* 创建 Kubernetes secret。+* 部署 Beats。+* 用仪表板查看日志和指标。++## {{% heading "prerequisites" %}}+++{{< include "task-tutorial-prereqs.md" >}}+{{< version-check >}}++<!-- +Additionally you need:++* A running deployment of the [PHP Guestbook with Redis](/docs/tutorials/stateless-application/guestbook) tutorial.++* A running Elasticsearch and Kibana deployment. You can use [Elasticsearch Service in Elastic Cloud](https://cloud.elastic.co), run the [download files](https://www.elastic.co/guide/en/elastic-stack-get-started/current/get-started-elastic-stack.html) on your workstation or servers, or the [Elastic Helm Charts](https://github.com/elastic/helm-charts).+-->+此外,你还需要:++* 依照教程[使用 Redis 的 PHP留言本](/zh/docs/tutorials/stateless-application/guestbook)得到的一套运行中的部署环境。+* 一套运行中的Elasticsearch 和 Kibana部署环境。你可以使用[Elastic 云中的Elasticsearch 服务](https://cloud.elastic.co)、在工作站或者服务器上运行此[下载文件](https://www.elastic.co/guide/en/elastic-stack-get-started/current/get-started-elastic-stack.html)、或运行 [Elastic Helm Charts](https://github.com/elastic/helm-charts)。++<!-- lessoncontent -->++<!-- +## Start up the PHP Guestbook with Redis+This tutorial builds on the [PHP Guestbook with Redis](/docs/tutorials/stateless-application/guestbook) tutorial. If you have the guestbook application running, then you can monitor that. If you do not have it running then follow the instructions to deploy the guestbook and do not perform the **Cleanup** steps. Come back to this page when you have the guestbook running.+-->+## 启动用 Redis 部署的 PHP 留言板 {#start-up-the-php-guestbook-with-redis}+本教程建立在+[使用 Redis 部署 PHP 留言板](/zh/docs/tutorials/stateless-application/guestbook)之上。+如果你已经有一个运行的留言簿应用程序,那就监控它。+如果还没有,那就按照说明先部署留言板,但不要执行**清理**的步骤。+当留言板运行起来后,再返回本页。++<!-- +## Add a Cluster role binding+Create a [cluster level role binding](/docs/reference/access-authn-authz/rbac/#rolebinding-and-clusterrolebinding) so that you can deploy kube-state-metrics and the Beats at the cluster level (in kube-system).+-->+## 添加一个集群角色绑定 {#add-a-cluster-role-binding}+创建一个[集群范围的角色绑定](/zh/docs/reference/access-authn-authz/rbac/#rolebinding-和-clusterrolebinding),+以便你可以在集群范围(在 kube-system 中)部署 kube-state-metrics 和 Beats。++```shell+kubectl create clusterrolebinding cluster-admin-binding \+ --clusterrole=cluster-admin --user=<your email associated with the k8s provider account>+```++<!-- +## Install kube-state-metrics++Kubernetes [*kube-state-metrics*](https://github.com/kubernetes/kube-state-metrics) is a simple service that listens to the Kubernetes API server and generates metrics about the state of the objects. Metricbeat reports these metrics. Add kube-state-metrics to the Kubernetes cluster that the guestbook is running in.+--> +### 安装 kube-state-metrics {#install-kube-state-metrics}+Kubernetes [*kube-state-metrics*](https://github.com/kubernetes/kube-state-metrics)+是一个简单的服务,它侦听 Kubernetes API 服务器并生成对象状态的指标。+Metricbeat 报告这些指标。+添加 kube-state-metrics 到运行留言簿的 Kubernetes 集群。++```shell+git clone https://github.com/kubernetes/kube-state-metrics.git kube-state-metrics+kubectl apply -f kube-state-metrics/examples/standard+```++<!-- +### Check to see if kube-state-metrics is running+-->+### 检查 kube-state-metrics 是否正在运行 {#check-to-see-if-kube-state-metrics-is-running}+```shell+kubectl get pods --namespace=kube-system -l app.kubernetes.io/name=kube-state-metrics+```+<!-- +Output:+-->+输出;+```shell+NAME READY STATUS RESTARTS AGE+kube-state-metrics-89d656bf8-vdthm 1/1 Running 0 21s+```+<!-- +## Clone the Elastic examples GitHub repo+-->+## 从 GitHub 克隆 Elastic examples 库 {#clone-the-elastic-examples-github-repo}+```shell+git clone https://github.com/elastic/examples.git+```++<!-- +The rest of the commands will reference files in the `examples/beats-k8s-send-anywhere` directory, so change dir there:+-->+后续命令将引用目录 `examples/beats-k8s-send-anywhere` 中的文件,+所以把目录切换过去。++```shell+cd examples/beats-k8s-send-anywhere+```++<!-- +## Create a Kubernetes Secret+A Kubernetes {{< glossary_tooltip text="Secret" term_id="secret" >}} is an object that contains a small amount of sensitive data such as a password, a token, or a key. Such information might otherwise be put in a Pod specification or in an image; putting it in a Secret object allows for more control over how it is used, and reduces the risk of accidental exposure.++There are two sets of steps here, one for *self managed* Elasticsearch and Kibana (running on your servers or using the Elastic Helm Charts), and a second separate set for the *managed service* Elasticsearch Service in Elastic Cloud. Only create the secret for the type of Elasticsearch and Kibana system that you will use for this tutorial.+-->+## 创建 Kubernetes Secret {#create-a-kubernetes-secret}+Kubernetes {{< glossary_tooltip text="Secret" term_id="secret" >}}+是包含少量敏感数据(类似密码、令牌、秘钥等)的对象。+这类信息也可以放在 Pod 规格定义或者镜像中;+但放在 Secret 对象中,能更好的控制它的使用方式,也能减少意外泄露的风险。++{{< note >}}+这里有两套步骤,一套用于*自管理*的 Elasticsearch 和 Kibana(运行在你的服务器上或使用 Helm Charts),+另一套用于在 Elastic 云服务中*托管*的 Elasticsearch 服务。+在本教程中,只需要为 Elasticsearch 和 Kibana 系统创建 secret。+{{< /note >}}++{{< tabs name="tab_with_md" >}}+{{% tab name="自管理" %}}++<!-- +### Self managed+Switch to the **Managed service** tab if you are connecting to Elasticsearch Service in Elastic Cloud.++### Set the credentials+There are four files to edit to create a k8s secret when you are connecting to self managed Elasticsearch and Kibana (self managed is effectively anything other than the managed Elasticsearch Service in Elastic Cloud). The files are:+-->+### 自管理系统 {#self-managed}+如果你使用 Elastic 云中的 Elasticsearch 服务,切换到 **托管服务** 标签页。++### 设置凭据 {#set-the-credentials}+当你使用自管理的 Elasticsearch 和 Kibana (对比托管于 Elastic 云中的 Elasticsearch 服务,自管理更有效率),+创建 k8s secret 需要准备四个文件。这些文件是:++1. ELASTICSEARCH_HOSTS+2. ELASTICSEARCH_PASSWORD+3. ELASTICSEARCH_USERNAME+4. KIBANA_HOST++<!-- +Set these with the information for your Elasticsearch cluster and your Kibana host. Here are some examples (also see [*this configuration*](https://stackoverflow.com/questions/59892896/how-to-connect-from-minikube-to-elasticsearch-installed-on-host-local-developme/59892897#59892897))+-->+为你的 Elasticsearch 集群和 Kibana 主机设置这些信息。这里是一些例子+(另见[*此配置*](https://stackoverflow.com/questions/59892896/how-to-connect-from-minikube-to-elasticsearch-installed-on-host-local-developme/59892897#59892897))++#### `ELASTICSEARCH_HOSTS` {#elasticsearch-hosts}+<!-- +1. A nodeGroup from the Elastic Elasticsearch Helm Chart:+-->+1. 来自于 Elastic Elasticsearch Helm Chart 的节点组:++ ```shell+ ["http://elasticsearch-master.default.svc.cluster.local:9200"]+ ```+ <!-- + 1. A single Elasticsearch node running on a Mac where your Beats are running in Docker for Mac:+ -->+1. Mac 上的单节点的 Elasticsearch,Beats 运行在 Mac 的容器中:++ ```shell+ ["http://host.docker.internal:9200"]+ ```+ <!-- + 1. Two Elasticsearch nodes running in VMs or on physical hardware:+ -->+1. 运行在虚拟机或物理机上的两个 Elasticsearch 节点++ ```shell+ ["http://host1.example.com:9200", "http://host2.example.com:9200"]+ ```+<!-- +Edit `ELASTICSEARCH_HOSTS`+-->+编辑 `ELASTICSEARCH_HOSTS`+```shell+vi ELASTICSEARCH_HOSTS+```++#### `ELASTICSEARCH_PASSWORD` {#elasticsearch-password}+<!-- +Just the password; no whitespace, quotes, or <>:+-->+只有密码;没有空格、引号、<>:+ <yoursecretpassword>++<!-- +Edit `ELASTICSEARCH_PASSWORD`+-->+编辑 `ELASTICSEARCH_PASSWORD`+```shell+vi ELASTICSEARCH_PASSWORD+```++#### `ELASTICSEARCH_USERNAME` {#elasticsearch-username}+<!-- +Just the username; no whitespace, quotes, or <>:+-->+只有用名;没有空格、引号、<>:++ <your ingest username for Elasticsearch>++<!-- +Edit `ELASTICSEARCH_USERNAME`+-->+编辑 `ELASTICSEARCH_USERNAME`++```shell+vi ELASTICSEARCH_USERNAME+```++#### `KIBANA_HOST` {#kibana-host}++<!-- +1. The Kibana instance from the Elastic Kibana Helm Chart. The subdomain `default` refers to the default namespace. If you have deployed the Helm Chart using a different namespace, then your subdomain will be different:+-->+1. 从 Elastic Kibana Helm Chart 安装的 Kibana 实例。子域 `default` 指默认的命名空间。如果你把 Helm Chart 指定部署到不同的命名空间,那子域会不同: ++ ```shell+ "kibana-kibana.default.svc.cluster.local:5601"+ ```+ <!-- + 1. A Kibana instance running on a Mac where your Beats are running in Docker for Mac:+ -->+1. Mac 上的 Kibana 实例,Beats 运行于 Mac 的容器:++ ```shell
here too
comment created time in 3 days
Pull request review commentkubernetes/website
[zh] translate tutorial guestbook-logs-metrics-with-elk
+---+title: "示例: 添加日志和指标到 PHP / Redis 留言板案例"+content_type: tutorial+weight: 21+card:+ name: tutorials+ weight: 31+ title: "示例: 添加日志和指标到 PHP / Redis 留言板案例"+---+<!-- +title: "Example: Add logging and metrics to the PHP / Redis Guestbook example"+reviewers:+- sftim+content_type: tutorial+weight: 21+card:+ name: tutorials+ weight: 31+ title: "Example: Add logging and metrics to the PHP / Redis Guestbook example"+-->++<!-- overview -->+<!-- +This tutorial builds upon the [PHP Guestbook with Redis](/docs/tutorials/stateless-application/guestbook) tutorial. Lightweight log, metric, and network data open source shippers, or *Beats*, from Elastic are deployed in the same Kubernetes cluster as the guestbook. The Beats collect, parse, and index the data into Elasticsearch so that you can view and analyze the resulting operational information in Kibana. This example consists of the following components:++* A running instance of the [PHP Guestbook with Redis tutorial](/docs/tutorials/stateless-application/guestbook)+* Elasticsearch and Kibana+* Filebeat+* Metricbeat+* Packetbeat+-->+本教程建立在+[使用 Redis 部署 PHP 留言板](/zh/docs/tutorials/stateless-application/guestbook)教程之上。+*Beats*,是 Elastic 出品的开源的轻量级日志、指标和网络数据采集器,+将和留言板一同部署在 Kubernetes 集群中。+Beats 收集、分析、索引数据到 Elasticsearch,使你可以用 Kibana 查看并分析得到的运营信息。+本示例由以下内容组成:++* Elasticsearch 和 Kibana+* Filebeat+* Metricbeat+* Packetbeat++## {{% heading "objectives" %}}++<!-- +* Start up the PHP Guestbook with Redis.+* Install kube-state-metrics.+* Create a Kubernetes secret.+* Deploy the Beats.+* View dashboards of your logs and metrics.+-->+* 启动用 Redis 部署的 PHP 留言板。+* 安装 kube-state-metrics。+* 创建 Kubernetes secret。+* 部署 Beats。+* 用仪表板查看日志和指标。++## {{% heading "prerequisites" %}}+++{{< include "task-tutorial-prereqs.md" >}}+{{< version-check >}}++<!-- +Additionally you need:++* A running deployment of the [PHP Guestbook with Redis](/docs/tutorials/stateless-application/guestbook) tutorial.++* A running Elasticsearch and Kibana deployment. You can use [Elasticsearch Service in Elastic Cloud](https://cloud.elastic.co), run the [download files](https://www.elastic.co/guide/en/elastic-stack-get-started/current/get-started-elastic-stack.html) on your workstation or servers, or the [Elastic Helm Charts](https://github.com/elastic/helm-charts).+-->+此外,你还需要:++* 依照教程[使用 Redis 的 PHP留言本](/zh/docs/tutorials/stateless-application/guestbook)得到的一套运行中的部署环境。+* 一套运行中的Elasticsearch 和 Kibana部署环境。你可以使用[Elastic 云中的Elasticsearch 服务](https://cloud.elastic.co)、在工作站或者服务器上运行此[下载文件](https://www.elastic.co/guide/en/elastic-stack-get-started/current/get-started-elastic-stack.html)、或运行 [Elastic Helm Charts](https://github.com/elastic/helm-charts)。++<!-- lessoncontent -->++<!-- +## Start up the PHP Guestbook with Redis+This tutorial builds on the [PHP Guestbook with Redis](/docs/tutorials/stateless-application/guestbook) tutorial. If you have the guestbook application running, then you can monitor that. If you do not have it running then follow the instructions to deploy the guestbook and do not perform the **Cleanup** steps. Come back to this page when you have the guestbook running.+-->+## 启动用 Redis 部署的 PHP 留言板 {#start-up-the-php-guestbook-with-redis}+本教程建立在+[使用 Redis 部署 PHP 留言板](/zh/docs/tutorials/stateless-application/guestbook)之上。+如果你已经有一个运行的留言簿应用程序,那就监控它。+如果还没有,那就按照说明先部署留言板,但不要执行**清理**的步骤。+当留言板运行起来后,再返回本页。++<!-- +## Add a Cluster role binding+Create a [cluster level role binding](/docs/reference/access-authn-authz/rbac/#rolebinding-and-clusterrolebinding) so that you can deploy kube-state-metrics and the Beats at the cluster level (in kube-system).+-->+## 添加一个集群角色绑定 {#add-a-cluster-role-binding}+创建一个[集群范围的角色绑定](/zh/docs/reference/access-authn-authz/rbac/#rolebinding-和-clusterrolebinding),+以便你可以在集群范围(在 kube-system 中)部署 kube-state-metrics 和 Beats。++```shell+kubectl create clusterrolebinding cluster-admin-binding \+ --clusterrole=cluster-admin --user=<your email associated with the k8s provider account>+```++<!-- +## Install kube-state-metrics++Kubernetes [*kube-state-metrics*](https://github.com/kubernetes/kube-state-metrics) is a simple service that listens to the Kubernetes API server and generates metrics about the state of the objects. Metricbeat reports these metrics. Add kube-state-metrics to the Kubernetes cluster that the guestbook is running in.+--> +### 安装 kube-state-metrics {#install-kube-state-metrics}+Kubernetes [*kube-state-metrics*](https://github.com/kubernetes/kube-state-metrics)+是一个简单的服务,它侦听 Kubernetes API 服务器并生成对象状态的指标。+Metricbeat 报告这些指标。+添加 kube-state-metrics 到运行留言簿的 Kubernetes 集群。++```shell+git clone https://github.com/kubernetes/kube-state-metrics.git kube-state-metrics+kubectl apply -f kube-state-metrics/examples/standard+```++<!-- +### Check to see if kube-state-metrics is running+-->+### 检查 kube-state-metrics 是否正在运行 {#check-to-see-if-kube-state-metrics-is-running}+```shell+kubectl get pods --namespace=kube-system -l app.kubernetes.io/name=kube-state-metrics+```+<!-- +Output:+-->+输出;+```shell+NAME READY STATUS RESTARTS AGE+kube-state-metrics-89d656bf8-vdthm 1/1 Running 0 21s+```+<!-- +## Clone the Elastic examples GitHub repo+-->+## 从 GitHub 克隆 Elastic examples 库 {#clone-the-elastic-examples-github-repo}+```shell+git clone https://github.com/elastic/examples.git+```++<!-- +The rest of the commands will reference files in the `examples/beats-k8s-send-anywhere` directory, so change dir there:+-->+后续命令将引用目录 `examples/beats-k8s-send-anywhere` 中的文件,+所以把目录切换过去。++```shell+cd examples/beats-k8s-send-anywhere+```++<!-- +## Create a Kubernetes Secret+A Kubernetes {{< glossary_tooltip text="Secret" term_id="secret" >}} is an object that contains a small amount of sensitive data such as a password, a token, or a key. Such information might otherwise be put in a Pod specification or in an image; putting it in a Secret object allows for more control over how it is used, and reduces the risk of accidental exposure.++There are two sets of steps here, one for *self managed* Elasticsearch and Kibana (running on your servers or using the Elastic Helm Charts), and a second separate set for the *managed service* Elasticsearch Service in Elastic Cloud. Only create the secret for the type of Elasticsearch and Kibana system that you will use for this tutorial.+-->+## 创建 Kubernetes Secret {#create-a-kubernetes-secret}+Kubernetes {{< glossary_tooltip text="Secret" term_id="secret" >}}+是包含少量敏感数据(类似密码、令牌、秘钥等)的对象。+这类信息也可以放在 Pod 规格定义或者镜像中;+但放在 Secret 对象中,能更好的控制它的使用方式,也能减少意外泄露的风险。++{{< note >}}+这里有两套步骤,一套用于*自管理*的 Elasticsearch 和 Kibana(运行在你的服务器上或使用 Helm Charts),+另一套用于在 Elastic 云服务中*托管*的 Elasticsearch 服务。+在本教程中,只需要为 Elasticsearch 和 Kibana 系统创建 secret。+{{< /note >}}++{{< tabs name="tab_with_md" >}}+{{% tab name="自管理" %}}++<!-- +### Self managed+Switch to the **Managed service** tab if you are connecting to Elasticsearch Service in Elastic Cloud.++### Set the credentials+There are four files to edit to create a k8s secret when you are connecting to self managed Elasticsearch and Kibana (self managed is effectively anything other than the managed Elasticsearch Service in Elastic Cloud). The files are:+-->+### 自管理系统 {#self-managed}+如果你使用 Elastic 云中的 Elasticsearch 服务,切换到 **托管服务** 标签页。++### 设置凭据 {#set-the-credentials}+当你使用自管理的 Elasticsearch 和 Kibana (对比托管于 Elastic 云中的 Elasticsearch 服务,自管理更有效率),+创建 k8s secret 需要准备四个文件。这些文件是:++1. ELASTICSEARCH_HOSTS+2. ELASTICSEARCH_PASSWORD+3. ELASTICSEARCH_USERNAME+4. KIBANA_HOST++<!-- +Set these with the information for your Elasticsearch cluster and your Kibana host. Here are some examples (also see [*this configuration*](https://stackoverflow.com/questions/59892896/how-to-connect-from-minikube-to-elasticsearch-installed-on-host-local-developme/59892897#59892897))+-->+为你的 Elasticsearch 集群和 Kibana 主机设置这些信息。这里是一些例子+(另见[*此配置*](https://stackoverflow.com/questions/59892896/how-to-connect-from-minikube-to-elasticsearch-installed-on-host-local-developme/59892897#59892897))++#### `ELASTICSEARCH_HOSTS` {#elasticsearch-hosts}+<!-- +1. A nodeGroup from the Elastic Elasticsearch Helm Chart:+-->+1. 来自于 Elastic Elasticsearch Helm Chart 的节点组:++ ```shell+ ["http://elasticsearch-master.default.svc.cluster.local:9200"]+ ```+ <!-- + 1. A single Elasticsearch node running on a Mac where your Beats are running in Docker for Mac:+ -->+1. Mac 上的单节点的 Elasticsearch,Beats 运行在 Mac 的容器中:++ ```shell+ ["http://host.docker.internal:9200"]+ ```+ <!-- + 1. Two Elasticsearch nodes running in VMs or on physical hardware:+ -->+1. 运行在虚拟机或物理机上的两个 Elasticsearch 节点++ ```shell+ ["http://host1.example.com:9200", "http://host2.example.com:9200"]+ ```+<!-- +Edit `ELASTICSEARCH_HOSTS`+-->+编辑 `ELASTICSEARCH_HOSTS`+```shell+vi ELASTICSEARCH_HOSTS+```++#### `ELASTICSEARCH_PASSWORD` {#elasticsearch-password}+<!-- +Just the password; no whitespace, quotes, or <>:+-->+只有密码;没有空格、引号、<>:+ <yoursecretpassword>++<!-- +Edit `ELASTICSEARCH_PASSWORD`+-->+编辑 `ELASTICSEARCH_PASSWORD`+```shell+vi ELASTICSEARCH_PASSWORD+```++#### `ELASTICSEARCH_USERNAME` {#elasticsearch-username}+<!-- +Just the username; no whitespace, quotes, or <>:+-->+只有用名;没有空格、引号、<>:++ <your ingest username for Elasticsearch>++<!-- +Edit `ELASTICSEARCH_USERNAME`+-->+编辑 `ELASTICSEARCH_USERNAME`++```shell+vi ELASTICSEARCH_USERNAME+```++#### `KIBANA_HOST` {#kibana-host}++<!-- +1. The Kibana instance from the Elastic Kibana Helm Chart. The subdomain `default` refers to the default namespace. If you have deployed the Helm Chart using a different namespace, then your subdomain will be different:+-->+1. 从 Elastic Kibana Helm Chart 安装的 Kibana 实例。子域 `default` 指默认的命名空间。如果你把 Helm Chart 指定部署到不同的命名空间,那子域会不同: ++ ```shell
not shell
comment created time in 3 days
Pull request review commentkubernetes/website
[zh] translate tutorial guestbook-logs-metrics-with-elk
+---+title: "示例: 添加日志和指标到 PHP / Redis 留言板案例"+content_type: tutorial+weight: 21+card:+ name: tutorials+ weight: 31+ title: "示例: 添加日志和指标到 PHP / Redis 留言板案例"+---+<!-- +title: "Example: Add logging and metrics to the PHP / Redis Guestbook example"+reviewers:+- sftim+content_type: tutorial+weight: 21+card:+ name: tutorials+ weight: 31+ title: "Example: Add logging and metrics to the PHP / Redis Guestbook example"+-->++<!-- overview -->+<!-- +This tutorial builds upon the [PHP Guestbook with Redis](/docs/tutorials/stateless-application/guestbook) tutorial. Lightweight log, metric, and network data open source shippers, or *Beats*, from Elastic are deployed in the same Kubernetes cluster as the guestbook. The Beats collect, parse, and index the data into Elasticsearch so that you can view and analyze the resulting operational information in Kibana. This example consists of the following components:++* A running instance of the [PHP Guestbook with Redis tutorial](/docs/tutorials/stateless-application/guestbook)+* Elasticsearch and Kibana+* Filebeat+* Metricbeat+* Packetbeat+-->+本教程建立在+[使用 Redis 部署 PHP 留言板](/zh/docs/tutorials/stateless-application/guestbook)教程之上。+*Beats*,是 Elastic 出品的开源的轻量级日志、指标和网络数据采集器,+将和留言板一同部署在 Kubernetes 集群中。+Beats 收集、分析、索引数据到 Elasticsearch,使你可以用 Kibana 查看并分析得到的运营信息。+本示例由以下内容组成:++* Elasticsearch 和 Kibana+* Filebeat+* Metricbeat+* Packetbeat++## {{% heading "objectives" %}}++<!-- +* Start up the PHP Guestbook with Redis.+* Install kube-state-metrics.+* Create a Kubernetes secret.+* Deploy the Beats.+* View dashboards of your logs and metrics.+-->+* 启动用 Redis 部署的 PHP 留言板。+* 安装 kube-state-metrics。+* 创建 Kubernetes secret。+* 部署 Beats。+* 用仪表板查看日志和指标。++## {{% heading "prerequisites" %}}+++{{< include "task-tutorial-prereqs.md" >}}+{{< version-check >}}++<!-- +Additionally you need:++* A running deployment of the [PHP Guestbook with Redis](/docs/tutorials/stateless-application/guestbook) tutorial.++* A running Elasticsearch and Kibana deployment. You can use [Elasticsearch Service in Elastic Cloud](https://cloud.elastic.co), run the [download files](https://www.elastic.co/guide/en/elastic-stack-get-started/current/get-started-elastic-stack.html) on your workstation or servers, or the [Elastic Helm Charts](https://github.com/elastic/helm-charts).+-->+此外,你还需要:++* 依照教程[使用 Redis 的 PHP留言本](/zh/docs/tutorials/stateless-application/guestbook)得到的一套运行中的部署环境。+* 一套运行中的Elasticsearch 和 Kibana部署环境。你可以使用[Elastic 云中的Elasticsearch 服务](https://cloud.elastic.co)、在工作站或者服务器上运行此[下载文件](https://www.elastic.co/guide/en/elastic-stack-get-started/current/get-started-elastic-stack.html)、或运行 [Elastic Helm Charts](https://github.com/elastic/helm-charts)。++<!-- lessoncontent -->++<!-- +## Start up the PHP Guestbook with Redis+This tutorial builds on the [PHP Guestbook with Redis](/docs/tutorials/stateless-application/guestbook) tutorial. If you have the guestbook application running, then you can monitor that. If you do not have it running then follow the instructions to deploy the guestbook and do not perform the **Cleanup** steps. Come back to this page when you have the guestbook running.+-->+## 启动用 Redis 部署的 PHP 留言板 {#start-up-the-php-guestbook-with-redis}+本教程建立在+[使用 Redis 部署 PHP 留言板](/zh/docs/tutorials/stateless-application/guestbook)之上。+如果你已经有一个运行的留言簿应用程序,那就监控它。+如果还没有,那就按照说明先部署留言板,但不要执行**清理**的步骤。+当留言板运行起来后,再返回本页。++<!-- +## Add a Cluster role binding+Create a [cluster level role binding](/docs/reference/access-authn-authz/rbac/#rolebinding-and-clusterrolebinding) so that you can deploy kube-state-metrics and the Beats at the cluster level (in kube-system).+-->+## 添加一个集群角色绑定 {#add-a-cluster-role-binding}+创建一个[集群范围的角色绑定](/zh/docs/reference/access-authn-authz/rbac/#rolebinding-和-clusterrolebinding),+以便你可以在集群范围(在 kube-system 中)部署 kube-state-metrics 和 Beats。++```shell+kubectl create clusterrolebinding cluster-admin-binding \+ --clusterrole=cluster-admin --user=<your email associated with the k8s provider account>+```++<!-- +## Install kube-state-metrics++Kubernetes [*kube-state-metrics*](https://github.com/kubernetes/kube-state-metrics) is a simple service that listens to the Kubernetes API server and generates metrics about the state of the objects. Metricbeat reports these metrics. Add kube-state-metrics to the Kubernetes cluster that the guestbook is running in.+--> +### 安装 kube-state-metrics {#install-kube-state-metrics}+Kubernetes [*kube-state-metrics*](https://github.com/kubernetes/kube-state-metrics)+是一个简单的服务,它侦听 Kubernetes API 服务器并生成对象状态的指标。+Metricbeat 报告这些指标。+添加 kube-state-metrics 到运行留言簿的 Kubernetes 集群。++```shell+git clone https://github.com/kubernetes/kube-state-metrics.git kube-state-metrics+kubectl apply -f kube-state-metrics/examples/standard+```++<!-- +### Check to see if kube-state-metrics is running+-->+### 检查 kube-state-metrics 是否正在运行 {#check-to-see-if-kube-state-metrics-is-running}+```shell+kubectl get pods --namespace=kube-system -l app.kubernetes.io/name=kube-state-metrics+```+<!-- +Output:+-->+输出;+```shell+NAME READY STATUS RESTARTS AGE+kube-state-metrics-89d656bf8-vdthm 1/1 Running 0 21s+```+<!-- +## Clone the Elastic examples GitHub repo+-->+## 从 GitHub 克隆 Elastic examples 库 {#clone-the-elastic-examples-github-repo}+```shell+git clone https://github.com/elastic/examples.git+```++<!-- +The rest of the commands will reference files in the `examples/beats-k8s-send-anywhere` directory, so change dir there:+-->+后续命令将引用目录 `examples/beats-k8s-send-anywhere` 中的文件,+所以把目录切换过去。++```shell+cd examples/beats-k8s-send-anywhere+```++<!-- +## Create a Kubernetes Secret+A Kubernetes {{< glossary_tooltip text="Secret" term_id="secret" >}} is an object that contains a small amount of sensitive data such as a password, a token, or a key. Such information might otherwise be put in a Pod specification or in an image; putting it in a Secret object allows for more control over how it is used, and reduces the risk of accidental exposure.++There are two sets of steps here, one for *self managed* Elasticsearch and Kibana (running on your servers or using the Elastic Helm Charts), and a second separate set for the *managed service* Elasticsearch Service in Elastic Cloud. Only create the secret for the type of Elasticsearch and Kibana system that you will use for this tutorial.+-->+## 创建 Kubernetes Secret {#create-a-kubernetes-secret}+Kubernetes {{< glossary_tooltip text="Secret" term_id="secret" >}}+是包含少量敏感数据(类似密码、令牌、秘钥等)的对象。+这类信息也可以放在 Pod 规格定义或者镜像中;+但放在 Secret 对象中,能更好的控制它的使用方式,也能减少意外泄露的风险。++{{< note >}}+这里有两套步骤,一套用于*自管理*的 Elasticsearch 和 Kibana(运行在你的服务器上或使用 Helm Charts),+另一套用于在 Elastic 云服务中*托管*的 Elasticsearch 服务。+在本教程中,只需要为 Elasticsearch 和 Kibana 系统创建 secret。+{{< /note >}}++{{< tabs name="tab_with_md" >}}+{{% tab name="自管理" %}}++<!-- +### Self managed+Switch to the **Managed service** tab if you are connecting to Elasticsearch Service in Elastic Cloud.++### Set the credentials+There are four files to edit to create a k8s secret when you are connecting to self managed Elasticsearch and Kibana (self managed is effectively anything other than the managed Elasticsearch Service in Elastic Cloud). The files are:+-->+### 自管理系统 {#self-managed}+如果你使用 Elastic 云中的 Elasticsearch 服务,切换到 **托管服务** 标签页。++### 设置凭据 {#set-the-credentials}+当你使用自管理的 Elasticsearch 和 Kibana (对比托管于 Elastic 云中的 Elasticsearch 服务,自管理更有效率),+创建 k8s secret 需要准备四个文件。这些文件是:++1. ELASTICSEARCH_HOSTS+2. ELASTICSEARCH_PASSWORD+3. ELASTICSEARCH_USERNAME+4. KIBANA_HOST++<!-- +Set these with the information for your Elasticsearch cluster and your Kibana host. Here are some examples (also see [*this configuration*](https://stackoverflow.com/questions/59892896/how-to-connect-from-minikube-to-elasticsearch-installed-on-host-local-developme/59892897#59892897))+-->+为你的 Elasticsearch 集群和 Kibana 主机设置这些信息。这里是一些例子+(另见[*此配置*](https://stackoverflow.com/questions/59892896/how-to-connect-from-minikube-to-elasticsearch-installed-on-host-local-developme/59892897#59892897))++#### `ELASTICSEARCH_HOSTS` {#elasticsearch-hosts}+<!-- +1. A nodeGroup from the Elastic Elasticsearch Helm Chart:+-->+1. 来自于 Elastic Elasticsearch Helm Chart 的节点组:++ ```shell+ ["http://elasticsearch-master.default.svc.cluster.local:9200"]+ ```+ <!-- + 1. A single Elasticsearch node running on a Mac where your Beats are running in Docker for Mac:+ -->+1. Mac 上的单节点的 Elasticsearch,Beats 运行在 Mac 的容器中:++ ```shell+ ["http://host.docker.internal:9200"]+ ```+ <!-- + 1. Two Elasticsearch nodes running in VMs or on physical hardware:+ -->+1. 运行在虚拟机或物理机上的两个 Elasticsearch 节点++ ```shell+ ["http://host1.example.com:9200", "http://host2.example.com:9200"]+ ```+<!-- +Edit `ELASTICSEARCH_HOSTS`+-->+编辑 `ELASTICSEARCH_HOSTS`+```shell+vi ELASTICSEARCH_HOSTS+```++#### `ELASTICSEARCH_PASSWORD` {#elasticsearch-password}+<!-- +Just the password; no whitespace, quotes, or <>:+-->+只有密码;没有空格、引号、<>:
这里的大于号和小于号是否要改成 < 和 > ?
comment created time in 3 days
Pull request review commentkubernetes/website
[zh] translate tutorial guestbook-logs-metrics-with-elk
+---+title: "示例: 添加日志和指标到 PHP / Redis 留言板案例"+content_type: tutorial+weight: 21+card:+ name: tutorials+ weight: 31+ title: "示例: 添加日志和指标到 PHP / Redis 留言板案例"+---+<!-- +title: "Example: Add logging and metrics to the PHP / Redis Guestbook example"+reviewers:+- sftim+content_type: tutorial+weight: 21+card:+ name: tutorials+ weight: 31+ title: "Example: Add logging and metrics to the PHP / Redis Guestbook example"+-->++<!-- overview -->+<!-- +This tutorial builds upon the [PHP Guestbook with Redis](/docs/tutorials/stateless-application/guestbook) tutorial. Lightweight log, metric, and network data open source shippers, or *Beats*, from Elastic are deployed in the same Kubernetes cluster as the guestbook. The Beats collect, parse, and index the data into Elasticsearch so that you can view and analyze the resulting operational information in Kibana. This example consists of the following components:++* A running instance of the [PHP Guestbook with Redis tutorial](/docs/tutorials/stateless-application/guestbook)+* Elasticsearch and Kibana+* Filebeat+* Metricbeat+* Packetbeat+-->+本教程建立在+[使用 Redis 部署 PHP 留言板](/zh/docs/tutorials/stateless-application/guestbook)教程之上。+*Beats*,是 Elastic 出品的开源的轻量级日志、指标和网络数据采集器,+将和留言板一同部署在 Kubernetes 集群中。+Beats 收集、分析、索引数据到 Elasticsearch,使你可以用 Kibana 查看并分析得到的运营信息。+本示例由以下内容组成:++* Elasticsearch 和 Kibana+* Filebeat+* Metricbeat+* Packetbeat++## {{% heading "objectives" %}}++<!-- +* Start up the PHP Guestbook with Redis.+* Install kube-state-metrics.+* Create a Kubernetes secret.+* Deploy the Beats.+* View dashboards of your logs and metrics.+-->+* 启动用 Redis 部署的 PHP 留言板。+* 安装 kube-state-metrics。+* 创建 Kubernetes secret。+* 部署 Beats。+* 用仪表板查看日志和指标。++## {{% heading "prerequisites" %}}+++{{< include "task-tutorial-prereqs.md" >}}+{{< version-check >}}++<!-- +Additionally you need:++* A running deployment of the [PHP Guestbook with Redis](/docs/tutorials/stateless-application/guestbook) tutorial.++* A running Elasticsearch and Kibana deployment. You can use [Elasticsearch Service in Elastic Cloud](https://cloud.elastic.co), run the [download files](https://www.elastic.co/guide/en/elastic-stack-get-started/current/get-started-elastic-stack.html) on your workstation or servers, or the [Elastic Helm Charts](https://github.com/elastic/helm-charts).+-->+此外,你还需要:++* 依照教程[使用 Redis 的 PHP留言本](/zh/docs/tutorials/stateless-application/guestbook)得到的一套运行中的部署环境。+* 一套运行中的Elasticsearch 和 Kibana部署环境。你可以使用[Elastic 云中的Elasticsearch 服务](https://cloud.elastic.co)、在工作站或者服务器上运行此[下载文件](https://www.elastic.co/guide/en/elastic-stack-get-started/current/get-started-elastic-stack.html)、或运行 [Elastic Helm Charts](https://github.com/elastic/helm-charts)。++<!-- lessoncontent -->++<!-- +## Start up the PHP Guestbook with Redis+This tutorial builds on the [PHP Guestbook with Redis](/docs/tutorials/stateless-application/guestbook) tutorial. If you have the guestbook application running, then you can monitor that. If you do not have it running then follow the instructions to deploy the guestbook and do not perform the **Cleanup** steps. Come back to this page when you have the guestbook running.+-->+## 启动用 Redis 部署的 PHP 留言板 {#start-up-the-php-guestbook-with-redis}+本教程建立在+[使用 Redis 部署 PHP 留言板](/zh/docs/tutorials/stateless-application/guestbook)之上。+如果你已经有一个运行的留言簿应用程序,那就监控它。+如果还没有,那就按照说明先部署留言板,但不要执行**清理**的步骤。+当留言板运行起来后,再返回本页。++<!-- +## Add a Cluster role binding+Create a [cluster level role binding](/docs/reference/access-authn-authz/rbac/#rolebinding-and-clusterrolebinding) so that you can deploy kube-state-metrics and the Beats at the cluster level (in kube-system).+-->+## 添加一个集群角色绑定 {#add-a-cluster-role-binding}+创建一个[集群范围的角色绑定](/zh/docs/reference/access-authn-authz/rbac/#rolebinding-和-clusterrolebinding),+以便你可以在集群范围(在 kube-system 中)部署 kube-state-metrics 和 Beats。++```shell+kubectl create clusterrolebinding cluster-admin-binding \+ --clusterrole=cluster-admin --user=<your email associated with the k8s provider account>+```++<!-- +## Install kube-state-metrics++Kubernetes [*kube-state-metrics*](https://github.com/kubernetes/kube-state-metrics) is a simple service that listens to the Kubernetes API server and generates metrics about the state of the objects. Metricbeat reports these metrics. Add kube-state-metrics to the Kubernetes cluster that the guestbook is running in.+--> +### 安装 kube-state-metrics {#install-kube-state-metrics}+Kubernetes [*kube-state-metrics*](https://github.com/kubernetes/kube-state-metrics)+是一个简单的服务,它侦听 Kubernetes API 服务器并生成对象状态的指标。+Metricbeat 报告这些指标。+添加 kube-state-metrics 到运行留言簿的 Kubernetes 集群。++```shell+git clone https://github.com/kubernetes/kube-state-metrics.git kube-state-metrics+kubectl apply -f kube-state-metrics/examples/standard+```++<!-- +### Check to see if kube-state-metrics is running+-->+### 检查 kube-state-metrics 是否正在运行 {#check-to-see-if-kube-state-metrics-is-running}+```shell+kubectl get pods --namespace=kube-system -l app.kubernetes.io/name=kube-state-metrics+```+<!-- +Output:+-->+输出;+```shell+NAME READY STATUS RESTARTS AGE+kube-state-metrics-89d656bf8-vdthm 1/1 Running 0 21s+```+<!-- +## Clone the Elastic examples GitHub repo+-->+## 从 GitHub 克隆 Elastic examples 库 {#clone-the-elastic-examples-github-repo}+```shell+git clone https://github.com/elastic/examples.git+```++<!-- +The rest of the commands will reference files in the `examples/beats-k8s-send-anywhere` directory, so change dir there:+-->+后续命令将引用目录 `examples/beats-k8s-send-anywhere` 中的文件,+所以把目录切换过去。++```shell+cd examples/beats-k8s-send-anywhere+```++<!-- +## Create a Kubernetes Secret+A Kubernetes {{< glossary_tooltip text="Secret" term_id="secret" >}} is an object that contains a small amount of sensitive data such as a password, a token, or a key. Such information might otherwise be put in a Pod specification or in an image; putting it in a Secret object allows for more control over how it is used, and reduces the risk of accidental exposure.++There are two sets of steps here, one for *self managed* Elasticsearch and Kibana (running on your servers or using the Elastic Helm Charts), and a second separate set for the *managed service* Elasticsearch Service in Elastic Cloud. Only create the secret for the type of Elasticsearch and Kibana system that you will use for this tutorial.+-->+## 创建 Kubernetes Secret {#create-a-kubernetes-secret}+Kubernetes {{< glossary_tooltip text="Secret" term_id="secret" >}}+是包含少量敏感数据(类似密码、令牌、秘钥等)的对象。+这类信息也可以放在 Pod 规格定义或者镜像中;+但放在 Secret 对象中,能更好的控制它的使用方式,也能减少意外泄露的风险。++{{< note >}}+这里有两套步骤,一套用于*自管理*的 Elasticsearch 和 Kibana(运行在你的服务器上或使用 Helm Charts),+另一套用于在 Elastic 云服务中*托管*的 Elasticsearch 服务。+在本教程中,只需要为 Elasticsearch 和 Kibana 系统创建 secret。+{{< /note >}}++{{< tabs name="tab_with_md" >}}+{{% tab name="自管理" %}}++<!-- +### Self managed+Switch to the **Managed service** tab if you are connecting to Elasticsearch Service in Elastic Cloud.++### Set the credentials+There are four files to edit to create a k8s secret when you are connecting to self managed Elasticsearch and Kibana (self managed is effectively anything other than the managed Elasticsearch Service in Elastic Cloud). The files are:+-->+### 自管理系统 {#self-managed}+如果你使用 Elastic 云中的 Elasticsearch 服务,切换到 **托管服务** 标签页。++### 设置凭据 {#set-the-credentials}+当你使用自管理的 Elasticsearch 和 Kibana (对比托管于 Elastic 云中的 Elasticsearch 服务,自管理更有效率),+创建 k8s secret 需要准备四个文件。这些文件是:++1. ELASTICSEARCH_HOSTS+2. ELASTICSEARCH_PASSWORD+3. ELASTICSEARCH_USERNAME+4. KIBANA_HOST++<!-- +Set these with the information for your Elasticsearch cluster and your Kibana host. Here are some examples (also see [*this configuration*](https://stackoverflow.com/questions/59892896/how-to-connect-from-minikube-to-elasticsearch-installed-on-host-local-developme/59892897#59892897))+-->+为你的 Elasticsearch 集群和 Kibana 主机设置这些信息。这里是一些例子+(另见[*此配置*](https://stackoverflow.com/questions/59892896/how-to-connect-from-minikube-to-elasticsearch-installed-on-host-local-developme/59892897#59892897))++#### `ELASTICSEARCH_HOSTS` {#elasticsearch-hosts}+<!-- +1. A nodeGroup from the Elastic Elasticsearch Helm Chart:+-->+1. 来自于 Elastic Elasticsearch Helm Chart 的节点组:++ ```shell+ ["http://elasticsearch-master.default.svc.cluster.local:9200"]+ ```+ <!-- + 1. A single Elasticsearch node running on a Mac where your Beats are running in Docker for Mac:+ -->+1. Mac 上的单节点的 Elasticsearch,Beats 运行在 Mac 的容器中:++ ```shell+ ["http://host.docker.internal:9200"]+ ```+ <!-- + 1. Two Elasticsearch nodes running in VMs or on physical hardware:+ -->+1. 运行在虚拟机或物理机上的两个 Elasticsearch 节点++ ```shell
not a shell command
comment created time in 3 days
Pull request review commentkubernetes/website
[zh] translate tutorial guestbook-logs-metrics-with-elk
+---+title: "示例: 添加日志和指标到 PHP / Redis 留言板案例"+content_type: tutorial+weight: 21+card:+ name: tutorials+ weight: 31+ title: "示例: 添加日志和指标到 PHP / Redis 留言板案例"+---+<!-- +title: "Example: Add logging and metrics to the PHP / Redis Guestbook example"+reviewers:+- sftim+content_type: tutorial+weight: 21+card:+ name: tutorials+ weight: 31+ title: "Example: Add logging and metrics to the PHP / Redis Guestbook example"+-->++<!-- overview -->+<!-- +This tutorial builds upon the [PHP Guestbook with Redis](/docs/tutorials/stateless-application/guestbook) tutorial. Lightweight log, metric, and network data open source shippers, or *Beats*, from Elastic are deployed in the same Kubernetes cluster as the guestbook. The Beats collect, parse, and index the data into Elasticsearch so that you can view and analyze the resulting operational information in Kibana. This example consists of the following components:++* A running instance of the [PHP Guestbook with Redis tutorial](/docs/tutorials/stateless-application/guestbook)+* Elasticsearch and Kibana+* Filebeat+* Metricbeat+* Packetbeat+-->+本教程建立在+[使用 Redis 部署 PHP 留言板](/zh/docs/tutorials/stateless-application/guestbook)教程之上。+*Beats*,是 Elastic 出品的开源的轻量级日志、指标和网络数据采集器,+将和留言板一同部署在 Kubernetes 集群中。+Beats 收集、分析、索引数据到 Elasticsearch,使你可以用 Kibana 查看并分析得到的运营信息。+本示例由以下内容组成:++* Elasticsearch 和 Kibana+* Filebeat+* Metricbeat+* Packetbeat++## {{% heading "objectives" %}}++<!-- +* Start up the PHP Guestbook with Redis.+* Install kube-state-metrics.+* Create a Kubernetes secret.+* Deploy the Beats.+* View dashboards of your logs and metrics.+-->+* 启动用 Redis 部署的 PHP 留言板。+* 安装 kube-state-metrics。+* 创建 Kubernetes secret。+* 部署 Beats。+* 用仪表板查看日志和指标。++## {{% heading "prerequisites" %}}+++{{< include "task-tutorial-prereqs.md" >}}+{{< version-check >}}++<!-- +Additionally you need:++* A running deployment of the [PHP Guestbook with Redis](/docs/tutorials/stateless-application/guestbook) tutorial.++* A running Elasticsearch and Kibana deployment. You can use [Elasticsearch Service in Elastic Cloud](https://cloud.elastic.co), run the [download files](https://www.elastic.co/guide/en/elastic-stack-get-started/current/get-started-elastic-stack.html) on your workstation or servers, or the [Elastic Helm Charts](https://github.com/elastic/helm-charts).+-->+此外,你还需要:++* 依照教程[使用 Redis 的 PHP留言本](/zh/docs/tutorials/stateless-application/guestbook)得到的一套运行中的部署环境。+* 一套运行中的Elasticsearch 和 Kibana部署环境。你可以使用[Elastic 云中的Elasticsearch 服务](https://cloud.elastic.co)、在工作站或者服务器上运行此[下载文件](https://www.elastic.co/guide/en/elastic-stack-get-started/current/get-started-elastic-stack.html)、或运行 [Elastic Helm Charts](https://github.com/elastic/helm-charts)。++<!-- lessoncontent -->++<!-- +## Start up the PHP Guestbook with Redis+This tutorial builds on the [PHP Guestbook with Redis](/docs/tutorials/stateless-application/guestbook) tutorial. If you have the guestbook application running, then you can monitor that. If you do not have it running then follow the instructions to deploy the guestbook and do not perform the **Cleanup** steps. Come back to this page when you have the guestbook running.+-->+## 启动用 Redis 部署的 PHP 留言板 {#start-up-the-php-guestbook-with-redis}+本教程建立在+[使用 Redis 部署 PHP 留言板](/zh/docs/tutorials/stateless-application/guestbook)之上。+如果你已经有一个运行的留言簿应用程序,那就监控它。+如果还没有,那就按照说明先部署留言板,但不要执行**清理**的步骤。+当留言板运行起来后,再返回本页。++<!-- +## Add a Cluster role binding+Create a [cluster level role binding](/docs/reference/access-authn-authz/rbac/#rolebinding-and-clusterrolebinding) so that you can deploy kube-state-metrics and the Beats at the cluster level (in kube-system).+-->+## 添加一个集群角色绑定 {#add-a-cluster-role-binding}+创建一个[集群范围的角色绑定](/zh/docs/reference/access-authn-authz/rbac/#rolebinding-和-clusterrolebinding),+以便你可以在集群范围(在 kube-system 中)部署 kube-state-metrics 和 Beats。++```shell+kubectl create clusterrolebinding cluster-admin-binding \+ --clusterrole=cluster-admin --user=<your email associated with the k8s provider account>+```++<!-- +## Install kube-state-metrics++Kubernetes [*kube-state-metrics*](https://github.com/kubernetes/kube-state-metrics) is a simple service that listens to the Kubernetes API server and generates metrics about the state of the objects. Metricbeat reports these metrics. Add kube-state-metrics to the Kubernetes cluster that the guestbook is running in.+--> +### 安装 kube-state-metrics {#install-kube-state-metrics}+Kubernetes [*kube-state-metrics*](https://github.com/kubernetes/kube-state-metrics)+是一个简单的服务,它侦听 Kubernetes API 服务器并生成对象状态的指标。+Metricbeat 报告这些指标。+添加 kube-state-metrics 到运行留言簿的 Kubernetes 集群。++```shell+git clone https://github.com/kubernetes/kube-state-metrics.git kube-state-metrics+kubectl apply -f kube-state-metrics/examples/standard+```++<!-- +### Check to see if kube-state-metrics is running+-->+### 检查 kube-state-metrics 是否正在运行 {#check-to-see-if-kube-state-metrics-is-running}+```shell+kubectl get pods --namespace=kube-system -l app.kubernetes.io/name=kube-state-metrics+```+<!-- +Output:+-->+输出;+```shell+NAME READY STATUS RESTARTS AGE+kube-state-metrics-89d656bf8-vdthm 1/1 Running 0 21s+```+<!-- +## Clone the Elastic examples GitHub repo+-->+## 从 GitHub 克隆 Elastic examples 库 {#clone-the-elastic-examples-github-repo}+```shell+git clone https://github.com/elastic/examples.git+```++<!-- +The rest of the commands will reference files in the `examples/beats-k8s-send-anywhere` directory, so change dir there:+-->+后续命令将引用目录 `examples/beats-k8s-send-anywhere` 中的文件,+所以把目录切换过去。++```shell+cd examples/beats-k8s-send-anywhere+```++<!-- +## Create a Kubernetes Secret+A Kubernetes {{< glossary_tooltip text="Secret" term_id="secret" >}} is an object that contains a small amount of sensitive data such as a password, a token, or a key. Such information might otherwise be put in a Pod specification or in an image; putting it in a Secret object allows for more control over how it is used, and reduces the risk of accidental exposure.++There are two sets of steps here, one for *self managed* Elasticsearch and Kibana (running on your servers or using the Elastic Helm Charts), and a second separate set for the *managed service* Elasticsearch Service in Elastic Cloud. Only create the secret for the type of Elasticsearch and Kibana system that you will use for this tutorial.+-->+## 创建 Kubernetes Secret {#create-a-kubernetes-secret}+Kubernetes {{< glossary_tooltip text="Secret" term_id="secret" >}}+是包含少量敏感数据(类似密码、令牌、秘钥等)的对象。+这类信息也可以放在 Pod 规格定义或者镜像中;+但放在 Secret 对象中,能更好的控制它的使用方式,也能减少意外泄露的风险。++{{< note >}}+这里有两套步骤,一套用于*自管理*的 Elasticsearch 和 Kibana(运行在你的服务器上或使用 Helm Charts),+另一套用于在 Elastic 云服务中*托管*的 Elasticsearch 服务。+在本教程中,只需要为 Elasticsearch 和 Kibana 系统创建 secret。+{{< /note >}}++{{< tabs name="tab_with_md" >}}+{{% tab name="自管理" %}}++<!-- +### Self managed+Switch to the **Managed service** tab if you are connecting to Elasticsearch Service in Elastic Cloud.++### Set the credentials+There are four files to edit to create a k8s secret when you are connecting to self managed Elasticsearch and Kibana (self managed is effectively anything other than the managed Elasticsearch Service in Elastic Cloud). The files are:+-->+### 自管理系统 {#self-managed}+如果你使用 Elastic 云中的 Elasticsearch 服务,切换到 **托管服务** 标签页。++### 设置凭据 {#set-the-credentials}+当你使用自管理的 Elasticsearch 和 Kibana (对比托管于 Elastic 云中的 Elasticsearch 服务,自管理更有效率),+创建 k8s secret 需要准备四个文件。这些文件是:++1. ELASTICSEARCH_HOSTS+2. ELASTICSEARCH_PASSWORD+3. ELASTICSEARCH_USERNAME+4. KIBANA_HOST++<!-- +Set these with the information for your Elasticsearch cluster and your Kibana host. Here are some examples (also see [*this configuration*](https://stackoverflow.com/questions/59892896/how-to-connect-from-minikube-to-elasticsearch-installed-on-host-local-developme/59892897#59892897))+-->+为你的 Elasticsearch 集群和 Kibana 主机设置这些信息。这里是一些例子+(另见[*此配置*](https://stackoverflow.com/questions/59892896/how-to-connect-from-minikube-to-elasticsearch-installed-on-host-local-developme/59892897#59892897))++#### `ELASTICSEARCH_HOSTS` {#elasticsearch-hosts}+<!-- +1. A nodeGroup from the Elastic Elasticsearch Helm Chart:+-->+1. 来自于 Elastic Elasticsearch Helm Chart 的节点组:++ ```shell+ ["http://elasticsearch-master.default.svc.cluster.local:9200"]+ ```+ <!-- + 1. A single Elasticsearch node running on a Mac where your Beats are running in Docker for Mac:+ -->+1. Mac 上的单节点的 Elasticsearch,Beats 运行在 Mac 的容器中:++ ```shell+ ["http://host.docker.internal:9200"]+ ```+ <!-- + 1. Two Elasticsearch nodes running in VMs or on physical hardware:+ -->+1. 运行在虚拟机或物理机上的两个 Elasticsearch 节点++ ```shell+ ["http://host1.example.com:9200", "http://host2.example.com:9200"]+ ```+<!-- +Edit `ELASTICSEARCH_HOSTS`+-->+编辑 `ELASTICSEARCH_HOSTS`+```shell+vi ELASTICSEARCH_HOSTS+```++#### `ELASTICSEARCH_PASSWORD` {#elasticsearch-password}+<!-- +Just the password; no whitespace, quotes, or <>:+-->+只有密码;没有空格、引号、<>:+ <yoursecretpassword>
为确保结果正确,236 行可改为用三个反引号括起来的代码段形式。用四个空格缩进的这种不太靠谱。
<yoursecretpassword>
comment created time in 3 days
Pull request review commentkubernetes/website
[zh] translate tutorial guestbook-logs-metrics-with-elk
+---+title: "示例: 添加日志和指标到 PHP / Redis 留言板案例"+content_type: tutorial+weight: 21+card:+ name: tutorials+ weight: 31+ title: "示例: 添加日志和指标到 PHP / Redis 留言板案例"+---+<!-- +title: "Example: Add logging and metrics to the PHP / Redis Guestbook example"+reviewers:+- sftim+content_type: tutorial+weight: 21+card:+ name: tutorials+ weight: 31+ title: "Example: Add logging and metrics to the PHP / Redis Guestbook example"+-->++<!-- overview -->+<!-- +This tutorial builds upon the [PHP Guestbook with Redis](/docs/tutorials/stateless-application/guestbook) tutorial. Lightweight log, metric, and network data open source shippers, or *Beats*, from Elastic are deployed in the same Kubernetes cluster as the guestbook. The Beats collect, parse, and index the data into Elasticsearch so that you can view and analyze the resulting operational information in Kibana. This example consists of the following components:++* A running instance of the [PHP Guestbook with Redis tutorial](/docs/tutorials/stateless-application/guestbook)+* Elasticsearch and Kibana+* Filebeat+* Metricbeat+* Packetbeat+-->+本教程建立在+[使用 Redis 部署 PHP 留言板](/zh/docs/tutorials/stateless-application/guestbook)教程之上。+*Beats*,是 Elastic 出品的开源的轻量级日志、指标和网络数据采集器,+将和留言板一同部署在 Kubernetes 集群中。+Beats 收集、分析、索引数据到 Elasticsearch,使你可以用 Kibana 查看并分析得到的运营信息。+本示例由以下内容组成:++* Elasticsearch 和 Kibana+* Filebeat+* Metricbeat+* Packetbeat++## {{% heading "objectives" %}}++<!-- +* Start up the PHP Guestbook with Redis.+* Install kube-state-metrics.+* Create a Kubernetes secret.+* Deploy the Beats.+* View dashboards of your logs and metrics.+-->+* 启动用 Redis 部署的 PHP 留言板。+* 安装 kube-state-metrics。+* 创建 Kubernetes secret。+* 部署 Beats。+* 用仪表板查看日志和指标。++## {{% heading "prerequisites" %}}+++{{< include "task-tutorial-prereqs.md" >}}+{{< version-check >}}++<!-- +Additionally you need:++* A running deployment of the [PHP Guestbook with Redis](/docs/tutorials/stateless-application/guestbook) tutorial.++* A running Elasticsearch and Kibana deployment. You can use [Elasticsearch Service in Elastic Cloud](https://cloud.elastic.co), run the [download files](https://www.elastic.co/guide/en/elastic-stack-get-started/current/get-started-elastic-stack.html) on your workstation or servers, or the [Elastic Helm Charts](https://github.com/elastic/helm-charts).+-->+此外,你还需要:++* 依照教程[使用 Redis 的 PHP留言本](/zh/docs/tutorials/stateless-application/guestbook)得到的一套运行中的部署环境。+* 一套运行中的Elasticsearch 和 Kibana部署环境。你可以使用[Elastic 云中的Elasticsearch 服务](https://cloud.elastic.co)、在工作站或者服务器上运行此[下载文件](https://www.elastic.co/guide/en/elastic-stack-get-started/current/get-started-elastic-stack.html)、或运行 [Elastic Helm Charts](https://github.com/elastic/helm-charts)。++<!-- lessoncontent -->++<!-- +## Start up the PHP Guestbook with Redis+This tutorial builds on the [PHP Guestbook with Redis](/docs/tutorials/stateless-application/guestbook) tutorial. If you have the guestbook application running, then you can monitor that. If you do not have it running then follow the instructions to deploy the guestbook and do not perform the **Cleanup** steps. Come back to this page when you have the guestbook running.+-->+## 启动用 Redis 部署的 PHP 留言板 {#start-up-the-php-guestbook-with-redis}+本教程建立在+[使用 Redis 部署 PHP 留言板](/zh/docs/tutorials/stateless-application/guestbook)之上。+如果你已经有一个运行的留言簿应用程序,那就监控它。+如果还没有,那就按照说明先部署留言板,但不要执行**清理**的步骤。+当留言板运行起来后,再返回本页。++<!-- +## Add a Cluster role binding+Create a [cluster level role binding](/docs/reference/access-authn-authz/rbac/#rolebinding-and-clusterrolebinding) so that you can deploy kube-state-metrics and the Beats at the cluster level (in kube-system).+-->+## 添加一个集群角色绑定 {#add-a-cluster-role-binding}+创建一个[集群范围的角色绑定](/zh/docs/reference/access-authn-authz/rbac/#rolebinding-和-clusterrolebinding),+以便你可以在集群范围(在 kube-system 中)部署 kube-state-metrics 和 Beats。++```shell+kubectl create clusterrolebinding cluster-admin-binding \+ --clusterrole=cluster-admin --user=<your email associated with the k8s provider account>+```++<!-- +## Install kube-state-metrics++Kubernetes [*kube-state-metrics*](https://github.com/kubernetes/kube-state-metrics) is a simple service that listens to the Kubernetes API server and generates metrics about the state of the objects. Metricbeat reports these metrics. Add kube-state-metrics to the Kubernetes cluster that the guestbook is running in.+--> +### 安装 kube-state-metrics {#install-kube-state-metrics}+Kubernetes [*kube-state-metrics*](https://github.com/kubernetes/kube-state-metrics)+是一个简单的服务,它侦听 Kubernetes API 服务器并生成对象状态的指标。+Metricbeat 报告这些指标。+添加 kube-state-metrics 到运行留言簿的 Kubernetes 集群。++```shell+git clone https://github.com/kubernetes/kube-state-metrics.git kube-state-metrics+kubectl apply -f kube-state-metrics/examples/standard+```++<!-- +### Check to see if kube-state-metrics is running+-->+### 检查 kube-state-metrics 是否正在运行 {#check-to-see-if-kube-state-metrics-is-running}+```shell+kubectl get pods --namespace=kube-system -l app.kubernetes.io/name=kube-state-metrics+```+<!-- +Output:+-->+输出;+```shell+NAME READY STATUS RESTARTS AGE+kube-state-metrics-89d656bf8-vdthm 1/1 Running 0 21s+```+<!-- +## Clone the Elastic examples GitHub repo+-->+## 从 GitHub 克隆 Elastic examples 库 {#clone-the-elastic-examples-github-repo}+```shell+git clone https://github.com/elastic/examples.git+```++<!-- +The rest of the commands will reference files in the `examples/beats-k8s-send-anywhere` directory, so change dir there:+-->+后续命令将引用目录 `examples/beats-k8s-send-anywhere` 中的文件,+所以把目录切换过去。++```shell+cd examples/beats-k8s-send-anywhere+```++<!-- +## Create a Kubernetes Secret+A Kubernetes {{< glossary_tooltip text="Secret" term_id="secret" >}} is an object that contains a small amount of sensitive data such as a password, a token, or a key. Such information might otherwise be put in a Pod specification or in an image; putting it in a Secret object allows for more control over how it is used, and reduces the risk of accidental exposure.++There are two sets of steps here, one for *self managed* Elasticsearch and Kibana (running on your servers or using the Elastic Helm Charts), and a second separate set for the *managed service* Elasticsearch Service in Elastic Cloud. Only create the secret for the type of Elasticsearch and Kibana system that you will use for this tutorial.+-->+## 创建 Kubernetes Secret {#create-a-kubernetes-secret}+Kubernetes {{< glossary_tooltip text="Secret" term_id="secret" >}}+是包含少量敏感数据(类似密码、令牌、秘钥等)的对象。+这类信息也可以放在 Pod 规格定义或者镜像中;+但放在 Secret 对象中,能更好的控制它的使用方式,也能减少意外泄露的风险。++{{< note >}}+这里有两套步骤,一套用于*自管理*的 Elasticsearch 和 Kibana(运行在你的服务器上或使用 Helm Charts),+另一套用于在 Elastic 云服务中*托管*的 Elasticsearch 服务。+在本教程中,只需要为 Elasticsearch 和 Kibana 系统创建 secret。+{{< /note >}}++{{< tabs name="tab_with_md" >}}+{{% tab name="自管理" %}}++<!-- +### Self managed+Switch to the **Managed service** tab if you are connecting to Elasticsearch Service in Elastic Cloud.++### Set the credentials+There are four files to edit to create a k8s secret when you are connecting to self managed Elasticsearch and Kibana (self managed is effectively anything other than the managed Elasticsearch Service in Elastic Cloud). The files are:+-->+### 自管理系统 {#self-managed}+如果你使用 Elastic 云中的 Elasticsearch 服务,切换到 **托管服务** 标签页。++### 设置凭据 {#set-the-credentials}+当你使用自管理的 Elasticsearch 和 Kibana (对比托管于 Elastic 云中的 Elasticsearch 服务,自管理更有效率),+创建 k8s secret 需要准备四个文件。这些文件是:++1. ELASTICSEARCH_HOSTS+2. ELASTICSEARCH_PASSWORD+3. ELASTICSEARCH_USERNAME+4. KIBANA_HOST++<!-- +Set these with the information for your Elasticsearch cluster and your Kibana host. Here are some examples (also see [*this configuration*](https://stackoverflow.com/questions/59892896/how-to-connect-from-minikube-to-elasticsearch-installed-on-host-local-developme/59892897#59892897))+-->+为你的 Elasticsearch 集群和 Kibana 主机设置这些信息。这里是一些例子+(另见[*此配置*](https://stackoverflow.com/questions/59892896/how-to-connect-from-minikube-to-elasticsearch-installed-on-host-local-developme/59892897#59892897))++#### `ELASTICSEARCH_HOSTS` {#elasticsearch-hosts}+<!-- +1. A nodeGroup from the Elastic Elasticsearch Helm Chart:+-->+1. 来自于 Elastic Elasticsearch Helm Chart 的节点组:++ ```shell+ ["http://elasticsearch-master.default.svc.cluster.local:9200"]+ ```+ <!-- + 1. A single Elasticsearch node running on a Mac where your Beats are running in Docker for Mac:+ -->+1. Mac 上的单节点的 Elasticsearch,Beats 运行在 Mac 的容器中:++ ```shell
this is not shell either
comment created time in 3 days
Pull request review commentkubernetes/website
[zh] translate tutorial guestbook-logs-metrics-with-elk
+---+title: "示例: 添加日志和指标到 PHP / Redis 留言板案例"+content_type: tutorial+weight: 21+card:+ name: tutorials+ weight: 31+ title: "示例: 添加日志和指标到 PHP / Redis 留言板案例"+---+<!-- +title: "Example: Add logging and metrics to the PHP / Redis Guestbook example"+reviewers:+- sftim+content_type: tutorial+weight: 21+card:+ name: tutorials+ weight: 31+ title: "Example: Add logging and metrics to the PHP / Redis Guestbook example"+-->++<!-- overview -->+<!-- +This tutorial builds upon the [PHP Guestbook with Redis](/docs/tutorials/stateless-application/guestbook) tutorial. Lightweight log, metric, and network data open source shippers, or *Beats*, from Elastic are deployed in the same Kubernetes cluster as the guestbook. The Beats collect, parse, and index the data into Elasticsearch so that you can view and analyze the resulting operational information in Kibana. This example consists of the following components:++* A running instance of the [PHP Guestbook with Redis tutorial](/docs/tutorials/stateless-application/guestbook)+* Elasticsearch and Kibana+* Filebeat+* Metricbeat+* Packetbeat+-->+本教程建立在+[使用 Redis 部署 PHP 留言板](/zh/docs/tutorials/stateless-application/guestbook)教程之上。+*Beats*,是 Elastic 出品的开源的轻量级日志、指标和网络数据采集器,+将和留言板一同部署在 Kubernetes 集群中。+Beats 收集、分析、索引数据到 Elasticsearch,使你可以用 Kibana 查看并分析得到的运营信息。+本示例由以下内容组成:++* Elasticsearch 和 Kibana+* Filebeat+* Metricbeat+* Packetbeat++## {{% heading "objectives" %}}++<!-- +* Start up the PHP Guestbook with Redis.+* Install kube-state-metrics.+* Create a Kubernetes secret.+* Deploy the Beats.+* View dashboards of your logs and metrics.+-->+* 启动用 Redis 部署的 PHP 留言板。+* 安装 kube-state-metrics。+* 创建 Kubernetes secret。+* 部署 Beats。+* 用仪表板查看日志和指标。++## {{% heading "prerequisites" %}}+++{{< include "task-tutorial-prereqs.md" >}}+{{< version-check >}}++<!-- +Additionally you need:++* A running deployment of the [PHP Guestbook with Redis](/docs/tutorials/stateless-application/guestbook) tutorial.++* A running Elasticsearch and Kibana deployment. You can use [Elasticsearch Service in Elastic Cloud](https://cloud.elastic.co), run the [download files](https://www.elastic.co/guide/en/elastic-stack-get-started/current/get-started-elastic-stack.html) on your workstation or servers, or the [Elastic Helm Charts](https://github.com/elastic/helm-charts).+-->+此外,你还需要:++* 依照教程[使用 Redis 的 PHP留言本](/zh/docs/tutorials/stateless-application/guestbook)得到的一套运行中的部署环境。+* 一套运行中的Elasticsearch 和 Kibana部署环境。你可以使用[Elastic 云中的Elasticsearch 服务](https://cloud.elastic.co)、在工作站或者服务器上运行此[下载文件](https://www.elastic.co/guide/en/elastic-stack-get-started/current/get-started-elastic-stack.html)、或运行 [Elastic Helm Charts](https://github.com/elastic/helm-charts)。++<!-- lessoncontent -->++<!-- +## Start up the PHP Guestbook with Redis+This tutorial builds on the [PHP Guestbook with Redis](/docs/tutorials/stateless-application/guestbook) tutorial. If you have the guestbook application running, then you can monitor that. If you do not have it running then follow the instructions to deploy the guestbook and do not perform the **Cleanup** steps. Come back to this page when you have the guestbook running.+-->+## 启动用 Redis 部署的 PHP 留言板 {#start-up-the-php-guestbook-with-redis}+本教程建立在+[使用 Redis 部署 PHP 留言板](/zh/docs/tutorials/stateless-application/guestbook)之上。+如果你已经有一个运行的留言簿应用程序,那就监控它。+如果还没有,那就按照说明先部署留言板,但不要执行**清理**的步骤。+当留言板运行起来后,再返回本页。++<!-- +## Add a Cluster role binding+Create a [cluster level role binding](/docs/reference/access-authn-authz/rbac/#rolebinding-and-clusterrolebinding) so that you can deploy kube-state-metrics and the Beats at the cluster level (in kube-system).+-->+## 添加一个集群角色绑定 {#add-a-cluster-role-binding}+创建一个[集群范围的角色绑定](/zh/docs/reference/access-authn-authz/rbac/#rolebinding-和-clusterrolebinding),+以便你可以在集群范围(在 kube-system 中)部署 kube-state-metrics 和 Beats。++```shell+kubectl create clusterrolebinding cluster-admin-binding \+ --clusterrole=cluster-admin --user=<your email associated with the k8s provider account>+```++<!-- +## Install kube-state-metrics++Kubernetes [*kube-state-metrics*](https://github.com/kubernetes/kube-state-metrics) is a simple service that listens to the Kubernetes API server and generates metrics about the state of the objects. Metricbeat reports these metrics. Add kube-state-metrics to the Kubernetes cluster that the guestbook is running in.+--> +### 安装 kube-state-metrics {#install-kube-state-metrics}+Kubernetes [*kube-state-metrics*](https://github.com/kubernetes/kube-state-metrics)+是一个简单的服务,它侦听 Kubernetes API 服务器并生成对象状态的指标。+Metricbeat 报告这些指标。+添加 kube-state-metrics 到运行留言簿的 Kubernetes 集群。++```shell+git clone https://github.com/kubernetes/kube-state-metrics.git kube-state-metrics+kubectl apply -f kube-state-metrics/examples/standard+```++<!-- +### Check to see if kube-state-metrics is running+-->+### 检查 kube-state-metrics 是否正在运行 {#check-to-see-if-kube-state-metrics-is-running}+```shell+kubectl get pods --namespace=kube-system -l app.kubernetes.io/name=kube-state-metrics+```+<!-- +Output:+-->+输出;+```shell+NAME READY STATUS RESTARTS AGE+kube-state-metrics-89d656bf8-vdthm 1/1 Running 0 21s+```+<!-- +## Clone the Elastic examples GitHub repo+-->+## 从 GitHub 克隆 Elastic examples 库 {#clone-the-elastic-examples-github-repo}+```shell+git clone https://github.com/elastic/examples.git+```++<!-- +The rest of the commands will reference files in the `examples/beats-k8s-send-anywhere` directory, so change dir there:+-->+后续命令将引用目录 `examples/beats-k8s-send-anywhere` 中的文件,+所以把目录切换过去。++```shell+cd examples/beats-k8s-send-anywhere+```++<!-- +## Create a Kubernetes Secret+A Kubernetes {{< glossary_tooltip text="Secret" term_id="secret" >}} is an object that contains a small amount of sensitive data such as a password, a token, or a key. Such information might otherwise be put in a Pod specification or in an image; putting it in a Secret object allows for more control over how it is used, and reduces the risk of accidental exposure.++There are two sets of steps here, one for *self managed* Elasticsearch and Kibana (running on your servers or using the Elastic Helm Charts), and a second separate set for the *managed service* Elasticsearch Service in Elastic Cloud. Only create the secret for the type of Elasticsearch and Kibana system that you will use for this tutorial.+-->+## 创建 Kubernetes Secret {#create-a-kubernetes-secret}+Kubernetes {{< glossary_tooltip text="Secret" term_id="secret" >}}+是包含少量敏感数据(类似密码、令牌、秘钥等)的对象。+这类信息也可以放在 Pod 规格定义或者镜像中;+但放在 Secret 对象中,能更好的控制它的使用方式,也能减少意外泄露的风险。++{{< note >}}+这里有两套步骤,一套用于*自管理*的 Elasticsearch 和 Kibana(运行在你的服务器上或使用 Helm Charts),+另一套用于在 Elastic 云服务中*托管*的 Elasticsearch 服务。+在本教程中,只需要为 Elasticsearch 和 Kibana 系统创建 secret。+{{< /note >}}++{{< tabs name="tab_with_md" >}}+{{% tab name="自管理" %}}++<!-- +### Self managed+Switch to the **Managed service** tab if you are connecting to Elasticsearch Service in Elastic Cloud.++### Set the credentials+There are four files to edit to create a k8s secret when you are connecting to self managed Elasticsearch and Kibana (self managed is effectively anything other than the managed Elasticsearch Service in Elastic Cloud). The files are:+-->+### 自管理系统 {#self-managed}+如果你使用 Elastic 云中的 Elasticsearch 服务,切换到 **托管服务** 标签页。
"Managed service" 可考虑不翻译,因为该站点没有中文化。
comment created time in 3 days
Pull request review commentkubernetes/website
[zh] translate tutorial guestbook-logs-metrics-with-elk
+---+title: "示例: 添加日志和指标到 PHP / Redis 留言板案例"+content_type: tutorial+weight: 21+card:+ name: tutorials+ weight: 31+ title: "示例: 添加日志和指标到 PHP / Redis 留言板案例"+---+<!-- +title: "Example: Add logging and metrics to the PHP / Redis Guestbook example"+reviewers:+- sftim+content_type: tutorial+weight: 21+card:+ name: tutorials+ weight: 31+ title: "Example: Add logging and metrics to the PHP / Redis Guestbook example"+-->++<!-- overview -->+<!-- +This tutorial builds upon the [PHP Guestbook with Redis](/docs/tutorials/stateless-application/guestbook) tutorial. Lightweight log, metric, and network data open source shippers, or *Beats*, from Elastic are deployed in the same Kubernetes cluster as the guestbook. The Beats collect, parse, and index the data into Elasticsearch so that you can view and analyze the resulting operational information in Kibana. This example consists of the following components:++* A running instance of the [PHP Guestbook with Redis tutorial](/docs/tutorials/stateless-application/guestbook)+* Elasticsearch and Kibana+* Filebeat+* Metricbeat+* Packetbeat+-->+本教程建立在+[使用 Redis 部署 PHP 留言板](/zh/docs/tutorials/stateless-application/guestbook)教程之上。+*Beats*,是 Elastic 出品的开源的轻量级日志、指标和网络数据采集器,+将和留言板一同部署在 Kubernetes 集群中。+Beats 收集、分析、索引数据到 Elasticsearch,使你可以用 Kibana 查看并分析得到的运营信息。+本示例由以下内容组成:++* Elasticsearch 和 Kibana+* Filebeat+* Metricbeat+* Packetbeat++## {{% heading "objectives" %}}++<!-- +* Start up the PHP Guestbook with Redis.+* Install kube-state-metrics.+* Create a Kubernetes secret.+* Deploy the Beats.+* View dashboards of your logs and metrics.+-->+* 启动用 Redis 部署的 PHP 留言板。+* 安装 kube-state-metrics。+* 创建 Kubernetes secret。+* 部署 Beats。+* 用仪表板查看日志和指标。++## {{% heading "prerequisites" %}}+++{{< include "task-tutorial-prereqs.md" >}}+{{< version-check >}}++<!-- +Additionally you need:++* A running deployment of the [PHP Guestbook with Redis](/docs/tutorials/stateless-application/guestbook) tutorial.++* A running Elasticsearch and Kibana deployment. You can use [Elasticsearch Service in Elastic Cloud](https://cloud.elastic.co), run the [download files](https://www.elastic.co/guide/en/elastic-stack-get-started/current/get-started-elastic-stack.html) on your workstation or servers, or the [Elastic Helm Charts](https://github.com/elastic/helm-charts).+-->+此外,你还需要:++* 依照教程[使用 Redis 的 PHP留言本](/zh/docs/tutorials/stateless-application/guestbook)得到的一套运行中的部署环境。+* 一套运行中的Elasticsearch 和 Kibana部署环境。你可以使用[Elastic 云中的Elasticsearch 服务](https://cloud.elastic.co)、在工作站或者服务器上运行此[下载文件](https://www.elastic.co/guide/en/elastic-stack-get-started/current/get-started-elastic-stack.html)、或运行 [Elastic Helm Charts](https://github.com/elastic/helm-charts)。++<!-- lessoncontent -->++<!-- +## Start up the PHP Guestbook with Redis+This tutorial builds on the [PHP Guestbook with Redis](/docs/tutorials/stateless-application/guestbook) tutorial. If you have the guestbook application running, then you can monitor that. If you do not have it running then follow the instructions to deploy the guestbook and do not perform the **Cleanup** steps. Come back to this page when you have the guestbook running.+-->+## 启动用 Redis 部署的 PHP 留言板 {#start-up-the-php-guestbook-with-redis}+本教程建立在+[使用 Redis 部署 PHP 留言板](/zh/docs/tutorials/stateless-application/guestbook)之上。+如果你已经有一个运行的留言簿应用程序,那就监控它。+如果还没有,那就按照说明先部署留言板,但不要执行**清理**的步骤。+当留言板运行起来后,再返回本页。++<!-- +## Add a Cluster role binding+Create a [cluster level role binding](/docs/reference/access-authn-authz/rbac/#rolebinding-and-clusterrolebinding) so that you can deploy kube-state-metrics and the Beats at the cluster level (in kube-system).+-->+## 添加一个集群角色绑定 {#add-a-cluster-role-binding}+创建一个[集群范围的角色绑定](/zh/docs/reference/access-authn-authz/rbac/#rolebinding-和-clusterrolebinding),+以便你可以在集群范围(在 kube-system 中)部署 kube-state-metrics 和 Beats。++```shell+kubectl create clusterrolebinding cluster-admin-binding \+ --clusterrole=cluster-admin --user=<your email associated with the k8s provider account>+```++<!-- +## Install kube-state-metrics++Kubernetes [*kube-state-metrics*](https://github.com/kubernetes/kube-state-metrics) is a simple service that listens to the Kubernetes API server and generates metrics about the state of the objects. Metricbeat reports these metrics. Add kube-state-metrics to the Kubernetes cluster that the guestbook is running in.+--> +### 安装 kube-state-metrics {#install-kube-state-metrics}+Kubernetes [*kube-state-metrics*](https://github.com/kubernetes/kube-state-metrics)+是一个简单的服务,它侦听 Kubernetes API 服务器并生成对象状态的指标。+Metricbeat 报告这些指标。+添加 kube-state-metrics 到运行留言簿的 Kubernetes 集群。++```shell+git clone https://github.com/kubernetes/kube-state-metrics.git kube-state-metrics+kubectl apply -f kube-state-metrics/examples/standard+```++<!-- +### Check to see if kube-state-metrics is running+-->+### 检查 kube-state-metrics 是否正在运行 {#check-to-see-if-kube-state-metrics-is-running}+```shell+kubectl get pods --namespace=kube-system -l app.kubernetes.io/name=kube-state-metrics+```+<!-- +Output:+-->+输出;+```shell+NAME READY STATUS RESTARTS AGE+kube-state-metrics-89d656bf8-vdthm 1/1 Running 0 21s+```+<!-- +## Clone the Elastic examples GitHub repo+-->+## 从 GitHub 克隆 Elastic examples 库 {#clone-the-elastic-examples-github-repo}+```shell+git clone https://github.com/elastic/examples.git+```++<!-- +The rest of the commands will reference files in the `examples/beats-k8s-send-anywhere` directory, so change dir there:+-->+后续命令将引用目录 `examples/beats-k8s-send-anywhere` 中的文件,+所以把目录切换过去。++```shell+cd examples/beats-k8s-send-anywhere+```++<!-- +## Create a Kubernetes Secret+A Kubernetes {{< glossary_tooltip text="Secret" term_id="secret" >}} is an object that contains a small amount of sensitive data such as a password, a token, or a key. Such information might otherwise be put in a Pod specification or in an image; putting it in a Secret object allows for more control over how it is used, and reduces the risk of accidental exposure.++There are two sets of steps here, one for *self managed* Elasticsearch and Kibana (running on your servers or using the Elastic Helm Charts), and a second separate set for the *managed service* Elasticsearch Service in Elastic Cloud. Only create the secret for the type of Elasticsearch and Kibana system that you will use for this tutorial.+-->+## 创建 Kubernetes Secret {#create-a-kubernetes-secret}+Kubernetes {{< glossary_tooltip text="Secret" term_id="secret" >}}+是包含少量敏感数据(类似密码、令牌、秘钥等)的对象。+这类信息也可以放在 Pod 规格定义或者镜像中;+但放在 Secret 对象中,能更好的控制它的使用方式,也能减少意外泄露的风险。++{{< note >}}+这里有两套步骤,一套用于*自管理*的 Elasticsearch 和 Kibana(运行在你的服务器上或使用 Helm Charts),+另一套用于在 Elastic 云服务中*托管*的 Elasticsearch 服务。+在本教程中,只需要为 Elasticsearch 和 Kibana 系统创建 secret。+{{< /note >}}++{{< tabs name="tab_with_md" >}}+{{% tab name="自管理" %}}++<!-- +### Self managed+Switch to the **Managed service** tab if you are connecting to Elasticsearch Service in Elastic Cloud.++### Set the credentials+There are four files to edit to create a k8s secret when you are connecting to self managed Elasticsearch and Kibana (self managed is effectively anything other than the managed Elasticsearch Service in Elastic Cloud). The files are:+-->+### 自管理系统 {#self-managed}+如果你使用 Elastic 云中的 Elasticsearch 服务,切换到 **托管服务** 标签页。++### 设置凭据 {#set-the-credentials}+当你使用自管理的 Elasticsearch 和 Kibana (对比托管于 Elastic 云中的 Elasticsearch 服务,自管理更有效率),+创建 k8s secret 需要准备四个文件。这些文件是:++1. ELASTICSEARCH_HOSTS+2. ELASTICSEARCH_PASSWORD+3. ELASTICSEARCH_USERNAME+4. KIBANA_HOST++<!-- +Set these with the information for your Elasticsearch cluster and your Kibana host. Here are some examples (also see [*this configuration*](https://stackoverflow.com/questions/59892896/how-to-connect-from-minikube-to-elasticsearch-installed-on-host-local-developme/59892897#59892897))+-->+为你的 Elasticsearch 集群和 Kibana 主机设置这些信息。这里是一些例子+(另见[*此配置*](https://stackoverflow.com/questions/59892896/how-to-connect-from-minikube-to-elasticsearch-installed-on-host-local-developme/59892897#59892897))++#### `ELASTICSEARCH_HOSTS` {#elasticsearch-hosts}+<!-- +1. A nodeGroup from the Elastic Elasticsearch Helm Chart:+-->+1. 来自于 Elastic Elasticsearch Helm Chart 的节点组:++ ```shell
This is not shell
comment created time in 3 days
Pull request review commentkubernetes/website
[zh] translate tutorial guestbook-logs-metrics-with-elk
+---+title: "示例: 添加日志和指标到 PHP / Redis 留言板案例"+content_type: tutorial+weight: 21+card:+ name: tutorials+ weight: 31+ title: "示例: 添加日志和指标到 PHP / Redis 留言板案例"+---+<!-- +title: "Example: Add logging and metrics to the PHP / Redis Guestbook example"+reviewers:+- sftim+content_type: tutorial+weight: 21+card:+ name: tutorials+ weight: 31+ title: "Example: Add logging and metrics to the PHP / Redis Guestbook example"+-->++<!-- overview -->+<!-- +This tutorial builds upon the [PHP Guestbook with Redis](/docs/tutorials/stateless-application/guestbook) tutorial. Lightweight log, metric, and network data open source shippers, or *Beats*, from Elastic are deployed in the same Kubernetes cluster as the guestbook. The Beats collect, parse, and index the data into Elasticsearch so that you can view and analyze the resulting operational information in Kibana. This example consists of the following components:++* A running instance of the [PHP Guestbook with Redis tutorial](/docs/tutorials/stateless-application/guestbook)+* Elasticsearch and Kibana+* Filebeat+* Metricbeat+* Packetbeat+-->+本教程建立在+[使用 Redis 部署 PHP 留言板](/zh/docs/tutorials/stateless-application/guestbook)教程之上。+*Beats*,是 Elastic 出品的开源的轻量级日志、指标和网络数据采集器,+将和留言板一同部署在 Kubernetes 集群中。+Beats 收集、分析、索引数据到 Elasticsearch,使你可以用 Kibana 查看并分析得到的运营信息。+本示例由以下内容组成:++* Elasticsearch 和 Kibana+* Filebeat+* Metricbeat+* Packetbeat++## {{% heading "objectives" %}}++<!-- +* Start up the PHP Guestbook with Redis.+* Install kube-state-metrics.+* Create a Kubernetes secret.+* Deploy the Beats.+* View dashboards of your logs and metrics.+-->+* 启动用 Redis 部署的 PHP 留言板。+* 安装 kube-state-metrics。+* 创建 Kubernetes secret。+* 部署 Beats。+* 用仪表板查看日志和指标。++## {{% heading "prerequisites" %}}+++{{< include "task-tutorial-prereqs.md" >}}+{{< version-check >}}++<!-- +Additionally you need:++* A running deployment of the [PHP Guestbook with Redis](/docs/tutorials/stateless-application/guestbook) tutorial.++* A running Elasticsearch and Kibana deployment. You can use [Elasticsearch Service in Elastic Cloud](https://cloud.elastic.co), run the [download files](https://www.elastic.co/guide/en/elastic-stack-get-started/current/get-started-elastic-stack.html) on your workstation or servers, or the [Elastic Helm Charts](https://github.com/elastic/helm-charts).+-->+此外,你还需要:++* 依照教程[使用 Redis 的 PHP留言本](/zh/docs/tutorials/stateless-application/guestbook)得到的一套运行中的部署环境。+* 一套运行中的Elasticsearch 和 Kibana部署环境。你可以使用[Elastic 云中的Elasticsearch 服务](https://cloud.elastic.co)、在工作站或者服务器上运行此[下载文件](https://www.elastic.co/guide/en/elastic-stack-get-started/current/get-started-elastic-stack.html)、或运行 [Elastic Helm Charts](https://github.com/elastic/helm-charts)。++<!-- lessoncontent -->++<!-- +## Start up the PHP Guestbook with Redis+This tutorial builds on the [PHP Guestbook with Redis](/docs/tutorials/stateless-application/guestbook) tutorial. If you have the guestbook application running, then you can monitor that. If you do not have it running then follow the instructions to deploy the guestbook and do not perform the **Cleanup** steps. Come back to this page when you have the guestbook running.+-->+## 启动用 Redis 部署的 PHP 留言板 {#start-up-the-php-guestbook-with-redis}+本教程建立在+[使用 Redis 部署 PHP 留言板](/zh/docs/tutorials/stateless-application/guestbook)之上。+如果你已经有一个运行的留言簿应用程序,那就监控它。+如果还没有,那就按照说明先部署留言板,但不要执行**清理**的步骤。+当留言板运行起来后,再返回本页。++<!-- +## Add a Cluster role binding+Create a [cluster level role binding](/docs/reference/access-authn-authz/rbac/#rolebinding-and-clusterrolebinding) so that you can deploy kube-state-metrics and the Beats at the cluster level (in kube-system).+-->+## 添加一个集群角色绑定 {#add-a-cluster-role-binding}+创建一个[集群范围的角色绑定](/zh/docs/reference/access-authn-authz/rbac/#rolebinding-和-clusterrolebinding),+以便你可以在集群范围(在 kube-system 中)部署 kube-state-metrics 和 Beats。++```shell+kubectl create clusterrolebinding cluster-admin-binding \+ --clusterrole=cluster-admin --user=<your email associated with the k8s provider account>+```++<!-- +## Install kube-state-metrics++Kubernetes [*kube-state-metrics*](https://github.com/kubernetes/kube-state-metrics) is a simple service that listens to the Kubernetes API server and generates metrics about the state of the objects. Metricbeat reports these metrics. Add kube-state-metrics to the Kubernetes cluster that the guestbook is running in.+--> +### 安装 kube-state-metrics {#install-kube-state-metrics}+Kubernetes [*kube-state-metrics*](https://github.com/kubernetes/kube-state-metrics)+是一个简单的服务,它侦听 Kubernetes API 服务器并生成对象状态的指标。+Metricbeat 报告这些指标。+添加 kube-state-metrics 到运行留言簿的 Kubernetes 集群。++```shell+git clone https://github.com/kubernetes/kube-state-metrics.git kube-state-metrics+kubectl apply -f kube-state-metrics/examples/standard+```++<!-- +### Check to see if kube-state-metrics is running+-->+### 检查 kube-state-metrics 是否正在运行 {#check-to-see-if-kube-state-metrics-is-running}+```shell+kubectl get pods --namespace=kube-system -l app.kubernetes.io/name=kube-state-metrics+```+<!-- +Output:+-->+输出;+```shell
这个 shell 可去掉
comment created time in 3 days
Pull request review commentkubernetes/website
[zh] translate tutorial guestbook-logs-metrics-with-elk
+---+title: "示例: 添加日志和指标到 PHP / Redis 留言板案例"+content_type: tutorial+weight: 21+card:+ name: tutorials+ weight: 31+ title: "示例: 添加日志和指标到 PHP / Redis 留言板案例"+---+<!-- +title: "Example: Add logging and metrics to the PHP / Redis Guestbook example"+reviewers:+- sftim+content_type: tutorial+weight: 21+card:+ name: tutorials+ weight: 31+ title: "Example: Add logging and metrics to the PHP / Redis Guestbook example"+-->++<!-- overview -->+<!-- +This tutorial builds upon the [PHP Guestbook with Redis](/docs/tutorials/stateless-application/guestbook) tutorial. Lightweight log, metric, and network data open source shippers, or *Beats*, from Elastic are deployed in the same Kubernetes cluster as the guestbook. The Beats collect, parse, and index the data into Elasticsearch so that you can view and analyze the resulting operational information in Kibana. This example consists of the following components:++* A running instance of the [PHP Guestbook with Redis tutorial](/docs/tutorials/stateless-application/guestbook)+* Elasticsearch and Kibana+* Filebeat+* Metricbeat+* Packetbeat+-->+本教程建立在+[使用 Redis 部署 PHP 留言板](/zh/docs/tutorials/stateless-application/guestbook)教程之上。+*Beats*,是 Elastic 出品的开源的轻量级日志、指标和网络数据采集器,+将和留言板一同部署在 Kubernetes 集群中。+Beats 收集、分析、索引数据到 Elasticsearch,使你可以用 Kibana 查看并分析得到的运营信息。+本示例由以下内容组成:++* Elasticsearch 和 Kibana+* Filebeat+* Metricbeat+* Packetbeat++## {{% heading "objectives" %}}++<!-- +* Start up the PHP Guestbook with Redis.+* Install kube-state-metrics.+* Create a Kubernetes secret.+* Deploy the Beats.+* View dashboards of your logs and metrics.+-->+* 启动用 Redis 部署的 PHP 留言板。+* 安装 kube-state-metrics。+* 创建 Kubernetes secret。+* 部署 Beats。+* 用仪表板查看日志和指标。++## {{% heading "prerequisites" %}}+++{{< include "task-tutorial-prereqs.md" >}}+{{< version-check >}}++<!-- +Additionally you need:++* A running deployment of the [PHP Guestbook with Redis](/docs/tutorials/stateless-application/guestbook) tutorial.++* A running Elasticsearch and Kibana deployment. You can use [Elasticsearch Service in Elastic Cloud](https://cloud.elastic.co), run the [download files](https://www.elastic.co/guide/en/elastic-stack-get-started/current/get-started-elastic-stack.html) on your workstation or servers, or the [Elastic Helm Charts](https://github.com/elastic/helm-charts).+-->+此外,你还需要:++* 依照教程[使用 Redis 的 PHP留言本](/zh/docs/tutorials/stateless-application/guestbook)得到的一套运行中的部署环境。+* 一套运行中的Elasticsearch 和 Kibana部署环境。你可以使用[Elastic 云中的Elasticsearch 服务](https://cloud.elastic.co)、在工作站或者服务器上运行此[下载文件](https://www.elastic.co/guide/en/elastic-stack-get-started/current/get-started-elastic-stack.html)、或运行 [Elastic Helm Charts](https://github.com/elastic/helm-charts)。
* 一套运行中的 Elasticsearch 和 Kibana 部署环境。你可以使用 [Elastic 云中的 Elasticsearch 服务](https://cloud.elastic.co)、在工作站或者服务器上运行此[下载文件](https://www.elastic.co/guide/en/elastic-stack-get-started/current/get-started-elastic-stack.html)、或运行 [Elastic Helm Charts](https://github.com/elastic/helm-charts)。
comment created time in 3 days
Pull request review commentkubernetes/website
[zh] translate tutorial guestbook-logs-metrics-with-elk
+---+title: "示例: 添加日志和指标到 PHP / Redis 留言板案例"+content_type: tutorial+weight: 21+card:+ name: tutorials+ weight: 31+ title: "示例: 添加日志和指标到 PHP / Redis 留言板案例"+---+<!-- +title: "Example: Add logging and metrics to the PHP / Redis Guestbook example"+reviewers:+- sftim+content_type: tutorial+weight: 21+card:+ name: tutorials+ weight: 31+ title: "Example: Add logging and metrics to the PHP / Redis Guestbook example"+-->++<!-- overview -->+<!-- +This tutorial builds upon the [PHP Guestbook with Redis](/docs/tutorials/stateless-application/guestbook) tutorial. Lightweight log, metric, and network data open source shippers, or *Beats*, from Elastic are deployed in the same Kubernetes cluster as the guestbook. The Beats collect, parse, and index the data into Elasticsearch so that you can view and analyze the resulting operational information in Kibana. This example consists of the following components:++* A running instance of the [PHP Guestbook with Redis tutorial](/docs/tutorials/stateless-application/guestbook)+* Elasticsearch and Kibana+* Filebeat+* Metricbeat+* Packetbeat+-->+本教程建立在+[使用 Redis 部署 PHP 留言板](/zh/docs/tutorials/stateless-application/guestbook)教程之上。+*Beats*,是 Elastic 出品的开源的轻量级日志、指标和网络数据采集器,+将和留言板一同部署在 Kubernetes 集群中。+Beats 收集、分析、索引数据到 Elasticsearch,使你可以用 Kibana 查看并分析得到的运营信息。+本示例由以下内容组成:++* Elasticsearch 和 Kibana+* Filebeat+* Metricbeat+* Packetbeat++## {{% heading "objectives" %}}++<!-- +* Start up the PHP Guestbook with Redis.+* Install kube-state-metrics.+* Create a Kubernetes secret.+* Deploy the Beats.+* View dashboards of your logs and metrics.+-->+* 启动用 Redis 部署的 PHP 留言板。+* 安装 kube-state-metrics。+* 创建 Kubernetes secret。+* 部署 Beats。+* 用仪表板查看日志和指标。++## {{% heading "prerequisites" %}}+++{{< include "task-tutorial-prereqs.md" >}}+{{< version-check >}}++<!-- +Additionally you need:++* A running deployment of the [PHP Guestbook with Redis](/docs/tutorials/stateless-application/guestbook) tutorial.++* A running Elasticsearch and Kibana deployment. You can use [Elasticsearch Service in Elastic Cloud](https://cloud.elastic.co), run the [download files](https://www.elastic.co/guide/en/elastic-stack-get-started/current/get-started-elastic-stack.html) on your workstation or servers, or the [Elastic Helm Charts](https://github.com/elastic/helm-charts).+-->+此外,你还需要:++* 依照教程[使用 Redis 的 PHP留言本](/zh/docs/tutorials/stateless-application/guestbook)得到的一套运行中的部署环境。+* 一套运行中的Elasticsearch 和 Kibana部署环境。你可以使用[Elastic 云中的Elasticsearch 服务](https://cloud.elastic.co)、在工作站或者服务器上运行此[下载文件](https://www.elastic.co/guide/en/elastic-stack-get-started/current/get-started-elastic-stack.html)、或运行 [Elastic Helm Charts](https://github.com/elastic/helm-charts)。++<!-- lessoncontent -->++<!-- +## Start up the PHP Guestbook with Redis+This tutorial builds on the [PHP Guestbook with Redis](/docs/tutorials/stateless-application/guestbook) tutorial. If you have the guestbook application running, then you can monitor that. If you do not have it running then follow the instructions to deploy the guestbook and do not perform the **Cleanup** steps. Come back to this page when you have the guestbook running.+-->+## 启动用 Redis 部署的 PHP 留言板 {#start-up-the-php-guestbook-with-redis}+本教程建立在
83-84 之间最好加一个空行。下同。
comment created time in 3 days
Pull request review commentkubernetes/website
[zh] translate tutorial guestbook-logs-metrics-with-elk
+---+title: "示例: 添加日志和指标到 PHP / Redis 留言板案例"
Guestbook 是应用的名称,不必翻译。翻译了反而容易产生误解。
comment created time in 3 days
pull request commentkubernetes/website
[zh] translate tutorial guestbook-logs-metrics-with-elk, fix #24505
/retitle [zh] translate tutorial guestbook-logs-metrics-with-elk
comment created time in 3 days
pull request commentkubernetes/website
revise style guidelines for capitalization
Yes. We do need a dedicated issue (or even better with real examples) for this discussion. Maybe we can use this PR as an example for the discussion. A separate issue without examples always looks like empty talks.
comment created time in 3 days
issue openedkubernetes/website
Fix the link to Windows pause image dockerfile?
This is a Bug Report
Problem:
In https://kubernetes.io/docs/setup/production-environment/windows/intro-windows-in-kubernetes/#troubleshooting, the bulletin 16 is about the 'pause' image. There we have a DOCKERFILE link pointing to the wincat tool. This link makes no sense in the context. A reader would expect it to point to the Dockerfile used to build the pause image, not the wincat tool.
Proposed Solution:
Two options:
- remove the link, or
- correct the link, e.g. https://github.com/kubernetes-sigs/windows-testing/blob/master/images/pause/Dockerfile
Page to Update:
https://kubernetes.io/docs/setup/production-environment/windows/intro-windows-in-kubernetes/#troubleshooting
created time in 3 days
PR closed operator-framework/operator-sdk


Description of the change:
This tiny cleanup removes the Makefile level guessing of Kustomize version, image name etc. We have these values defined at the higher level. Leaving literal strings as guess values may bring inconsistency in future.
Motivation for the change:
The logic in makefile template code for assigning default values is unnecessary. These values are supposed to be passed top-down rather than having the template guess a default value which may conflict with the top level settings.
pr closed time in 3 days
pull request commentoperator-framework/operator-sdk
Remove unnecessary initialization for Makefile scaffolding
Alright, I'm trapped into reference circles problem. Too busy to reason about it. I'll abandon this. Thank you all for your time spent on this.
comment created time in 3 days
issue commentkubernetes/website
Possible abuse of the note shortcode
@sftim Thanks for the comments. Please don't change the topic of this issue. This issue is about the shortcode, not about other tidy up. The page was just mentioned as an example. Hope we are clear about this.
comment created time in 3 days
push eventtengqm/operator-sdk
commit sha fc038e32cef51bdd2eeaa8b612df75b5e4535c25
Ansible: pin community-kubernetes to <1.0.0 in tests to match ansible project scaffold (#4014) Co-authored-by: Austin Macdonald <[email protected]>
commit sha bb866f7fe749bca9cba5ff199273eb8eebaaa7d7
Add tests for configmap.go (#3990) * added tests for configmap.go * update the Describes messages to match method names * added tests for addObjectToBinaryData * added tests for getRegistryConfigMaps * add license header
commit sha b3125be8dbd4f2428c89eee3ba3e9d8c2083eaf2
Add k8s black lives matter statement (#4022) * updates * Update website/layouts/index.html Co-authored-by: Joe Lanford <[email protected]> Co-authored-by: matthew carleton <[email protected]> Co-authored-by: Austin Macdonald <[email protected]> Co-authored-by: Joe Lanford <[email protected]>
commit sha 1254d834becdcfe9e02273a99c7e22d0868427f5
runbundle: refactor printing deployment/pod errors (#3908) * refactor printDeployment and printPodError funcs * Addressing PR comments * fix sanity error * Reverting a2ed4 and 8e004 * Reverting a2ed4 and 8e004 * Addressing PR comments * Added podError struct, and other PR comments * Address review comments Co-authored-by: varshaprasad96 <[email protected]>
commit sha 6eb31294a80e39f3b5fd8ca1d2140c8c51baab9e
doc: add base doc that clarifies how users can test their projects (#3823) **Description of the change:** doc: add base doc to clarifies how users can test their projects **Motivation for the change:** Many users have raised these questions. The goal of this doc is to provide the basic information and the links/references for they are able to move forward. It can be improved by the community and/or in the post 1.0 doc plans. Closes: https://github.com/operator-framework/operator-sdk/issues/3511
commit sha e4635fa2eb8d8e07229723575a4f7a5ac89e79b4
add marc and move bharathi-tenneti to sdk-emeritus-approvers (#4019)
commit sha c3e2231bcffb707a9171b2e4e6b60932f841c8a1
*: clean up samples (#4035)
commit sha 63a080fa5991e903766c9833b3ee4c65fca49cd1
Makefile: run cli-doc generator directly (#4033)
commit sha c36f1b61eda3e05189eb19b15e678f2fa4a4a153
change makefile test target for no longer be required manual steps to run the commands (#3983) **Description** Customize the makefile target tests to download the binaries. Closes: #3692
commit sha 9d27e224efac78fcc9354ece4e43a50eb30ea968
Release v1.1.0 (#4031)
commit sha f06c8c0298ae2db2ee97f1d81db9e14c9bdb71d3
post-release: update samples tag (#4050)
commit sha 718cc3758e41de6e858e193f174121eef203b363
Post release 1.1 (#4049)
commit sha e3110860a8b8681cb78ddb520f53c3eed104b28a
Makefile,*: cleanup and refactoring, support reproducible tests locally (#4023)
commit sha 5776ba2f1a371bfd17fe43a948e2cb241e40fe0a
cleanup e2e: centralize the code to manage the prerequisites (#3996) **Description of the change:** centralize the code to manage the prerequisites to install OLM and Prometheus which are equals for all e2e tests **Motivation for the change:** - maintainability - reusability - remove code duplications across the e2e tests
commit sha 09c3aa14625965af9f22f513cd5c891471dbded2
*: refactor Dockerfiles and Makefiles (#4069)
commit sha ed6575cc61a269ce31caf42cdc01062ce1d9b100
fix incorrect build command in installation doc (#4075)
commit sha 2e28869c1985e2db8ad3eec7184f8960ef16ae72
Add tests for deployment.go (#4052) * Deployment first commit * Deployment tests for all functions * Deployment tests for all functions updates * Deployment tests for all functions
commit sha b7d55086c08aaaa8235df822c327153e770648bb
docs/advanced-topics/scorecard: pin master links to a commit (#4076)
commit sha 4e332fa73c4ce272557d70265155103ff4fb9f84
Makefile,release/Makefile: remove custom-scorecard-tests from image build/push (#4081)
commit sha 0d6e9c9f82085dd6a985f2af47409a1f5fa52330
upgrade kb and controller-runtime dep version (#4062) **Description of the change:** - Upgrade kb commit from f7a3b65dd250 to c993a2a221fe - Upgrade controller-runtime version from `v0.6.2` to `v0.6.3`. More info: https://github.com/kubernetes-sigs/controller-runtime/releases/tag/v0.6.3 **Motivation for the change:** - Address bugfixes done in Kubebuilder so far - Solve tech-debts - Keep the projects aligned.
push time in 3 days
push eventtengqm/operator-sdk
commit sha 6eb31294a80e39f3b5fd8ca1d2140c8c51baab9e
doc: add base doc that clarifies how users can test their projects (#3823) **Description of the change:** doc: add base doc to clarifies how users can test their projects **Motivation for the change:** Many users have raised these questions. The goal of this doc is to provide the basic information and the links/references for they are able to move forward. It can be improved by the community and/or in the post 1.0 doc plans. Closes: https://github.com/operator-framework/operator-sdk/issues/3511
commit sha e4635fa2eb8d8e07229723575a4f7a5ac89e79b4
add marc and move bharathi-tenneti to sdk-emeritus-approvers (#4019)
commit sha c3e2231bcffb707a9171b2e4e6b60932f841c8a1
*: clean up samples (#4035)
commit sha 63a080fa5991e903766c9833b3ee4c65fca49cd1
Makefile: run cli-doc generator directly (#4033)
commit sha c36f1b61eda3e05189eb19b15e678f2fa4a4a153
change makefile test target for no longer be required manual steps to run the commands (#3983) **Description** Customize the makefile target tests to download the binaries. Closes: #3692
commit sha 9d27e224efac78fcc9354ece4e43a50eb30ea968
Release v1.1.0 (#4031)
commit sha f06c8c0298ae2db2ee97f1d81db9e14c9bdb71d3
post-release: update samples tag (#4050)
commit sha 718cc3758e41de6e858e193f174121eef203b363
Post release 1.1 (#4049)
commit sha e3110860a8b8681cb78ddb520f53c3eed104b28a
Makefile,*: cleanup and refactoring, support reproducible tests locally (#4023)
commit sha 5776ba2f1a371bfd17fe43a948e2cb241e40fe0a
cleanup e2e: centralize the code to manage the prerequisites (#3996) **Description of the change:** centralize the code to manage the prerequisites to install OLM and Prometheus which are equals for all e2e tests **Motivation for the change:** - maintainability - reusability - remove code duplications across the e2e tests
commit sha 09c3aa14625965af9f22f513cd5c891471dbded2
*: refactor Dockerfiles and Makefiles (#4069)
commit sha ed6575cc61a269ce31caf42cdc01062ce1d9b100
fix incorrect build command in installation doc (#4075)
commit sha 2e28869c1985e2db8ad3eec7184f8960ef16ae72
Add tests for deployment.go (#4052) * Deployment first commit * Deployment tests for all functions * Deployment tests for all functions updates * Deployment tests for all functions
commit sha b7d55086c08aaaa8235df822c327153e770648bb
docs/advanced-topics/scorecard: pin master links to a commit (#4076)
commit sha 4e332fa73c4ce272557d70265155103ff4fb9f84
Makefile,release/Makefile: remove custom-scorecard-tests from image build/push (#4081)
commit sha 0d6e9c9f82085dd6a985f2af47409a1f5fa52330
upgrade kb and controller-runtime dep version (#4062) **Description of the change:** - Upgrade kb commit from f7a3b65dd250 to c993a2a221fe - Upgrade controller-runtime version from `v0.6.2` to `v0.6.3`. More info: https://github.com/kubernetes-sigs/controller-runtime/releases/tag/v0.6.3 **Motivation for the change:** - Address bugfixes done in Kubebuilder so far - Solve tech-debts - Keep the projects aligned.
commit sha 30181408e24103a194820a8eef736b1c1ef28ccb
slight update to migration documentation (#3783)
push time in 3 days
Pull request review commentoperator-framework/operator-sdk
Remove unnecessary initialization for Makefile scaffolding
import ( ansibleroles "github.com/operator-framework/operator-sdk/internal/plugins/ansible/v1/scaffolds/internal/templates/roles" "github.com/operator-framework/operator-sdk/internal/kubebuilder/machinery"+ "github.com/operator-framework/operator-sdk/internal/version" ) const (- // KustomizeVersion is the kubernetes-sigs/kustomize version to be used in the project- KustomizeVersion = "v3.5.4"
I'd revise this according to your suggestion anyway since it is not the focus of this PR.
comment created time in 3 days
Pull request review commentoperator-framework/operator-sdk
Remove unnecessary initialization for Makefile scaffolding
import ( ansibleroles "github.com/operator-framework/operator-sdk/internal/plugins/ansible/v1/scaffolds/internal/templates/roles" "github.com/operator-framework/operator-sdk/internal/kubebuilder/machinery"+ "github.com/operator-framework/operator-sdk/internal/version" ) const (- // KustomizeVersion is the kubernetes-sigs/kustomize version to be used in the project- KustomizeVersion = "v3.5.4"
Maybe we should not define this in the first place if we want to make sure we are using the same version as with KB?
comment created time in 3 days
pull request commentoperator-framework/operator-sdk
Bootstrap Chinese localization for website
@asmacdo Thanks. Let me know when there is a decision from the team.
comment created time in 3 days

issue openedkubernetes/website
Possible abuse of the note shortcode
This is a Bug Report
Problem:
As shown in the following screenshot, the windows in kubernetes section has a subsection that consists of nothing other than notes!
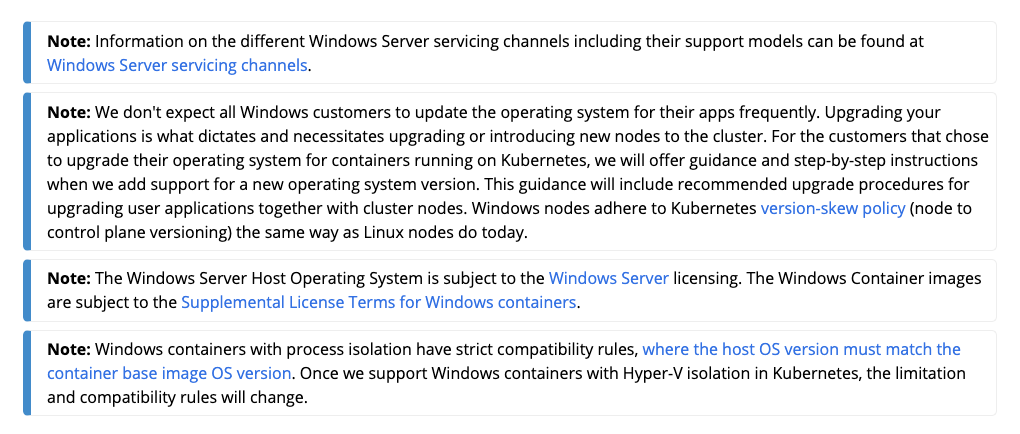
This is a suspected abuse of the note shortcode. We are not supposed to mark all texts as notes. To one extreme, the whole Kubernetes website is about about notes, something we want readers to know, to notice.
Proposed Solution:
- We should use the
note,warningalike short code with caution. - We may want to refrain from introducing more shortcode into Website unless there is a compelling need, i.e. something we really want to bundle together for the sole purpose of reuse.
Page to Update:
created time in 4 days
issue commentkubernetes/website
[zh] Translate docs/setup/production-environment/windows/intro-windows-in-kubernetes.md
/assign
comment created time in 4 days
pull request commentoperator-framework/operator-sdk
Bootstrap Chinese localization for website
I never get a green light that this one is okay to proceed before the PR is closed ... sigh.
comment created time in 4 days
pull request commentkubernetes/website
kubeadm: promote the "kubeadm certs" command to GA
I'd like to suggest we put this on hold until we are near the release week. There could be further changes to kubeadm tool. Such changes will lead to the changes in the generated docs as well.

comment created time in 4 days
push eventtengqm/website
commit sha 55892e5367ae0aa7f4a30ae7024d5e96327d5b9c
translate liveness fr
commit sha 293a4ea9d76cd2709a026dd9d90f135165b31c92
translate process namespace fr
commit sha 74af2f19b3c7c5e655cb6966bbdad3e0d898e8f7
fix naming for liveness fr
commit sha 414e1ce8046fdc351b116c744643ff2789aca36f
fix translate share process fr
commit sha 16bbc95df8693330ccf9a6ddd6088144c291a2ab
fix translate liveness and probes fr
commit sha 623f46446aa68b9dfa8f1b70244d2e1a4b3201f8
Added new PHP client library
commit sha 580d1b31004e29e27a391e59c312fff13e2b7cdc
fix broken link: http://kubernetes.io/docs/home/contribute/page-templates/
commit sha a78caf7fbbc6edb7655844aa9e7443484089d2b6
added uk minikube documentation
commit sha c2c4b6ca0e38f64f4d4519d6c2c1d6ca5f8c0e67
added original link
commit sha 4ffeeb31c8f3892e74468eeff2b6262b0ab9d798
fix identation
commit sha cbced2f6cd6f3fc39061d457147767d2f1903455
fix grammar
commit sha ddeb9944460f846e84a6d528f38b9d20593b9913
Add irvifa as lead as a preparation step for transition
commit sha 13516045d352f814f335775dcc1a521efd64a845
Add docs/tutorials/kubernetes-basics/deploy-app ID translation
commit sha 93262be5cf7101101e7ae71693fc2d593fbf32d4
upgrade translation for control-plane-node-communication
commit sha f543b530fb53f44cf4585fc9134f24e95fec6d5b
ID Fix link emphasize
commit sha 83c4b6096679eac1d70910bf86c30c63b242ffaf
ID localization for administer cluster - sysctl
commit sha 71d6fb6d97d29a34026642872371907ff03530e2
Start translation
commit sha 6558ca888a89af93cdef93fa2560b800ff7020a2
end of translation
commit sha 23e979e5f01985693221ef2d98efbea02bf551bf
Add examples
commit sha d38aa54efab970c7e8108fa69c9b6bd6c977faeb
ja-trans: Translate concepts/cluster-administration/manage-deployment.md into Japanese #19280
push time in 4 days
Pull request review commentkubernetes/website
Improve ServiceAccount administration doc
incomplete features are referred to in order to better describe service accounts Kubernetes distinguishes between the concept of a user account and a service account for a number of reasons: - - User accounts are for humans. Service accounts are for processes, which- run in pods.- - User accounts are intended to be global. Names must be unique across all- namespaces of a cluster, future user resource will not be namespaced.- Service accounts are namespaced.- - Typically, a cluster's User accounts might be synced from a corporate- database, where new user account creation requires special privileges and- is tied to complex business processes. Service account creation is intended- to be more lightweight, allowing cluster users to create service accounts for- specific tasks (i.e. principle of least privilege).- - Auditing considerations for humans and service accounts may differ.- - A config bundle for a complex system may include definition of various service- accounts for components of that system. Because service accounts can be created- ad-hoc and have namespaced names, such config is portable.+- User accounts are for humans. Service accounts are for processes, which run+ in pods.+- User accounts are intended to be global. Names must be unique across all+ namespaces of a cluster. Service accounts are namespaced.+- Typically, a cluster's user accounts might be synced from a corporate+ database, where new user account creation requires special privileges and is+ tied to complex business processes. Service account creation is intended to be+ more lightweight, allowing cluster users to create service accounts for+ specific tasks (i.e. principle of least privilege).+- Auditing considerations for humans and service accounts may differ.+- A config bundle for a complex system may include definition of various service+ accounts for components of that system. Because service accounts can be created+ ad-hoc and have namespaced names, such config is portable. ## Service account automation Three separate components cooperate to implement the automation around service accounts: - - A Service account admission controller- - A Token controller- - A Service account controller+- A `ServiceAccount` admission controller+- A Token controller+- A ServiceAccount controller -### Service Account Admission Controller+### ServiceAccount Admission Controller The modification of pods is implemented via a plugin-called an [Admission Controller](/docs/reference/access-authn-authz/admission-controllers/). It is part of the apiserver.+called an [Admission Controller](/docs/reference/access-authn-authz/admission-controllers/).+It is part of the API server. It acts synchronously to modify pods as they are created or updated. When this plugin is active (and it is by default on most distributions), then it does the following when a pod is created or modified: - 1. If the pod does not have a `ServiceAccount` set, it sets the `ServiceAccount` to `default`.- 1. It ensures that the `ServiceAccount` referenced by the pod exists, and otherwise rejects it.- 1. If the pod does not contain any `ImagePullSecrets`, then `ImagePullSecrets` of the `ServiceAccount` are added to the pod.- 1. It adds a `volume` to the pod which contains a token for API access.- 1. It adds a `volumeSource` to each container of the pod mounted at `/var/run/secrets/kubernetes.io/serviceaccount`.--Starting from v1.13, you can migrate a service account volume to a projected volume when+1. If the pod does not have a `serviceAccountName` set, it sets the+ `serviceAccountName` to `default`.+1. It ensures that the `serviceAccountName` referenced by the pod exists, and+ otherwise rejects it.+1. If the pod does not contain any `imagePullSecrets`, then `imagePullSecrets`+ of the ServiceAccount referenced by `serviceAccountName` are added to the pod.+1. It adds a `volume` to the pod which contains a token for API access+ if neither the ServiceAccount `automountServiceAccountToken` nor the Pod's+ `automountServiceAccountToken` is set to `false`.+1. It adds a `volumeSource` to each container of the pod mounted at+ `/var/run/secrets/kubernetes.io/serviceaccount`, if the previous step has+ created a volume for ServiceAccount token.++You can migrate a service account volume to a projected volume when the `BoundServiceAccountTokenVolume` feature gate is enabled.-The service account token will expire after 1 hour or the pod is deleted. See more details about [projected volume](/docs/tasks/configure-pod-container/configure-projected-volume-storage/).+The service account token will expire after 1 hour or the pod is deleted. See+more details about+[projected volume](/docs/tasks/configure-pod-container/configure-projected-volume-storage/). ### Token Controller -TokenController runs as part of controller-manager. It acts asynchronously. It:+TokenController runs as part of `kube-controller-manager`. It acts asynchronously. It: -- observes serviceAccount creation and creates a corresponding Secret to allow API access.-- observes serviceAccount deletion and deletes all corresponding ServiceAccountToken Secrets.-- observes secret addition, and ensures the referenced ServiceAccount exists, and adds a token to the secret if needed.-- observes secret deletion and removes a reference from the corresponding ServiceAccount if needed.+- watches ServiceAccount creation and creates a corresponding+ ServiceAccount token Secret to allow API access.+- watches ServiceAccount deletion and deletes all corresponding ServiceAccount+ token Secrets.+- watches ServiceAccount token Secret addition, and ensures the referenced+ ServiceAccount exists, and adds a token to the Secret if needed.+- watches Secret deletion and removes a reference from the corresponding+ ServiceAccount if needed. -You must pass a service account private key file to the token controller in the controller-manager by using-the `--service-account-private-key-file` option. The private key will be used to sign generated service account tokens.-Similarly, you must pass the corresponding public key to the kube-apiserver using the `--service-account-key-file`-option. The public key will be used to verify the tokens during authentication.+You must pass a service account private key file to the token controller in+the `kube-controller-manager` using the `--service-account-private-key-file`+flag. The private key is used to sign generated service account tokens.+Similarly, you must pass the corresponding public key to the `kube-apiserver`+using the `--service-account-key-file` flag. The public key will be used to+verify the tokens during authentication. #### To create additional API tokens -A controller loop ensures a secret with an API token exists for each service-account. To create additional API tokens for a service account, create a secret-of type `ServiceAccountToken` with an annotation referencing the service-account, and the controller will update it with a generated token:--secret.json:--```json-{- "kind": "Secret",- "apiVersion": "v1",- "metadata": {- "name": "mysecretname",- "annotations": {- "kubernetes.io/service-account.name": "myserviceaccount"- }- },- "type": "kubernetes.io/service-account-token"-}+A controller loop ensures a Secret with an API token exists for each+ServiceAccount. To create additional API tokens for a ServiceAccount, create a+Secret of type `kubernetes.io/service-account-token` with an annotation+referencing the ServiceAccount, and the controller will update it with a+generated token:++Below is a sample configuration for such a Secret:++```yaml+apiVersion: v1+kind: Secret+metadata:+ name: mysecretname+ annotations:+ kubernetes.io/service-account.name: myserviceaccount+type: kubernetes.io/service-account-token ``` ```shell-kubectl create -f ./secret.json+kubectl create -f ./secret.yaml kubectl describe secret mysecretname ``` -#### To delete/invalidate a service account token+#### To delete/invalidate a ServiceAccount token Secret
yes, we are referring to a Secret object, rather than a general term.
comment created time in 4 days
Pull request review commentkubernetes/website
Improve ServiceAccount administration doc
incomplete features are referred to in order to better describe service accounts Kubernetes distinguishes between the concept of a user account and a service account for a number of reasons: - - User accounts are for humans. Service accounts are for processes, which- run in pods.- - User accounts are intended to be global. Names must be unique across all- namespaces of a cluster, future user resource will not be namespaced.- Service accounts are namespaced.- - Typically, a cluster's User accounts might be synced from a corporate- database, where new user account creation requires special privileges and- is tied to complex business processes. Service account creation is intended- to be more lightweight, allowing cluster users to create service accounts for- specific tasks (i.e. principle of least privilege).- - Auditing considerations for humans and service accounts may differ.- - A config bundle for a complex system may include definition of various service- accounts for components of that system. Because service accounts can be created- ad-hoc and have namespaced names, such config is portable.+- User accounts are for humans. Service accounts are for processes, which run+ in pods.+- User accounts are intended to be global. Names must be unique across all+ namespaces of a cluster. Service accounts are namespaced.+- Typically, a cluster's user accounts might be synced from a corporate+ database, where new user account creation requires special privileges and is+ tied to complex business processes. Service account creation is intended to be+ more lightweight, allowing cluster users to create service accounts for+ specific tasks (i.e. principle of least privilege).+- Auditing considerations for humans and service accounts may differ.+- A config bundle for a complex system may include definition of various service+ accounts for components of that system. Because service accounts can be created+ ad-hoc and have namespaced names, such config is portable. ## Service account automation Three separate components cooperate to implement the automation around service accounts: - - A Service account admission controller- - A Token controller- - A Service account controller+- A `ServiceAccount` admission controller+- A Token controller+- A ServiceAccount controller -### Service Account Admission Controller+### ServiceAccount Admission Controller The modification of pods is implemented via a plugin-called an [Admission Controller](/docs/reference/access-authn-authz/admission-controllers/). It is part of the apiserver.+called an [Admission Controller](/docs/reference/access-authn-authz/admission-controllers/).+It is part of the API server. It acts synchronously to modify pods as they are created or updated. When this plugin is active (and it is by default on most distributions), then it does the following when a pod is created or modified: - 1. If the pod does not have a `ServiceAccount` set, it sets the `ServiceAccount` to `default`.- 1. It ensures that the `ServiceAccount` referenced by the pod exists, and otherwise rejects it.- 1. If the pod does not contain any `ImagePullSecrets`, then `ImagePullSecrets` of the `ServiceAccount` are added to the pod.- 1. It adds a `volume` to the pod which contains a token for API access.- 1. It adds a `volumeSource` to each container of the pod mounted at `/var/run/secrets/kubernetes.io/serviceaccount`.--Starting from v1.13, you can migrate a service account volume to a projected volume when+1. If the pod does not have a `serviceAccountName` set, it sets the+ `serviceAccountName` to `default`.+1. It ensures that the `serviceAccountName` referenced by the pod exists, and+ otherwise rejects it.+1. If the pod does not contain any `imagePullSecrets`, then `imagePullSecrets`+ of the ServiceAccount referenced by `serviceAccountName` are added to the pod.+1. It adds a `volume` to the pod which contains a token for API access+ if neither the ServiceAccount `automountServiceAccountToken` nor the Pod's+ `automountServiceAccountToken` is set to `false`.+1. It adds a `volumeSource` to each container of the pod mounted at+ `/var/run/secrets/kubernetes.io/serviceaccount`, if the previous step has+ created a volume for ServiceAccount token.++You can migrate a service account volume to a projected volume when the `BoundServiceAccountTokenVolume` feature gate is enabled.-The service account token will expire after 1 hour or the pod is deleted. See more details about [projected volume](/docs/tasks/configure-pod-container/configure-projected-volume-storage/).+The service account token will expire after 1 hour or the pod is deleted. See+more details about+[projected volume](/docs/tasks/configure-pod-container/configure-projected-volume-storage/). ### Token Controller -TokenController runs as part of controller-manager. It acts asynchronously. It:+TokenController runs as part of `kube-controller-manager`. It acts asynchronously. It: -- observes serviceAccount creation and creates a corresponding Secret to allow API access.-- observes serviceAccount deletion and deletes all corresponding ServiceAccountToken Secrets.-- observes secret addition, and ensures the referenced ServiceAccount exists, and adds a token to the secret if needed.-- observes secret deletion and removes a reference from the corresponding ServiceAccount if needed.+- watches ServiceAccount creation and creates a corresponding+ ServiceAccount token Secret to allow API access.+- watches ServiceAccount deletion and deletes all corresponding ServiceAccount+ token Secrets.+- watches ServiceAccount token Secret addition, and ensures the referenced+ ServiceAccount exists, and adds a token to the Secret if needed.+- watches Secret deletion and removes a reference from the corresponding+ ServiceAccount if needed. -You must pass a service account private key file to the token controller in the controller-manager by using-the `--service-account-private-key-file` option. The private key will be used to sign generated service account tokens.-Similarly, you must pass the corresponding public key to the kube-apiserver using the `--service-account-key-file`-option. The public key will be used to verify the tokens during authentication.+You must pass a service account private key file to the token controller in
I thought about that. If we put this as TokenController, it means we have something named TokenController. However, it is not the case. Even if we do have such struct in GoLang, we don't want to expose it to readers. This is the reason I didn't change 'token controller' to 'TokenController'.
comment created time in 4 days
Pull request review commentkubernetes/website
Improve ServiceAccount administration doc
incomplete features are referred to in order to better describe service accounts Kubernetes distinguishes between the concept of a user account and a service account for a number of reasons: - - User accounts are for humans. Service accounts are for processes, which- run in pods.- - User accounts are intended to be global. Names must be unique across all- namespaces of a cluster, future user resource will not be namespaced.- Service accounts are namespaced.- - Typically, a cluster's User accounts might be synced from a corporate- database, where new user account creation requires special privileges and- is tied to complex business processes. Service account creation is intended- to be more lightweight, allowing cluster users to create service accounts for- specific tasks (i.e. principle of least privilege).- - Auditing considerations for humans and service accounts may differ.- - A config bundle for a complex system may include definition of various service- accounts for components of that system. Because service accounts can be created- ad-hoc and have namespaced names, such config is portable.+- User accounts are for humans. Service accounts are for processes, which run+ in pods.+- User accounts are intended to be global. Names must be unique across all+ namespaces of a cluster. Service accounts are namespaced.+- Typically, a cluster's user accounts might be synced from a corporate+ database, where new user account creation requires special privileges and is+ tied to complex business processes. Service account creation is intended to be+ more lightweight, allowing cluster users to create service accounts for+ specific tasks (i.e. principle of least privilege).+- Auditing considerations for humans and service accounts may differ.+- A config bundle for a complex system may include definition of various service+ accounts for components of that system. Because service accounts can be created+ ad-hoc and have namespaced names, such config is portable. ## Service account automation Three separate components cooperate to implement the automation around service accounts: - - A Service account admission controller- - A Token controller- - A Service account controller+- A `ServiceAccount` admission controller+- A Token controller+- A ServiceAccount controller
Yes.
comment created time in 4 days
Pull request review commentkubernetes/website
Improve ServiceAccount administration doc
incomplete features are referred to in order to better describe service accounts Kubernetes distinguishes between the concept of a user account and a service account for a number of reasons: - - User accounts are for humans. Service accounts are for processes, which- run in pods.- - User accounts are intended to be global. Names must be unique across all- namespaces of a cluster, future user resource will not be namespaced.- Service accounts are namespaced.- - Typically, a cluster's User accounts might be synced from a corporate- database, where new user account creation requires special privileges and- is tied to complex business processes. Service account creation is intended- to be more lightweight, allowing cluster users to create service accounts for- specific tasks (i.e. principle of least privilege).- - Auditing considerations for humans and service accounts may differ.- - A config bundle for a complex system may include definition of various service- accounts for components of that system. Because service accounts can be created- ad-hoc and have namespaced names, such config is portable.+- User accounts are for humans. Service accounts are for processes, which run+ in pods.+- User accounts are intended to be global. Names must be unique across all+ namespaces of a cluster. Service accounts are namespaced.+- Typically, a cluster's user accounts might be synced from a corporate+ database, where new user account creation requires special privileges and is+ tied to complex business processes. Service account creation is intended to be+ more lightweight, allowing cluster users to create service accounts for+ specific tasks (i.e. principle of least privilege).
ok
comment created time in 4 days
push eventtengqm/website
commit sha f543b530fb53f44cf4585fc9134f24e95fec6d5b
ID Fix link emphasize
commit sha 429c78f8f62f1aab8371f74cbad46112703eae0b
update README-ko.md
commit sha 92fd3569b31c1443e020704be5af2a94ffe0de76
add v1.18 api ref to redirects
commit sha 43c987054ef61c563ff22ea08746d3ff4603d19c
adjust table margin bottom
commit sha 52d52488f6209a2dcea1e67d2af7c3569fa9b6fe
cleanup docs owners
commit sha 735410f17b6bf8445c6f7d1978adeeadd8a4ded4
Only load copy-and-paste helper on pages that use it This change helps improve load times for key non-documentation pages such as https://kubernetes.io/
commit sha ff6b8edc5b2075fb3d554b6b47f01fbfe703c6ff
Move Server Side Apply into a separate reference page "Server Side Apply" is a big topic that warrants a dedicated page on it. Its current content is 400+ lines in the `api-concepts` page, kind of hijacking the "api-concepts" for a standalone feature. This PR proposes a separation for maintainability.
commit sha 77d853b7e3823845685c19883c915450ad69aeb3
update traslation: safely-drain-node
commit sha 519f8ec5bcb477f38ef3fbd908a8cc03772561e5
Update authentication.md Small grammatical corrections
commit sha aef91ae2e8948a22f84c5d4219ec1c33a70eccbb
Update safely-drain-node.md
commit sha 596ac67cf57e968fe420eb3140a80188101fe292
translate list-all-running-container-images to French
commit sha 1a389f5674c8ffb589ac0ba3502b1ee31281beac
Merge pull request #24625 from remyleone/list_container translate list-all-running-container-images to French
commit sha 877c115babed3078a7ab48da17a34eb013973f64
translate configure-access-multiple-clusters to French
commit sha c357def80d488696b5039da0d326ee9f36c12f02
Merge pull request #24626 from remyleone/configure_access_to_multiple_clusters translate configure-access-multiple-clusters to French
commit sha 9e862337b919c37bea504c5ca34c896b91fae76e
Merge pull request #23863 from tengqm/split-server-side-apply Move Server Side Apply into a separate reference page
commit sha a42b440589b963c6e640da1bfaf32dfd319d3c2d
Improve resource quota concepts Fix some inaccurate and/or out-dated content in the resource quota concept page.
commit sha 4d9ee76ace29aa281c669a55e28d8abf07f8b4c8
Improve maintainability of Case Studies styling - Add quote and lead shortcode - Add case study metadata in front matter (to generate page) - Allow case study page to inherit similar styles from a centralised CSS file.
commit sha 3a19c6b7bc962a145b78a24e2440b29b0e13a5af
[zh] Translate upgrading-windows-nodes
commit sha bb39cfb0776247f142843f172d79756e931e6299
Merge pull request #24584 from lianghao208/master update traslation: safely-drain-node
commit sha 588bed76c084f52428f87c9423af7b8001e5be9a
Update API reference to contain API group and versino info The updated reference is generated using the https://github.com/kubernetes-sigs/reference-docs/pull/172 change.
push time in 4 days
issue commentkubernetes/website
Document security recommendation for component log levels
Are we talking about this feature? https://github.com/kubernetes/kubernetes/pull/95316

comment created time in 4 days
push eventtengqm/website
commit sha ffd3b623e00e2b930a756ca8fd8beb1e59609e4c
[zh] Translate configure-gmsa into Chinese
push time in 4 days
Pull request review commentkubernetes/website
[zh] Translate configure-gmsa into Chinese
+---+title: 为 Windows Pod 和容器配置 GMSA+content_type: task+weight: 20+---+<!--+title: Configure GMSA for Windows Pods and containers+content_type: task+weight: 20+-->+<!-- overview -->++{{< feature-state for_k8s_version="v1.18" state="stable" >}}++<!--+This page shows how to configure [Group Managed Service Accounts](https://docs.microsoft.com/en-us/windows-server/security/group-managed-service-accounts/group-managed-service-accounts-overview) (GMSA) for Pods and containers that will run on Windows nodes. Group Managed Service Accounts are a specific type of Active Directory account that provides automatic password management, simplified service principal name (SPN) management, and the ability to delegate the management to other administrators across multiple servers.+-->+本页展示如何为将运行在 Windows 节点上的 Pod 和容器配置+[组管理的服务账号(Group Managed Service Accounts,GMSA)](https://docs.microsoft.com/en-us/windows-server/security/group-managed-service-accounts/group-managed-service-accounts-overview)。+组管理的服务账号是活动目录(Active Directory)的一种特殊类型,提供自动化的+密码管理、简化的服务主体名称(Service Principal Name,SPN)管理以及跨多个+服务器将管理操作委派给其他管理员等能力。++<!--+In Kubernetes, GMSA credential specs are configured at a Kubernetes cluster-wide scope as Custom Resources. Windows Pods, as well as individual containers within a Pod, can be configured to use a GMSA for domain based functions (e.g. Kerberos authentication) when interacting with other Windows services. As of v1.16, the Docker runtime supports GMSA for Windows workloads.+-->+在 Kubernetes 环境中,GMSA 凭据规约配置为 Kubernetes 集群范围的自定义资源+(Custom Resources)形式。Windows Pod 以及各 Pod 中的每个容器可以配置为+使用 GMSA 来完成基于域(Domain)的操作(例如,Kerberos 身份认证),以便+与其他 Windows 服务相交互。自 Kubernetes 1.16 版本起,Docker 运行时为+Windows 负载支持 GMSA。++## {{% heading "prerequisites" %}}++<!--+You need to have a Kubernetes cluster and the `kubectl` command-line tool must be configured to communicate with your cluster. The cluster is expected to have Windows worker nodes. This section covers a set of initial steps required once for each cluster:+-->+你需要一个 Kubernetes 集群,以及 `kubectl` 命令行工具,且工具必须已配置+为能够与你的集群通信。集群预期包含 Windows 工作节点。+本节讨论需要为每个集群执行一次的初始操作。++<!--+### Install the GMSACredentialSpec CRD++A [CustomResourceDefinition](/docs/tasks/extend-kubernetes/custom-resources/custom-resource-definitions/)(CRD) for GMSA credential spec resources needs to be configured on the cluster to define the custom resource type `GMSACredentialSpec`. Download the GMSA CRD [YAML](https://github.com/kubernetes-sigs/windows-gmsa/blob/master/admission-webhook/deploy/gmsa-crd.yml) and save it as gmsa-crd.yaml.+Next, install the CRD with `kubectl apply -f gmsa-crd.yaml`+-->+### 安装 GMSACredentialSpec CRD++你需要在集群上配置一个用于 GMSA 凭据规约资源的+[CustomResourceDefinition](/zh/docs/tasks/extend-kubernetes/custom-resources/custom-resource-definitions/)(CRD),+以便定义类型为 `GMSACredentialSpec` 的自定义资源。+首先下载 GMSA CRD [YAML](https://github.com/kubernetes-sigs/windows-gmsa/blob/master/admission-webhook/deploy/gmsa-crd.yml)+并将其保存为 `gmsa-crd.yaml`。接下来执行 `kubectl apply -f gmsa-crd.yaml`+安装 CRD。++<!--+### Install webhooks to validate GMSA users+Two webhooks need to be configured on the Kubernetes cluster to populate and validate GMSA credential spec references at the Pod or container level:++1. A mutating webhook that expands references to GMSAs (by name from a Pod specification) into the full credential spec in JSON form within the Pod spec.++1. A validating webhook ensures all references to GMSAs are authorized to be used by the Pod service account.+-->+### 安装 Webhook 来验证 GMSA 用户++你需要为 Kubernetes 集群配置两个 Webhook,在 Pod 或容器级别填充和检查+GMSA 凭据规约引用。++1. 一个修改模式(Mutating)的 Webhook,将对 GMSA 的引用(在 Pod 规约中提现为名字)+ 展开为完整凭据规约的 JSON 形式,并保存回 Pod 规约中。++1. 一个验证模式(Validating)的 Webhook,确保对 GMSA 的所有引用都是已经授权+ 给 Pod 的服务账号使用的。++<!--+Installing the above webhooks and associated objects require the steps below:++1. Create a certificate key pair (that will be used to allow the webhook container to communicate to the cluster)++1. Install a secret with the certificate from above.++1. Create a deployment for the core webhook logic. ++1. Create the validating and mutating webhook configurations referring to the deployment. +-->+安装以上 Webhook 及其相关联的对象需要执行以下步骤:++1. 创建一个证书密钥对(用于允许 Webhook 容器与集群通信)++1. 安装一个包含如上证书的 Secret++1. 创建一个包含核心 Webhook 逻辑的 Deployment++1. 创建引用该 Deployment 的 Validating Webhook 和 Mutating Webhook 配置++<!--+A [script](https://github.com/kubernetes-sigs/windows-gmsa/blob/master/admission-webhook/deploy/deploy-gmsa-webhook.sh) can be used to deploy and configure the GMSA webhooks and associated objects mentioned above. The script can be run with a `-dry-run=server` option to allow you to review the changes that would be made to your cluster.++The [YAML template](https://github.com/kubernetes-sigs/windows-gmsa/blob/master/admission-webhook/deploy/gmsa-webhook.yml.tpl) used by the script may also be used to deploy the webhooks and associated objects manually (with appropriate substitutions for the parameters)+-->+你可以使用[这个脚本](https://github.com/kubernetes-sigs/windows-gmsa/blob/master/admission-webhook/deploy/deploy-gmsa-webhook.sh)+来部署和配置上述 GMSA Webhook 及相关联的对象。你还可以在运行脚本时设置 `--dry-run=server`+选项以便审查脚本将会对集群做出的变更。++脚本所使用的[YAML 模板](https://github.com/kubernetes-sigs/windows-gmsa/blob/master/admission-webhook/deploy/gmsa-webhook.yml.tpl)+也可用于手动部署 Webhook 及相关联的对象,不过需要对其中的参数作适当替换。++<!-- steps -->++<!--+## Configure GMSAs and Windows nodes in Active Directory++Before Pods in Kubernetes can be configured to use GMSAs, the desired GMSAs need to be provisioned in Active Directory as described in the [Windows GMSA documentation](https://docs.microsoft.com/en-us/windows-server/security/group-managed-service-accounts/getting-started-with-group-managed-service-accounts#BKMK_Step1). Windows worker nodes (that are part of the Kubernetes cluster) need to be configured in Active Directory to access the secret credentials associated with the desired GMSA as described in the [Windows GMSA documentation](https://docs.microsoft.com/en-us/windows-server/security/group-managed-service-accounts/getting-started-with-group-managed-service-accounts#to-add-member-hosts-using-the-set-adserviceaccount-cmdlet)+-->+## 在活动目录中配置 GMSA 和 Windows 节点++在配置 Kubernetes 中的 Pod 以使用 GMSA 之前,需要按+[Windows GMSA 文档](https://docs.microsoft.com/en-us/windows-server/security/group-managed-service-accounts/getting-started-with-group-managed-service-accounts#BKMK_Step1)+中描述的那样先在活动目录中准备好期望的 GMSA。+Windows 工作节点(作为 Kubernetes 集群的一部分)需要被配置到活动目录中,以便+访问与期望的 GSMA 相关联的秘密凭据数据。这一操作的描述位于+[Windows GMSA 文档](https://docs.microsoft.com/en-us/windows-server/security/group-managed-service-accounts/getting-started-with-group-managed-service-accounts#to-add-member-hosts-using-the-set-adserviceaccount-cmdlet)+中。++<!--+## Create GMSA credential spec resources+With the GMSACredentialSpec CRD installed (as described earlier), custom resources containing GMSA credential specs can be configured. The GMSA credential spec does not contain secret or sensitive data. It is information that a container runtime can use to describe the desired GMSA of a container to Windows. GMSA credential specs can be generated in YAML format with a utility [PowerShell script](https://github.com/kubernetes-sigs/windows-gmsa/tree/master/scripts/GenerateCredentialSpecResource.ps1). +-->+## 创建 GMSA 凭据规约资源++当(如前所述)安装了 GMSACredentialSpec CRD 之后,你就可以配置包含 GMSA 凭据+规约的自定义资源了。GMSA 凭据规约中并不包含秘密或敏感数据。+其中包含的信息主要用于容器运行时,便于后者向 Windows 描述容器所期望的 GMSA。+GMSA 凭据规约可以使用+[PowerShell 脚本](https://github.com/kubernetes-sigs/windows-gmsa/tree/master/scripts/GenerateCredentialSpecResource.ps1)+以 YAML 格式生成。++<!--+Following are the steps for generating a GMSA credential spec YAML manually in JSON format and then converting it:++1. Import the CredentialSpec [module](https://github.com/MicrosoftDocs/Virtualization-Documentation/blob/live/windows-server-container-tools/ServiceAccounts/CredentialSpec.psm1): `ipmo CredentialSpec.psm1`++1. Create a credential spec in JSON format using `New-CredentialSpec`. To create a GMSA credential spec named WebApp1, invoke `New-CredentialSpec -Name WebApp1 -AccountName WebApp1 -Domain $(Get-ADDomain -Current LocalComputer)`++1. Use `Get-CredentialSpec` to show the path of the JSON file. ++1. Convert the credspec file from JSON to YAML format and apply the necessary header fields `apiVersion`, `kind`, `metadata` and `credspec` to make it a GMSACredentialSpec custom resource that can be configured in Kubernetes. +-->+下面是手动以 JSON 格式生成 GMSA 凭据规约并对其进行 YAML 转换的步骤:++1. 导入 CredentialSpec [模块](https://github.com/MicrosoftDocs/Virtualization-Documentation/blob/live/windows-server-container-tools/ServiceAccounts/CredentialSpec.psm1): `ipmo CredentialSpec.psm1`++1. 使用 `New-CredentialSpec` 来创建一个 JSON 格式的凭据规约。+ 要创建名为 `WebApp1` 的 GMSA 凭据规约,调用+ `New-CredentialSpec -Name WebApp1 -AccountName WebApp1 -Domain $(Get-ADDomain -Current LocalComputer)`。++1. 使用 `Get-CredentialSpec` 来显示 JSON 文件的路径。++1. 将凭据规约从 JSON 格式转换为 YAML 格式,并添加必要的头部字段+ `apiVersion`、`kind`、`metadata` 和 `credspec`,使其成为一个可以在+ Kubernetes 中配置的 GMSACredentialSpec 自定义资源。++<!--+The following YAML configuration describes a GMSA credential spec named `gmsa-WebApp1`:++```yaml+apiVersion: windows.k8s.io/v1alpha1+kind: GMSACredentialSpec+metadata:+ name: gmsa-WebApp1 #This is an arbitrary name but it will be used as a reference+credspec:+ ActiveDirectoryConfig:+ GroupManagedServiceAccounts:+ - Name: WebApp1 #Username of the GMSA account+ Scope: CONTOSO #NETBIOS Domain Name+ - Name: WebApp1 #Username of the GMSA account+ Scope: contoso.com #DNS Domain Name+ CmsPlugins:+ - ActiveDirectory+ DomainJoinConfig:+ DnsName: contoso.com #DNS Domain Name+ DnsTreeName: contoso.com #DNS Domain Name Root+ Guid: 244818ae-87ac-4fcd-92ec-e79e5252348a #GUID+ MachineAccountName: WebApp1 #Username of the GMSA account+ NetBiosName: CONTOSO #NETBIOS Domain Name+ Sid: S-1-5-21-2126449477-2524075714-3094792973 #SID of GMSA+```+-->+下面的 YAML 配置描述的是一个名为 `gmsa-WebApp1` 的 GMSA 凭据规约:++```yaml+apiVersion: windows.k8s.io/v1alpha1+kind: GMSACredentialSpec+metadata:+ name: gmsa-WebApp1 # 这是随意起的一个名字,将用作引用+credspec:+ ActiveDirectoryConfig:+ GroupManagedServiceAccounts:+ - Name: WebApp1 # GMSA 账号的用户名+ Scope: CONTOSO # NETBIOS 域名+ - Name: WebApp1 # GMSA 账号的用户名+ Scope: contoso.com # DNS 域名+ CmsPlugins:+ - ActiveDirectory+ DomainJoinConfig:+ DnsName: contoso.com # DNS 域名+ DnsTreeName: contoso.com # DNS 域名根+ Guid: 244818ae-87ac-4fcd-92ec-e79e5252348a # GUID+ MachineAccountName: WebApp1 # GMSA 账号的用户名+ NetBiosName: CONTOSO # NETBIOS 域名+ Sid: S-1-5-21-2126449477-2524075714-3094792973 # GMSA 的 SID+```++<!--+The above credential spec resource may be saved as `gmsa-Webapp1-credspec.yaml` and applied to the cluster using: `kubectl apply -f gmsa-Webapp1-credspec.yml`+-->+上面的凭据规约资源可以保存为 `gmsa-Webapp1-credspec.yaml`,之后使用+`kubectl apply -f gmsa-Webapp1-credspec.yml` 应用到集群上。++<!--+## Configure cluster role to enable RBAC on specific GMSA credential specs++A cluster role needs to be defined for each GMSA credential spec resource. This authorizes the `use` verb on a specific GMSA resource by a subject which is typically a service account. The following example shows a cluster role that authorizes usage of the `gmsa-WebApp1` credential spec from above. Save the file as gmsa-webapp1-role.yaml and apply using `kubectl apply -f gmsa-webapp1-role.yaml`+-->+## 配置集群角色以启用对特定 GMSA 凭据规约的 RBAC++你需要为每个 GMSA 凭据规约资源定义集群角色。+该集群角色授权某主体(通常是一个服务账号)对特定的 GMSA 资源执行 `use` 动词。
决定译为 ”执行 use 动作"。
comment created time in 4 days
Pull request review commentkubernetes/website
[zh] Translate configure-gmsa into Chinese
+---+title: 为 Windows Pod 和容器配置 GMSA+content_type: task+weight: 20+---+<!--+title: Configure GMSA for Windows Pods and containers+content_type: task+weight: 20+-->+<!-- overview -->++{{< feature-state for_k8s_version="v1.18" state="stable" >}}++<!--+This page shows how to configure [Group Managed Service Accounts](https://docs.microsoft.com/en-us/windows-server/security/group-managed-service-accounts/group-managed-service-accounts-overview) (GMSA) for Pods and containers that will run on Windows nodes. Group Managed Service Accounts are a specific type of Active Directory account that provides automatic password management, simplified service principal name (SPN) management, and the ability to delegate the management to other administrators across multiple servers.+-->+本页展示如何为将运行在 Windows 节点上的 Pod 和容器配置+[组管理的服务账号(Group Managed Service Accounts,GMSA)](https://docs.microsoft.com/en-us/windows-server/security/group-managed-service-accounts/group-managed-service-accounts-overview)。+组管理的服务账号是活动目录(Active Directory)的一种特殊类型,提供自动化的+密码管理、简化的服务主体名称(Service Principal Name,SPN)管理以及跨多个+服务器将管理操作委派给其他管理员等能力。++<!--+In Kubernetes, GMSA credential specs are configured at a Kubernetes cluster-wide scope as Custom Resources. Windows Pods, as well as individual containers within a Pod, can be configured to use a GMSA for domain based functions (e.g. Kerberos authentication) when interacting with other Windows services. As of v1.16, the Docker runtime supports GMSA for Windows workloads.+-->+在 Kubernetes 环境中,GMSA 凭据规约配置为 Kubernetes 集群范围的自定义资源+(Custom Resources)形式。Windows Pod 以及各 Pod 中的每个容器可以配置为+使用 GMSA 来完成基于域(Domain)的操作(例如,Kerberos 身份认证),以便+与其他 Windows 服务相交互。自 Kubernetes 1.16 版本起,Docker 运行时为+Windows 负载支持 GMSA。++## {{% heading "prerequisites" %}}++<!--+You need to have a Kubernetes cluster and the `kubectl` command-line tool must be configured to communicate with your cluster. The cluster is expected to have Windows worker nodes. This section covers a set of initial steps required once for each cluster:+-->+你需要一个 Kubernetes 集群,以及 `kubectl` 命令行工具,且工具必须已配置+为能够与你的集群通信。集群预期包含 Windows 工作节点。+本节讨论需要为每个集群执行一次的初始操作。++<!--+### Install the GMSACredentialSpec CRD++A [CustomResourceDefinition](/docs/tasks/extend-kubernetes/custom-resources/custom-resource-definitions/)(CRD) for GMSA credential spec resources needs to be configured on the cluster to define the custom resource type `GMSACredentialSpec`. Download the GMSA CRD [YAML](https://github.com/kubernetes-sigs/windows-gmsa/blob/master/admission-webhook/deploy/gmsa-crd.yml) and save it as gmsa-crd.yaml.+Next, install the CRD with `kubectl apply -f gmsa-crd.yaml`+-->+### 安装 GMSACredentialSpec CRD++你需要在集群上配置一个用于 GMSA 凭据规约资源的+[CustomResourceDefinition](/zh/docs/tasks/extend-kubernetes/custom-resources/custom-resource-definitions/)(CRD),+以便定义类型为 `GMSACredentialSpec` 的自定义资源。+首先下载 GMSA CRD [YAML](https://github.com/kubernetes-sigs/windows-gmsa/blob/master/admission-webhook/deploy/gmsa-crd.yml)+并将其保存为 `gmsa-crd.yaml`。接下来执行 `kubectl apply -f gmsa-crd.yaml`+安装 CRD。++<!--+### Install webhooks to validate GMSA users+Two webhooks need to be configured on the Kubernetes cluster to populate and validate GMSA credential spec references at the Pod or container level:++1. A mutating webhook that expands references to GMSAs (by name from a Pod specification) into the full credential spec in JSON form within the Pod spec.++1. A validating webhook ensures all references to GMSAs are authorized to be used by the Pod service account.+-->+### 安装 Webhook 来验证 GMSA 用户++你需要为 Kubernetes 集群配置两个 Webhook,在 Pod 或容器级别填充和检查+GMSA 凭据规约引用。++1. 一个修改模式(Mutating)的 Webhook,将对 GMSA 的引用(在 Pod 规约中提现为名字)+ 展开为完整凭据规约的 JSON 形式,并保存回 Pod 规约中。++1. 一个验证模式(Validating)的 Webhook,确保对 GMSA 的所有引用都是已经授权+ 给 Pod 的服务账号使用的。++<!--+Installing the above webhooks and associated objects require the steps below:++1. Create a certificate key pair (that will be used to allow the webhook container to communicate to the cluster)++1. Install a secret with the certificate from above.++1. Create a deployment for the core webhook logic. ++1. Create the validating and mutating webhook configurations referring to the deployment. +-->+安装以上 Webhook 及其相关联的对象需要执行以下步骤:++1. 创建一个证书密钥对(用于允许 Webhook 容器与集群通信)++1. 安装一个包含如上证书的 Secret++1. 创建一个包含核心 Webhook 逻辑的 Deployment++1. 创建引用该 Deployment 的 Validating Webhook 和 Mutating Webhook 配置++<!--+A [script](https://github.com/kubernetes-sigs/windows-gmsa/blob/master/admission-webhook/deploy/deploy-gmsa-webhook.sh) can be used to deploy and configure the GMSA webhooks and associated objects mentioned above. The script can be run with a `-dry-run=server` option to allow you to review the changes that would be made to your cluster.++The [YAML template](https://github.com/kubernetes-sigs/windows-gmsa/blob/master/admission-webhook/deploy/gmsa-webhook.yml.tpl) used by the script may also be used to deploy the webhooks and associated objects manually (with appropriate substitutions for the parameters)+-->+你可以使用[这个脚本](https://github.com/kubernetes-sigs/windows-gmsa/blob/master/admission-webhook/deploy/deploy-gmsa-webhook.sh)+来部署和配置上述 GMSA Webhook 及相关联的对象。你还可以在运行脚本时设置 `--dry-run=server`+选项以便审查脚本将会对集群做出的变更。++脚本所使用的[YAML 模板](https://github.com/kubernetes-sigs/windows-gmsa/blob/master/admission-webhook/deploy/gmsa-webhook.yml.tpl)+也可用于手动部署 Webhook 及相关联的对象,不过需要对其中的参数作适当替换。++<!-- steps -->++<!--+## Configure GMSAs and Windows nodes in Active Directory++Before Pods in Kubernetes can be configured to use GMSAs, the desired GMSAs need to be provisioned in Active Directory as described in the [Windows GMSA documentation](https://docs.microsoft.com/en-us/windows-server/security/group-managed-service-accounts/getting-started-with-group-managed-service-accounts#BKMK_Step1). Windows worker nodes (that are part of the Kubernetes cluster) need to be configured in Active Directory to access the secret credentials associated with the desired GMSA as described in the [Windows GMSA documentation](https://docs.microsoft.com/en-us/windows-server/security/group-managed-service-accounts/getting-started-with-group-managed-service-accounts#to-add-member-hosts-using-the-set-adserviceaccount-cmdlet)+-->+## 在活动目录中配置 GMSA 和 Windows 节点++在配置 Kubernetes 中的 Pod 以使用 GMSA 之前,需要按+[Windows GMSA 文档](https://docs.microsoft.com/en-us/windows-server/security/group-managed-service-accounts/getting-started-with-group-managed-service-accounts#BKMK_Step1)+中描述的那样先在活动目录中准备好期望的 GMSA。+Windows 工作节点(作为 Kubernetes 集群的一部分)需要被配置到活动目录中,以便+访问与期望的 GSMA 相关联的秘密凭据数据。这一操作的描述位于+[Windows GMSA 文档](https://docs.microsoft.com/en-us/windows-server/security/group-managed-service-accounts/getting-started-with-group-managed-service-accounts#to-add-member-hosts-using-the-set-adserviceaccount-cmdlet)+中。++<!--+## Create GMSA credential spec resources+With the GMSACredentialSpec CRD installed (as described earlier), custom resources containing GMSA credential specs can be configured. The GMSA credential spec does not contain secret or sensitive data. It is information that a container runtime can use to describe the desired GMSA of a container to Windows. GMSA credential specs can be generated in YAML format with a utility [PowerShell script](https://github.com/kubernetes-sigs/windows-gmsa/tree/master/scripts/GenerateCredentialSpecResource.ps1). +-->+## 创建 GMSA 凭据规约资源++当(如前所述)安装了 GMSACredentialSpec CRD 之后,你就可以配置包含 GMSA 凭据+规约的自定义资源了。GMSA 凭据规约中并不包含秘密或敏感数据。+其中包含的信息主要用于容器运行时,便于后者向 Windows 描述容器所期望的 GMSA。+GMSA 凭据规约可以使用+[PowerShell 脚本](https://github.com/kubernetes-sigs/windows-gmsa/tree/master/scripts/GenerateCredentialSpecResource.ps1)+以 YAML 格式生成。++<!--+Following are the steps for generating a GMSA credential spec YAML manually in JSON format and then converting it:++1. Import the CredentialSpec [module](https://github.com/MicrosoftDocs/Virtualization-Documentation/blob/live/windows-server-container-tools/ServiceAccounts/CredentialSpec.psm1): `ipmo CredentialSpec.psm1`++1. Create a credential spec in JSON format using `New-CredentialSpec`. To create a GMSA credential spec named WebApp1, invoke `New-CredentialSpec -Name WebApp1 -AccountName WebApp1 -Domain $(Get-ADDomain -Current LocalComputer)`++1. Use `Get-CredentialSpec` to show the path of the JSON file. ++1. Convert the credspec file from JSON to YAML format and apply the necessary header fields `apiVersion`, `kind`, `metadata` and `credspec` to make it a GMSACredentialSpec custom resource that can be configured in Kubernetes. +-->+下面是手动以 JSON 格式生成 GMSA 凭据规约并对其进行 YAML 转换的步骤:++1. 导入 CredentialSpec [模块](https://github.com/MicrosoftDocs/Virtualization-Documentation/blob/live/windows-server-container-tools/ServiceAccounts/CredentialSpec.psm1): `ipmo CredentialSpec.psm1`++1. 使用 `New-CredentialSpec` 来创建一个 JSON 格式的凭据规约。+ 要创建名为 `WebApp1` 的 GMSA 凭据规约,调用+ `New-CredentialSpec -Name WebApp1 -AccountName WebApp1 -Domain $(Get-ADDomain -Current LocalComputer)`。++1. 使用 `Get-CredentialSpec` 来显示 JSON 文件的路径。++1. 将凭据规约从 JSON 格式转换为 YAML 格式,并添加必要的头部字段+ `apiVersion`、`kind`、`metadata` 和 `credspec`,使其成为一个可以在+ Kubernetes 中配置的 GMSACredentialSpec 自定义资源。++<!--+The following YAML configuration describes a GMSA credential spec named `gmsa-WebApp1`:++```yaml+apiVersion: windows.k8s.io/v1alpha1+kind: GMSACredentialSpec+metadata:+ name: gmsa-WebApp1 #This is an arbitrary name but it will be used as a reference+credspec:+ ActiveDirectoryConfig:+ GroupManagedServiceAccounts:+ - Name: WebApp1 #Username of the GMSA account+ Scope: CONTOSO #NETBIOS Domain Name+ - Name: WebApp1 #Username of the GMSA account+ Scope: contoso.com #DNS Domain Name+ CmsPlugins:+ - ActiveDirectory+ DomainJoinConfig:+ DnsName: contoso.com #DNS Domain Name+ DnsTreeName: contoso.com #DNS Domain Name Root+ Guid: 244818ae-87ac-4fcd-92ec-e79e5252348a #GUID+ MachineAccountName: WebApp1 #Username of the GMSA account+ NetBiosName: CONTOSO #NETBIOS Domain Name+ Sid: S-1-5-21-2126449477-2524075714-3094792973 #SID of GMSA+```+-->+下面的 YAML 配置描述的是一个名为 `gmsa-WebApp1` 的 GMSA 凭据规约:++```yaml+apiVersion: windows.k8s.io/v1alpha1+kind: GMSACredentialSpec+metadata:+ name: gmsa-WebApp1 # 这是随意起的一个名字,将用作引用+credspec:+ ActiveDirectoryConfig:+ GroupManagedServiceAccounts:+ - Name: WebApp1 # GMSA 账号的用户名+ Scope: CONTOSO # NETBIOS 域名+ - Name: WebApp1 # GMSA 账号的用户名+ Scope: contoso.com # DNS 域名+ CmsPlugins:+ - ActiveDirectory+ DomainJoinConfig:+ DnsName: contoso.com # DNS 域名+ DnsTreeName: contoso.com # DNS 域名根+ Guid: 244818ae-87ac-4fcd-92ec-e79e5252348a # GUID+ MachineAccountName: WebApp1 # GMSA 账号的用户名+ NetBiosName: CONTOSO # NETBIOS 域名+ Sid: S-1-5-21-2126449477-2524075714-3094792973 # GMSA 的 SID+```++<!--+The above credential spec resource may be saved as `gmsa-Webapp1-credspec.yaml` and applied to the cluster using: `kubectl apply -f gmsa-Webapp1-credspec.yml`+-->+上面的凭据规约资源可以保存为 `gmsa-Webapp1-credspec.yaml`,之后使用+`kubectl apply -f gmsa-Webapp1-credspec.yml` 应用到集群上。++<!--+## Configure cluster role to enable RBAC on specific GMSA credential specs++A cluster role needs to be defined for each GMSA credential spec resource. This authorizes the `use` verb on a specific GMSA resource by a subject which is typically a service account. The following example shows a cluster role that authorizes usage of the `gmsa-WebApp1` credential spec from above. Save the file as gmsa-webapp1-role.yaml and apply using `kubectl apply -f gmsa-webapp1-role.yaml`+-->+## 配置集群角色以启用对特定 GMSA 凭据规约的 RBAC++你需要为每个 GMSA 凭据规约资源定义集群角色。+该集群角色授权某主体(通常是一个服务账号)对特定的 GMSA 资源执行 `use` 动词。
同上。
comment created time in 4 days
Pull request review commentkubernetes/website
[zh] Translate configure-gmsa into Chinese
+---+title: 为 Windows Pod 和容器配置 GMSA+content_type: task+weight: 20+---+<!--+title: Configure GMSA for Windows Pods and containers+content_type: task+weight: 20+-->+<!-- overview -->++{{< feature-state for_k8s_version="v1.18" state="stable" >}}++<!--+This page shows how to configure [Group Managed Service Accounts](https://docs.microsoft.com/en-us/windows-server/security/group-managed-service-accounts/group-managed-service-accounts-overview) (GMSA) for Pods and containers that will run on Windows nodes. Group Managed Service Accounts are a specific type of Active Directory account that provides automatic password management, simplified service principal name (SPN) management, and the ability to delegate the management to other administrators across multiple servers.+-->+本页展示如何为将运行在 Windows 节点上的 Pod 和容器配置+[组管理的服务账号(Group Managed Service Accounts,GMSA)](https://docs.microsoft.com/en-us/windows-server/security/group-managed-service-accounts/group-managed-service-accounts-overview)。+组管理的服务账号是活动目录(Active Directory)的一种特殊类型,提供自动化的+密码管理、简化的服务主体名称(Service Principal Name,SPN)管理以及跨多个+服务器将管理操作委派给其他管理员等能力。++<!--+In Kubernetes, GMSA credential specs are configured at a Kubernetes cluster-wide scope as Custom Resources. Windows Pods, as well as individual containers within a Pod, can be configured to use a GMSA for domain based functions (e.g. Kerberos authentication) when interacting with other Windows services. As of v1.16, the Docker runtime supports GMSA for Windows workloads.+-->+在 Kubernetes 环境中,GMSA 凭据规约配置为 Kubernetes 集群范围的自定义资源+(Custom Resources)形式。Windows Pod 以及各 Pod 中的每个容器可以配置为+使用 GMSA 来完成基于域(Domain)的操作(例如,Kerberos 身份认证),以便+与其他 Windows 服务相交互。自 Kubernetes 1.16 版本起,Docker 运行时为+Windows 负载支持 GMSA。++## {{% heading "prerequisites" %}}++<!--+You need to have a Kubernetes cluster and the `kubectl` command-line tool must be configured to communicate with your cluster. The cluster is expected to have Windows worker nodes. This section covers a set of initial steps required once for each cluster:+-->+你需要一个 Kubernetes 集群,以及 `kubectl` 命令行工具,且工具必须已配置+为能够与你的集群通信。集群预期包含 Windows 工作节点。+本节讨论需要为每个集群执行一次的初始操作。++<!--+### Install the GMSACredentialSpec CRD++A [CustomResourceDefinition](/docs/tasks/extend-kubernetes/custom-resources/custom-resource-definitions/)(CRD) for GMSA credential spec resources needs to be configured on the cluster to define the custom resource type `GMSACredentialSpec`. Download the GMSA CRD [YAML](https://github.com/kubernetes-sigs/windows-gmsa/blob/master/admission-webhook/deploy/gmsa-crd.yml) and save it as gmsa-crd.yaml.+Next, install the CRD with `kubectl apply -f gmsa-crd.yaml`+-->+### 安装 GMSACredentialSpec CRD++你需要在集群上配置一个用于 GMSA 凭据规约资源的+[CustomResourceDefinition](/zh/docs/tasks/extend-kubernetes/custom-resources/custom-resource-definitions/)(CRD),+以便定义类型为 `GMSACredentialSpec` 的自定义资源。+首先下载 GMSA CRD [YAML](https://github.com/kubernetes-sigs/windows-gmsa/blob/master/admission-webhook/deploy/gmsa-crd.yml)+并将其保存为 `gmsa-crd.yaml`。接下来执行 `kubectl apply -f gmsa-crd.yaml`+安装 CRD。++<!--+### Install webhooks to validate GMSA users+Two webhooks need to be configured on the Kubernetes cluster to populate and validate GMSA credential spec references at the Pod or container level:++1. A mutating webhook that expands references to GMSAs (by name from a Pod specification) into the full credential spec in JSON form within the Pod spec.++1. A validating webhook ensures all references to GMSAs are authorized to be used by the Pod service account.+-->+### 安装 Webhook 来验证 GMSA 用户++你需要为 Kubernetes 集群配置两个 Webhook,在 Pod 或容器级别填充和检查+GMSA 凭据规约引用。++1. 一个修改模式(Mutating)的 Webhook,将对 GMSA 的引用(在 Pod 规约中提现为名字)+ 展开为完整凭据规约的 JSON 形式,并保存回 Pod 规约中。++1. 一个验证模式(Validating)的 Webhook,确保对 GMSA 的所有引用都是已经授权+ 给 Pod 的服务账号使用的。++<!--+Installing the above webhooks and associated objects require the steps below:++1. Create a certificate key pair (that will be used to allow the webhook container to communicate to the cluster)++1. Install a secret with the certificate from above.++1. Create a deployment for the core webhook logic. ++1. Create the validating and mutating webhook configurations referring to the deployment. +-->+安装以上 Webhook 及其相关联的对象需要执行以下步骤:++1. 创建一个证书密钥对(用于允许 Webhook 容器与集群通信)++1. 安装一个包含如上证书的 Secret++1. 创建一个包含核心 Webhook 逻辑的 Deployment++1. 创建引用该 Deployment 的 Validating Webhook 和 Mutating Webhook 配置++<!--+A [script](https://github.com/kubernetes-sigs/windows-gmsa/blob/master/admission-webhook/deploy/deploy-gmsa-webhook.sh) can be used to deploy and configure the GMSA webhooks and associated objects mentioned above. The script can be run with a `-dry-run=server` option to allow you to review the changes that would be made to your cluster.++The [YAML template](https://github.com/kubernetes-sigs/windows-gmsa/blob/master/admission-webhook/deploy/gmsa-webhook.yml.tpl) used by the script may also be used to deploy the webhooks and associated objects manually (with appropriate substitutions for the parameters)+-->+你可以使用[这个脚本](https://github.com/kubernetes-sigs/windows-gmsa/blob/master/admission-webhook/deploy/deploy-gmsa-webhook.sh)+来部署和配置上述 GMSA Webhook 及相关联的对象。你还可以在运行脚本时设置 `--dry-run=server`+选项以便审查脚本将会对集群做出的变更。++脚本所使用的[YAML 模板](https://github.com/kubernetes-sigs/windows-gmsa/blob/master/admission-webhook/deploy/gmsa-webhook.yml.tpl)+也可用于手动部署 Webhook 及相关联的对象,不过需要对其中的参数作适当替换。++<!-- steps -->++<!--+## Configure GMSAs and Windows nodes in Active Directory++Before Pods in Kubernetes can be configured to use GMSAs, the desired GMSAs need to be provisioned in Active Directory as described in the [Windows GMSA documentation](https://docs.microsoft.com/en-us/windows-server/security/group-managed-service-accounts/getting-started-with-group-managed-service-accounts#BKMK_Step1). Windows worker nodes (that are part of the Kubernetes cluster) need to be configured in Active Directory to access the secret credentials associated with the desired GMSA as described in the [Windows GMSA documentation](https://docs.microsoft.com/en-us/windows-server/security/group-managed-service-accounts/getting-started-with-group-managed-service-accounts#to-add-member-hosts-using-the-set-adserviceaccount-cmdlet)+-->+## 在活动目录中配置 GMSA 和 Windows 节点++在配置 Kubernetes 中的 Pod 以使用 GMSA 之前,需要按+[Windows GMSA 文档](https://docs.microsoft.com/en-us/windows-server/security/group-managed-service-accounts/getting-started-with-group-managed-service-accounts#BKMK_Step1)+中描述的那样先在活动目录中准备好期望的 GMSA。+Windows 工作节点(作为 Kubernetes 集群的一部分)需要被配置到活动目录中,以便+访问与期望的 GSMA 相关联的秘密凭据数据。这一操作的描述位于+[Windows GMSA 文档](https://docs.microsoft.com/en-us/windows-server/security/group-managed-service-accounts/getting-started-with-group-managed-service-accounts#to-add-member-hosts-using-the-set-adserviceaccount-cmdlet)+中。++<!--+## Create GMSA credential spec resources+With the GMSACredentialSpec CRD installed (as described earlier), custom resources containing GMSA credential specs can be configured. The GMSA credential spec does not contain secret or sensitive data. It is information that a container runtime can use to describe the desired GMSA of a container to Windows. GMSA credential specs can be generated in YAML format with a utility [PowerShell script](https://github.com/kubernetes-sigs/windows-gmsa/tree/master/scripts/GenerateCredentialSpecResource.ps1). +-->+## 创建 GMSA 凭据规约资源++当(如前所述)安装了 GMSACredentialSpec CRD 之后,你就可以配置包含 GMSA 凭据+规约的自定义资源了。GMSA 凭据规约中并不包含秘密或敏感数据。+其中包含的信息主要用于容器运行时,便于后者向 Windows 描述容器所期望的 GMSA。+GMSA 凭据规约可以使用+[PowerShell 脚本](https://github.com/kubernetes-sigs/windows-gmsa/tree/master/scripts/GenerateCredentialSpecResource.ps1)+以 YAML 格式生成。++<!--+Following are the steps for generating a GMSA credential spec YAML manually in JSON format and then converting it:++1. Import the CredentialSpec [module](https://github.com/MicrosoftDocs/Virtualization-Documentation/blob/live/windows-server-container-tools/ServiceAccounts/CredentialSpec.psm1): `ipmo CredentialSpec.psm1`++1. Create a credential spec in JSON format using `New-CredentialSpec`. To create a GMSA credential spec named WebApp1, invoke `New-CredentialSpec -Name WebApp1 -AccountName WebApp1 -Domain $(Get-ADDomain -Current LocalComputer)`++1. Use `Get-CredentialSpec` to show the path of the JSON file. ++1. Convert the credspec file from JSON to YAML format and apply the necessary header fields `apiVersion`, `kind`, `metadata` and `credspec` to make it a GMSACredentialSpec custom resource that can be configured in Kubernetes. +-->+下面是手动以 JSON 格式生成 GMSA 凭据规约并对其进行 YAML 转换的步骤:++1. 导入 CredentialSpec [模块](https://github.com/MicrosoftDocs/Virtualization-Documentation/blob/live/windows-server-container-tools/ServiceAccounts/CredentialSpec.psm1): `ipmo CredentialSpec.psm1`++1. 使用 `New-CredentialSpec` 来创建一个 JSON 格式的凭据规约。+ 要创建名为 `WebApp1` 的 GMSA 凭据规约,调用+ `New-CredentialSpec -Name WebApp1 -AccountName WebApp1 -Domain $(Get-ADDomain -Current LocalComputer)`。++1. 使用 `Get-CredentialSpec` 来显示 JSON 文件的路径。++1. 将凭据规约从 JSON 格式转换为 YAML 格式,并添加必要的头部字段+ `apiVersion`、`kind`、`metadata` 和 `credspec`,使其成为一个可以在+ Kubernetes 中配置的 GMSACredentialSpec 自定义资源。++<!--+The following YAML configuration describes a GMSA credential spec named `gmsa-WebApp1`:++```yaml+apiVersion: windows.k8s.io/v1alpha1+kind: GMSACredentialSpec+metadata:+ name: gmsa-WebApp1 #This is an arbitrary name but it will be used as a reference+credspec:+ ActiveDirectoryConfig:+ GroupManagedServiceAccounts:+ - Name: WebApp1 #Username of the GMSA account+ Scope: CONTOSO #NETBIOS Domain Name+ - Name: WebApp1 #Username of the GMSA account+ Scope: contoso.com #DNS Domain Name+ CmsPlugins:+ - ActiveDirectory+ DomainJoinConfig:+ DnsName: contoso.com #DNS Domain Name+ DnsTreeName: contoso.com #DNS Domain Name Root+ Guid: 244818ae-87ac-4fcd-92ec-e79e5252348a #GUID+ MachineAccountName: WebApp1 #Username of the GMSA account+ NetBiosName: CONTOSO #NETBIOS Domain Name+ Sid: S-1-5-21-2126449477-2524075714-3094792973 #SID of GMSA+```+-->+下面的 YAML 配置描述的是一个名为 `gmsa-WebApp1` 的 GMSA 凭据规约:++```yaml+apiVersion: windows.k8s.io/v1alpha1+kind: GMSACredentialSpec+metadata:+ name: gmsa-WebApp1 # 这是随意起的一个名字,将用作引用+credspec:+ ActiveDirectoryConfig:+ GroupManagedServiceAccounts:+ - Name: WebApp1 # GMSA 账号的用户名+ Scope: CONTOSO # NETBIOS 域名+ - Name: WebApp1 # GMSA 账号的用户名+ Scope: contoso.com # DNS 域名+ CmsPlugins:+ - ActiveDirectory+ DomainJoinConfig:+ DnsName: contoso.com # DNS 域名+ DnsTreeName: contoso.com # DNS 域名根+ Guid: 244818ae-87ac-4fcd-92ec-e79e5252348a # GUID+ MachineAccountName: WebApp1 # GMSA 账号的用户名+ NetBiosName: CONTOSO # NETBIOS 域名+ Sid: S-1-5-21-2126449477-2524075714-3094792973 # GMSA 的 SID+```++<!--+The above credential spec resource may be saved as `gmsa-Webapp1-credspec.yaml` and applied to the cluster using: `kubectl apply -f gmsa-Webapp1-credspec.yml`+-->+上面的凭据规约资源可以保存为 `gmsa-Webapp1-credspec.yaml`,之后使用+`kubectl apply -f gmsa-Webapp1-credspec.yml` 应用到集群上。++<!--+## Configure cluster role to enable RBAC on specific GMSA credential specs++A cluster role needs to be defined for each GMSA credential spec resource. This authorizes the `use` verb on a specific GMSA resource by a subject which is typically a service account. The following example shows a cluster role that authorizes usage of the `gmsa-WebApp1` credential spec from above. Save the file as gmsa-webapp1-role.yaml and apply using `kubectl apply -f gmsa-webapp1-role.yaml`+-->+## 配置集群角色以启用对特定 GMSA 凭据规约的 RBAC++你需要为每个 GMSA 凭据规约资源定义集群角色。+该集群角色授权某主体(通常是一个服务账号)对特定的 GMSA 资源执行 `use` 动词。+下面的示例显示的是一个集群角色,对前文创建的凭据规约 `gmsa-WebApp1` 执行鉴权。+将此文件保存为 `gmsa-webapp1-role.yaml` 并执行 `kubectl apply -f gmsa-webapp1-role.yaml`。++<!--+```yaml+#Create the Role to read the credspec+apiVersion: rbac.authorization.k8s.io/v1+kind: ClusterRole+metadata:+ name: webapp1-role+rules:+- apiGroups: ["windows.k8s.io"]+ resources: ["gmsacredentialspecs"]+ verbs: ["use"]+ resourceNames: ["gmsa-WebApp1"]+```+-->+```yaml+# 创建集群角色读取凭据规约+apiVersion: rbac.authorization.k8s.io/v1+kind: ClusterRole+metadata:+ name: webapp1-role+rules:+- apiGroups: ["windows.k8s.io"]+ resources: ["gmsacredentialspecs"]+ verbs: ["use"]+ resourceNames: ["gmsa-WebApp1"]+```++<!--+## Assign role to service accounts to use specific GMSA credspecs+A service account (that Pods will be configured with) needs to be bound to the cluster role create above. This authorizes the service account to use the desired GMSA credential spec resource. The following shows the default service account being bound to a cluster role `webapp1-role` to use `gmsa-WebApp1` credential spec resource created above.+-->+## 将角色指派给要使用特定 GMSA 凭据规约的服务账号++你需要将某个服务账号(Pod 配置所对应的那个)绑定到前文创建的集群角色上。+这一绑定操作实际上授予该服务账号使用所指定的 GMSA 凭据规约资源的访问权限。+下面显示的是一个绑定到集群角色 `webapp1-role` 上的 default 服务账号,使之+能够使用前面所创建的 `gmsa-WebApp1` 凭据规约资源。++```yaml+apiVersion: rbac.authorization.k8s.io/v1+kind: RoleBinding+metadata:+ name: allow-default-svc-account-read-on-gmsa-WebApp1+ namespace: default+subjects:+- kind: ServiceAccount+ name: default+ namespace: default+roleRef:+ kind: ClusterRole+ name: webapp1-role+ apiGroup: rbac.authorization.k8s.io+```++<!--+## Configure GMSA credential spec reference in Pod spec+The Pod spec field `securityContext.windowsOptions.gmsaCredentialSpecName` is used to specify references to desired GMSA credential spec custom resources in Pod specs. This configures all containers in the Pod spec to use the specified GMSA. A sample Pod spec with the annotation populated to refer to `gmsa-WebApp1`:+-->+## 在 Pod 规约中配置 GMSA 凭据规约引用++Pod 规约字段 `securityContext.windowsOptions.gmsaCredentialSpecName` 可用来+设置对指定 GMSA 凭据规约自定义资源的引用。+设置此引用将会配置 Pod 中的所有容器使用所给的 GMSA。+下面是一个 Pod 规约示例,其中包含了对 `gmsa-WebApp1` 凭据规约的引用:++```yaml+apiVersion: apps/v1+kind: Deployment+metadata:+ labels:+ run: with-creds+ name: with-creds+ namespace: default+spec:+ replicas: 1+ selector:+ matchLabels:+ run: with-creds+ template:+ metadata:+ labels:+ run: with-creds+ spec:+ securityContext:+ windowsOptions:+ gmsaCredentialSpecName: gmsa-webapp1+ containers:+ - image: mcr.microsoft.com/windows/servercore/iis:windowsservercore-ltsc2019+ imagePullPolicy: Always+ name: iis+ nodeSelector:+ kubernetes.io/os: windows+```++<!--+Individual containers in a Pod spec can also specify the desired GMSA credspec using a per-container `securityContext.windowsOptions.gmsaCredentialSpecName` field. For example:+-->+Pod 中的各个容器也可以使用对应容器的 `securityContext.windowsOptions.gmsaCredentialSpecName`+字段来设置期望使用的 GMSA 凭据规约。+例如:++```yaml+apiVersion: apps/v1+kind: Deployment+metadata:+ labels:+ run: with-creds+ name: with-creds+ namespace: default+spec:+ replicas: 1+ selector:+ matchLabels:+ run: with-creds+ template:+ metadata:+ labels:+ run: with-creds+ spec:+ containers:+ - image: mcr.microsoft.com/windows/servercore/iis:windowsservercore-ltsc2019+ imagePullPolicy: Always+ name: iis+ securityContext:+ windowsOptions:+ gmsaCredentialSpecName: gmsa-Webapp1+ nodeSelector:+ kubernetes.io/os: windows+```++<!--+As Pod specs with GMSA fields populated (as described above) are applied in a cluster, the following sequence of events take place:++1. The mutating webhook resolves and expands all references to GMSA credential spec resources to the contents of the GMSA credential spec.++1. The validating webhook ensures the service account associated with the Pod is authorized for the `use` verb on the specified GMSA credential spec.++1. The container runtime configures each Windows container with the specified GMSA credential spec so that the container can assume the identity of the GMSA in Active Directory and access services in the domain using that identity.+-->+当 Pod 规约中填充了 GMSA 相关字段(如上所述),在集群中应用 Pod 规约时会依次+发生以下事件:++1. Mutating Webhook 解析对 GMSA 凭据规约资源的引用,并将其全部展开,+ 得到 GMSA 凭据规约的实际内容。++1. Validating Webhook 确保与 Pod 相关联的服务账号有权在所给的 GMSA 凭据规约+ 上使用 `use` 动词。
如果译为操作,则需要改成”执行 use 操作“,这又与原文的含义有出入。 所以决定忠实原文语义,译为"使用 ... 动词"。
comment created time in 4 days
Pull request review commentkubernetes/website
[zh] Translate configure-gmsa into Chinese
+---+title: 为 Windows Pod 和容器配置 GMSA+content_type: task+weight: 20+---+<!--+title: Configure GMSA for Windows Pods and containers+content_type: task+weight: 20+-->+<!-- overview -->++{{< feature-state for_k8s_version="v1.18" state="stable" >}}++<!--+This page shows how to configure [Group Managed Service Accounts](https://docs.microsoft.com/en-us/windows-server/security/group-managed-service-accounts/group-managed-service-accounts-overview) (GMSA) for Pods and containers that will run on Windows nodes. Group Managed Service Accounts are a specific type of Active Directory account that provides automatic password management, simplified service principal name (SPN) management, and the ability to delegate the management to other administrators across multiple servers.+-->+本页展示如何为将运行在 Windows 节点上的 Pod 和容器配置+[组管理的服务账号(Group Managed Service Accounts,GMSA)](https://docs.microsoft.com/en-us/windows-server/security/group-managed-service-accounts/group-managed-service-accounts-overview)。+组管理的服务账号是活动目录(Active Directory)的一种特殊类型,提供自动化的+密码管理、简化的服务主体名称(Service Principal Name,SPN)管理以及跨多个+服务器将管理操作委派给其他管理员等能力。++<!--+In Kubernetes, GMSA credential specs are configured at a Kubernetes cluster-wide scope as Custom Resources. Windows Pods, as well as individual containers within a Pod, can be configured to use a GMSA for domain based functions (e.g. Kerberos authentication) when interacting with other Windows services. As of v1.16, the Docker runtime supports GMSA for Windows workloads.+-->+在 Kubernetes 环境中,GMSA 凭据规约配置为 Kubernetes 集群范围的自定义资源+(Custom Resources)形式。Windows Pod 以及各 Pod 中的每个容器可以配置为+使用 GMSA 来完成基于域(Domain)的操作(例如,Kerberos 身份认证),以便+与其他 Windows 服务相交互。自 Kubernetes 1.16 版本起,Docker 运行时为+Windows 负载支持 GMSA。++## {{% heading "prerequisites" %}}++<!--+You need to have a Kubernetes cluster and the `kubectl` command-line tool must be configured to communicate with your cluster. The cluster is expected to have Windows worker nodes. This section covers a set of initial steps required once for each cluster:+-->+你需要一个 Kubernetes 集群,以及 `kubectl` 命令行工具,且工具必须已配置+为能够与你的集群通信。集群预期包含 Windows 工作节点。+本节讨论需要为每个集群执行一次的初始操作。++<!--+### Install the GMSACredentialSpec CRD++A [CustomResourceDefinition](/docs/tasks/extend-kubernetes/custom-resources/custom-resource-definitions/)(CRD) for GMSA credential spec resources needs to be configured on the cluster to define the custom resource type `GMSACredentialSpec`. Download the GMSA CRD [YAML](https://github.com/kubernetes-sigs/windows-gmsa/blob/master/admission-webhook/deploy/gmsa-crd.yml) and save it as gmsa-crd.yaml.+Next, install the CRD with `kubectl apply -f gmsa-crd.yaml`+-->+### 安装 GMSACredentialSpec CRD
doesn't matter, because no one would link to this subsection I assume.
comment created time in 4 days